IOS-XE CLI
A high-level overview of the IOS-XE CLI workflow is depicted in the diagram below followed by the additional description of each step in further detail.

Figure 1. User workflow for the SD-WAN Conversion Tool
A detailed explanation for each step of this workflow can be viewed by clicking on the respective section name from the following list:
See also
The links above explain various steps for config file conversion workflow without any errors. Refer to Appendix A for errors that may occur at various stages of the above workflow.
Upload
The user initially interacts with the web-based UI to upload a Cisco IOS-XE config file. The SD-WAN Conversion Tool initiates a pre-validation process that parses the config file to identify individual parent and child config blocks. It then validates the commands present in the uploaded configuration by creating a connection with Cisco NSO which pushes each command to a Cisco IOS-XE NED.
See also
For details about these components and their functionalities, refer to SD-WAN Conversion Tool Architecture Guide
In case of any errors, the line numbers of the errors and the string containing the error messages are returned to the UI for the user to identify and fix the specific issues in the uploaded config.
Activity Window
This section gives the details of the available functionalities for the Upload step in the activity window. The activity window for the Upload step allows the following two options to the user for uploading a configuration file:
Drag and drop
Manually browse for a file
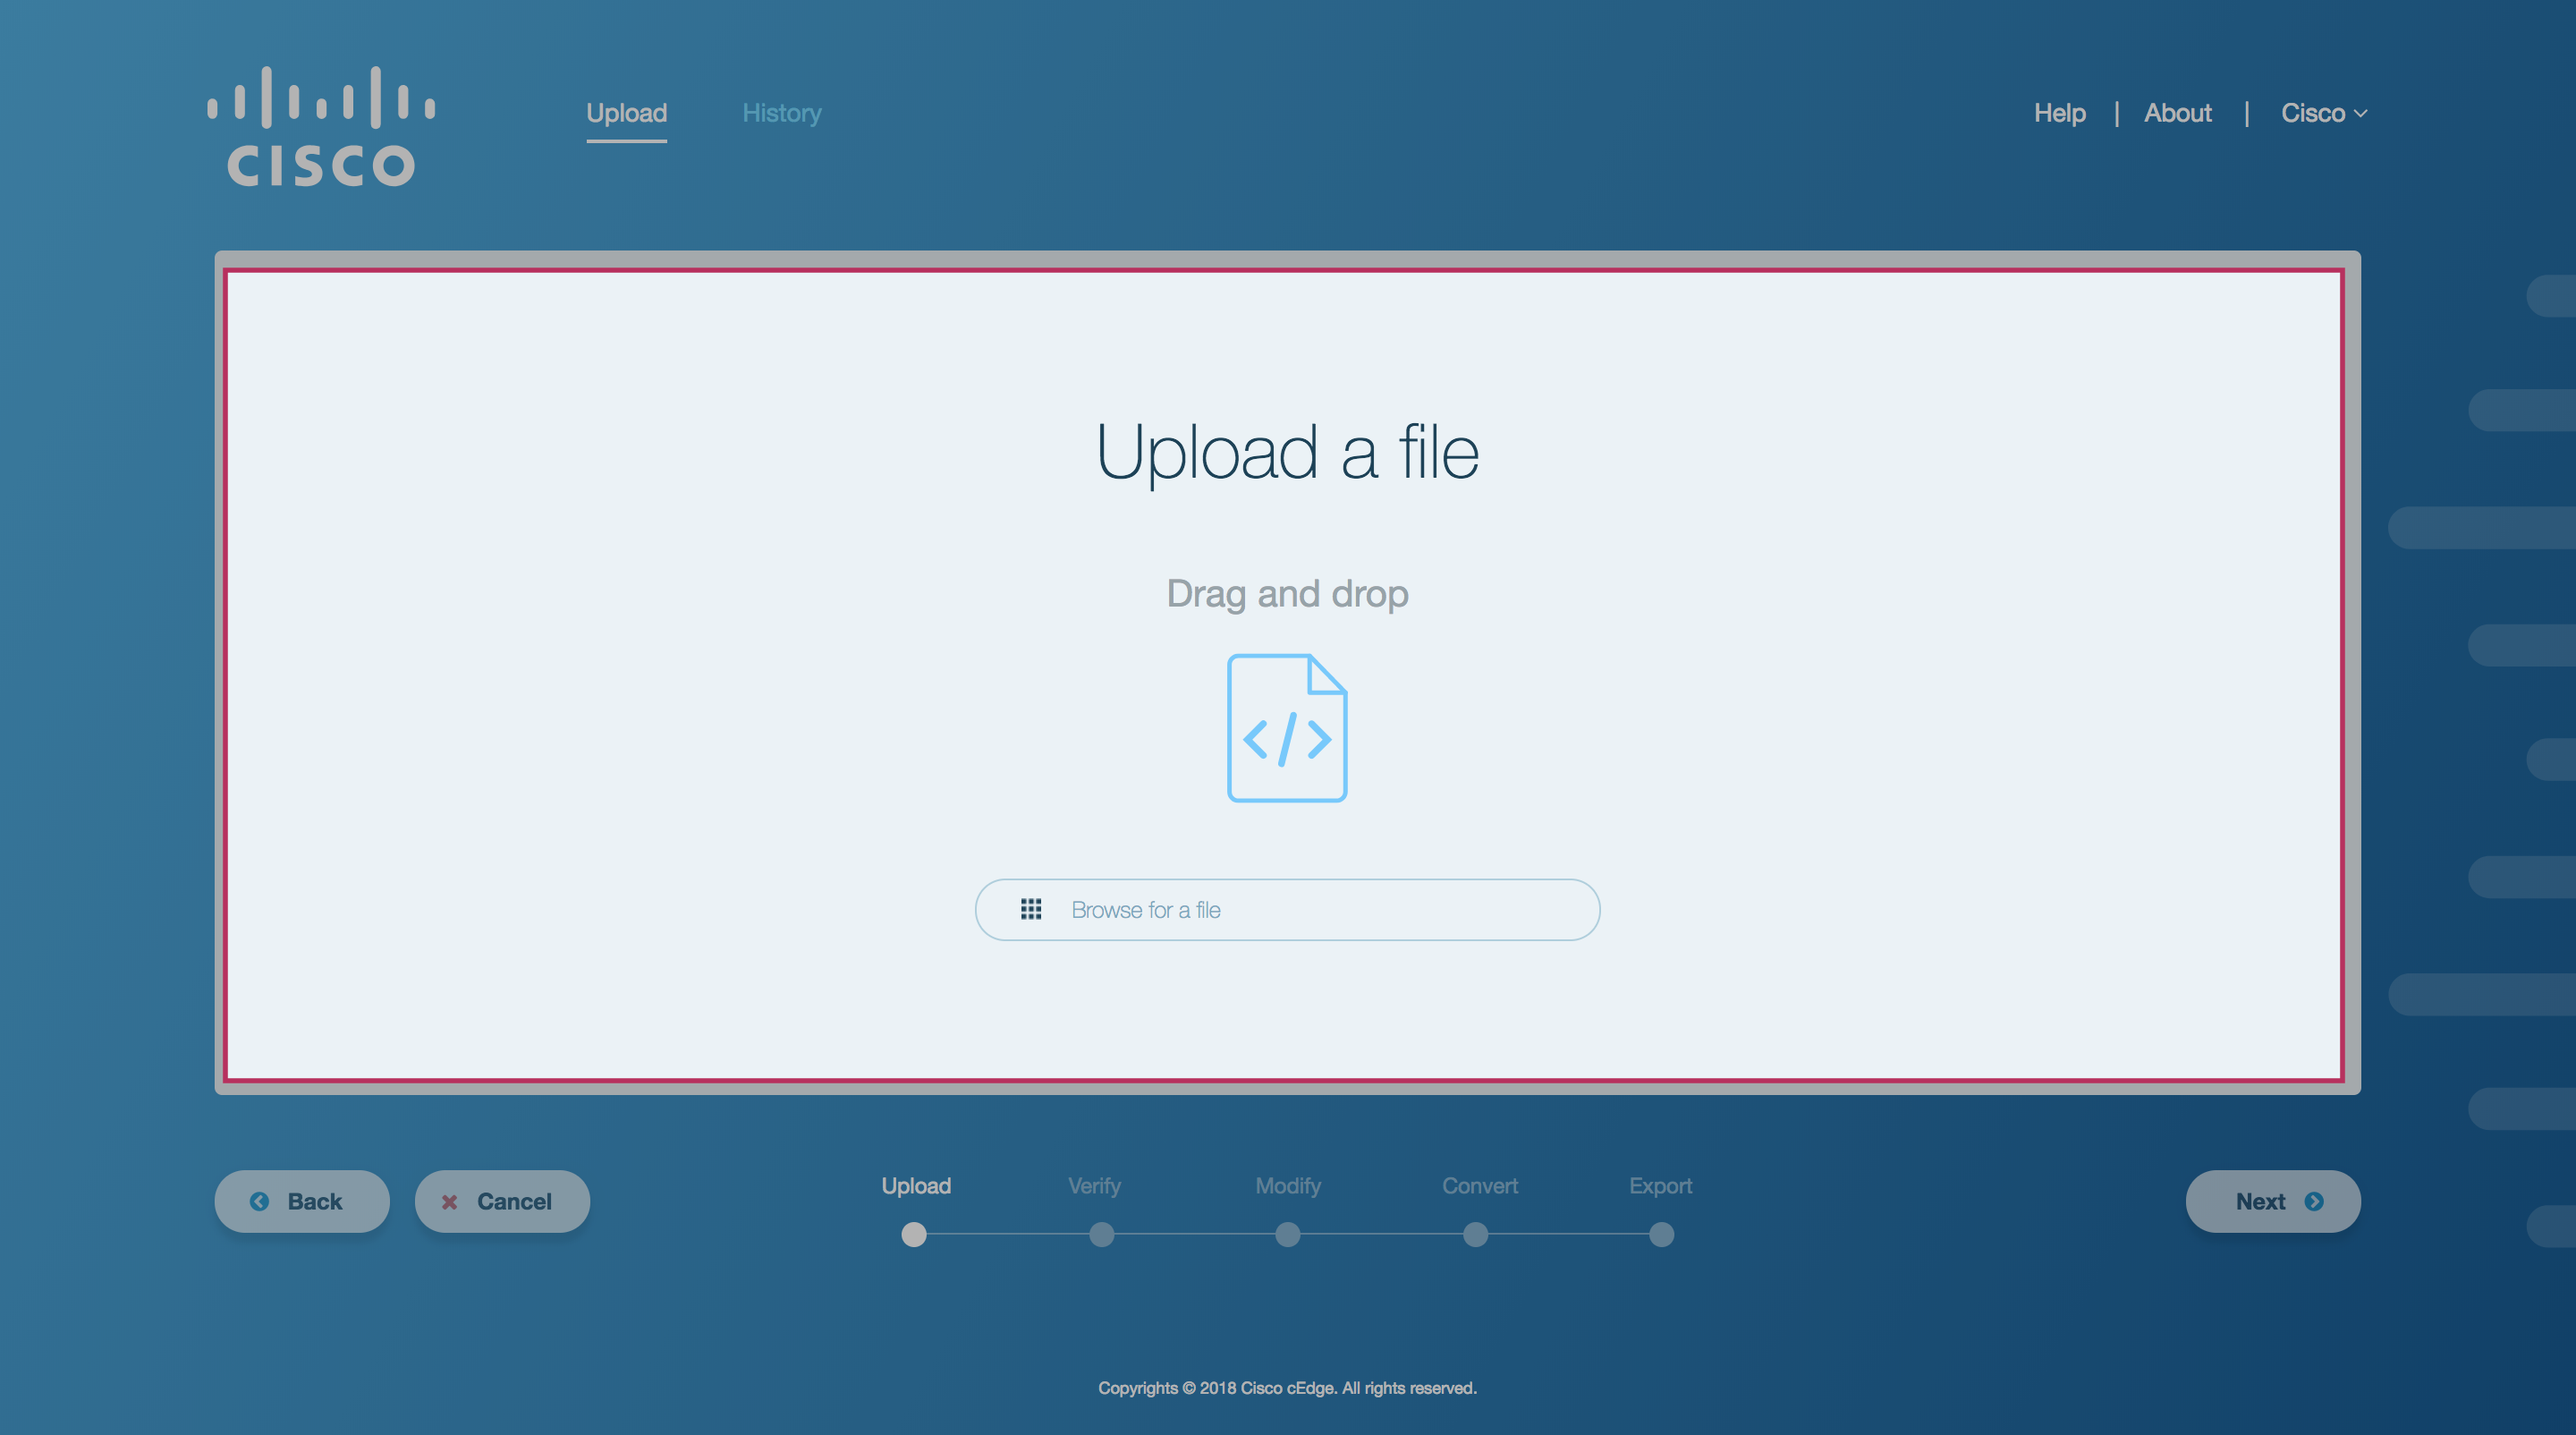
Figure 1. Activity window for upload step
The upload workflow is explained in the section below.
Upload Workflow
The first step required by the user is to upload Cisco IOS-XE config file that needs to be converted into a compatible SD-WAN configuration.
Drag and Drop: To upload a file, simply drag and drop it to the activity window. The name of the file will be displayed next to the
 icon, as shown in the figure below.
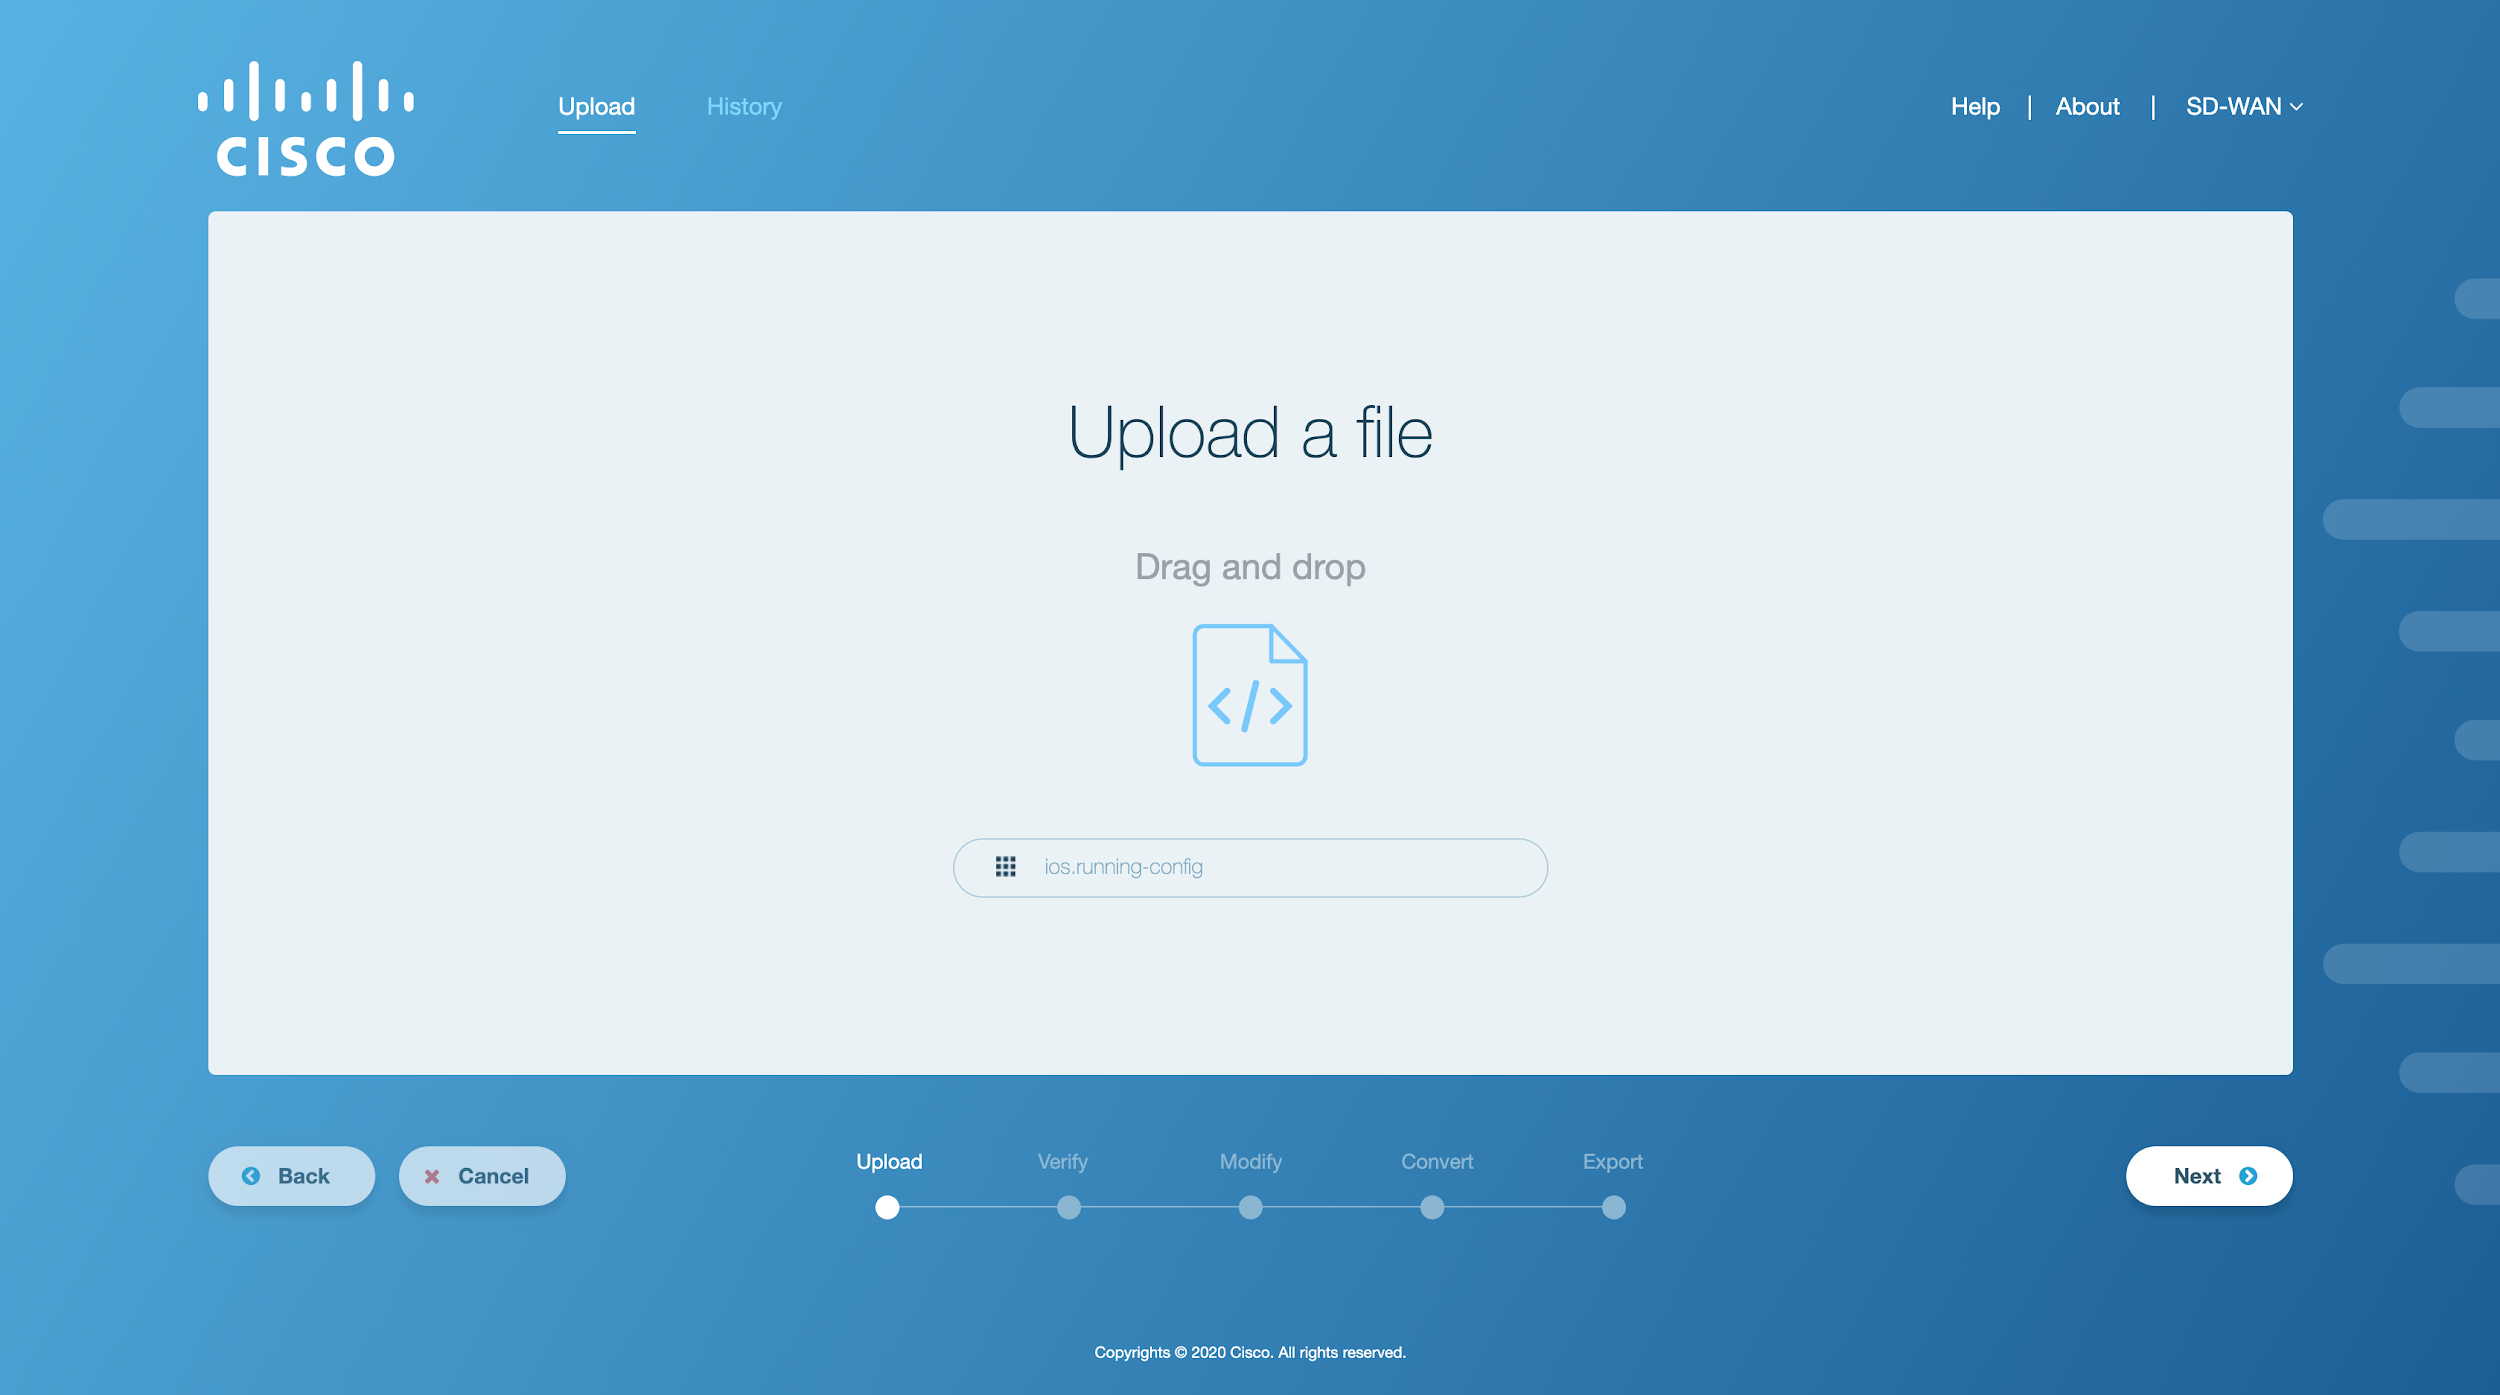
Figure 2. Sample config file uploaded.
Manually Browse: To upload a file manually, click on the
icon and browse the file in your computer’s directory.
Note
Currently, SD-WAN Conversion Tool supports text files with plain text or a config file without any extension.
Click on Next to upload the file on SD-WAN Conversion Tool. A loading screen will appear on the screen as shown in the figure below.
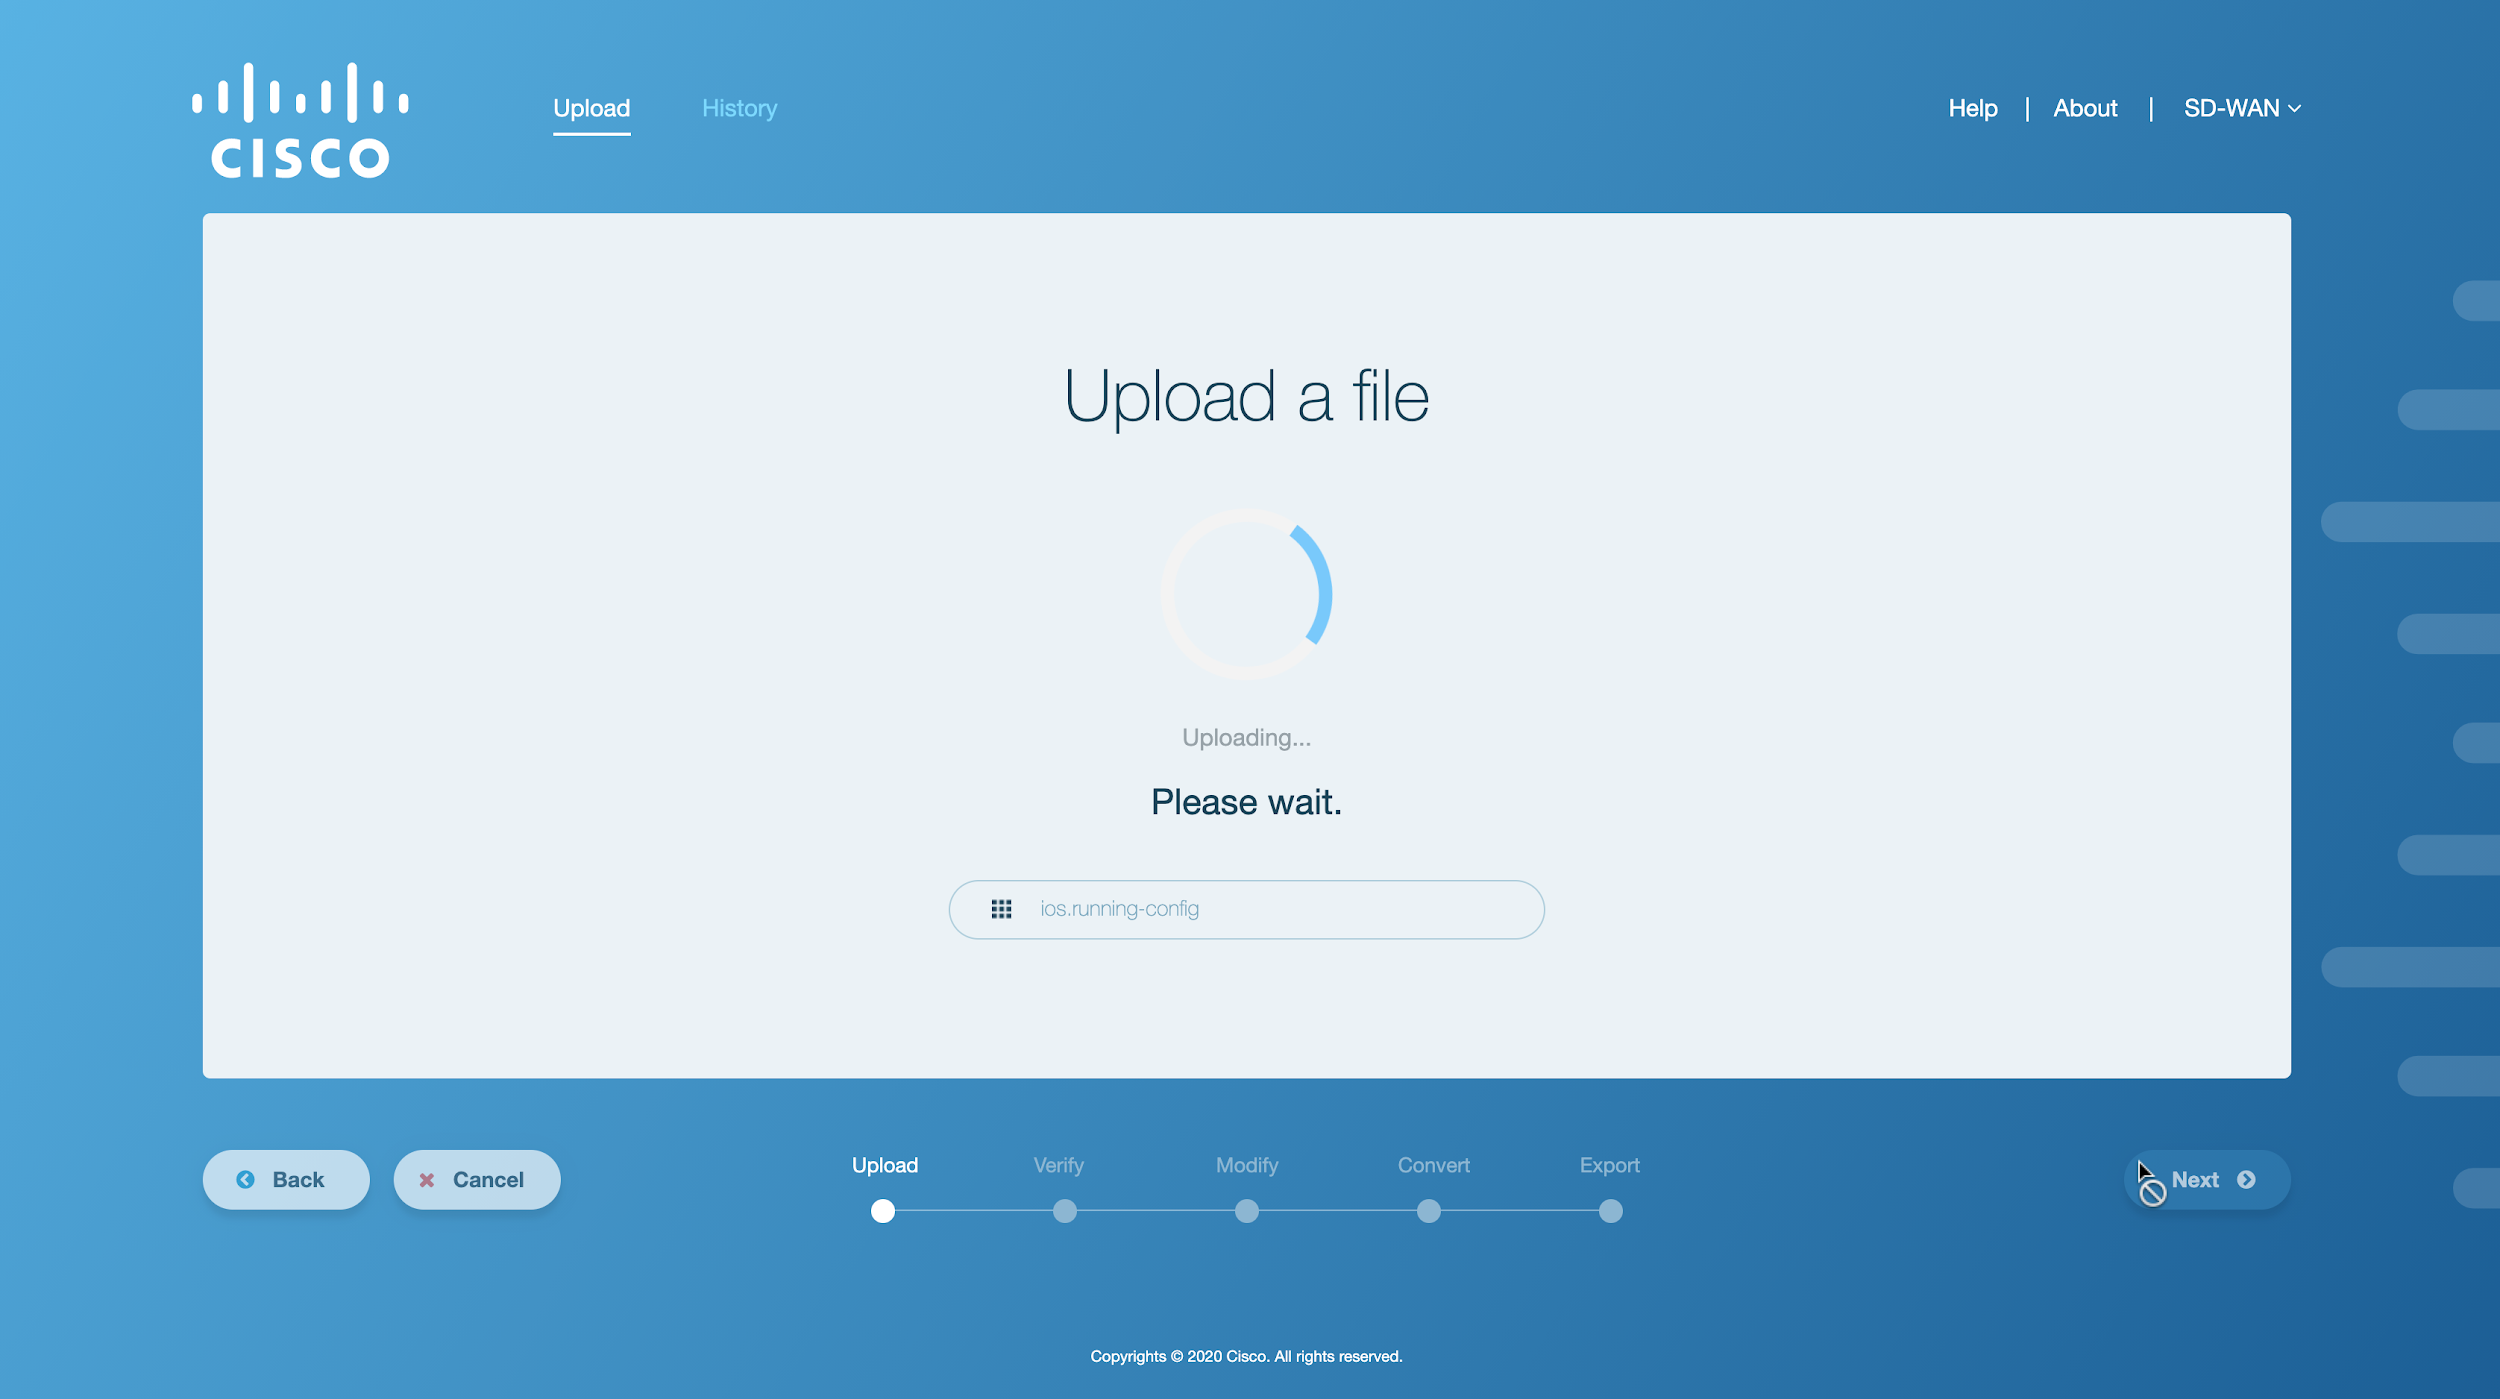
Figure 3. Uploading the config file
Upon successfully uploading the file in SD-WAN Conversion Tool, the contents of the original file will be displayed in an on-screen editor.
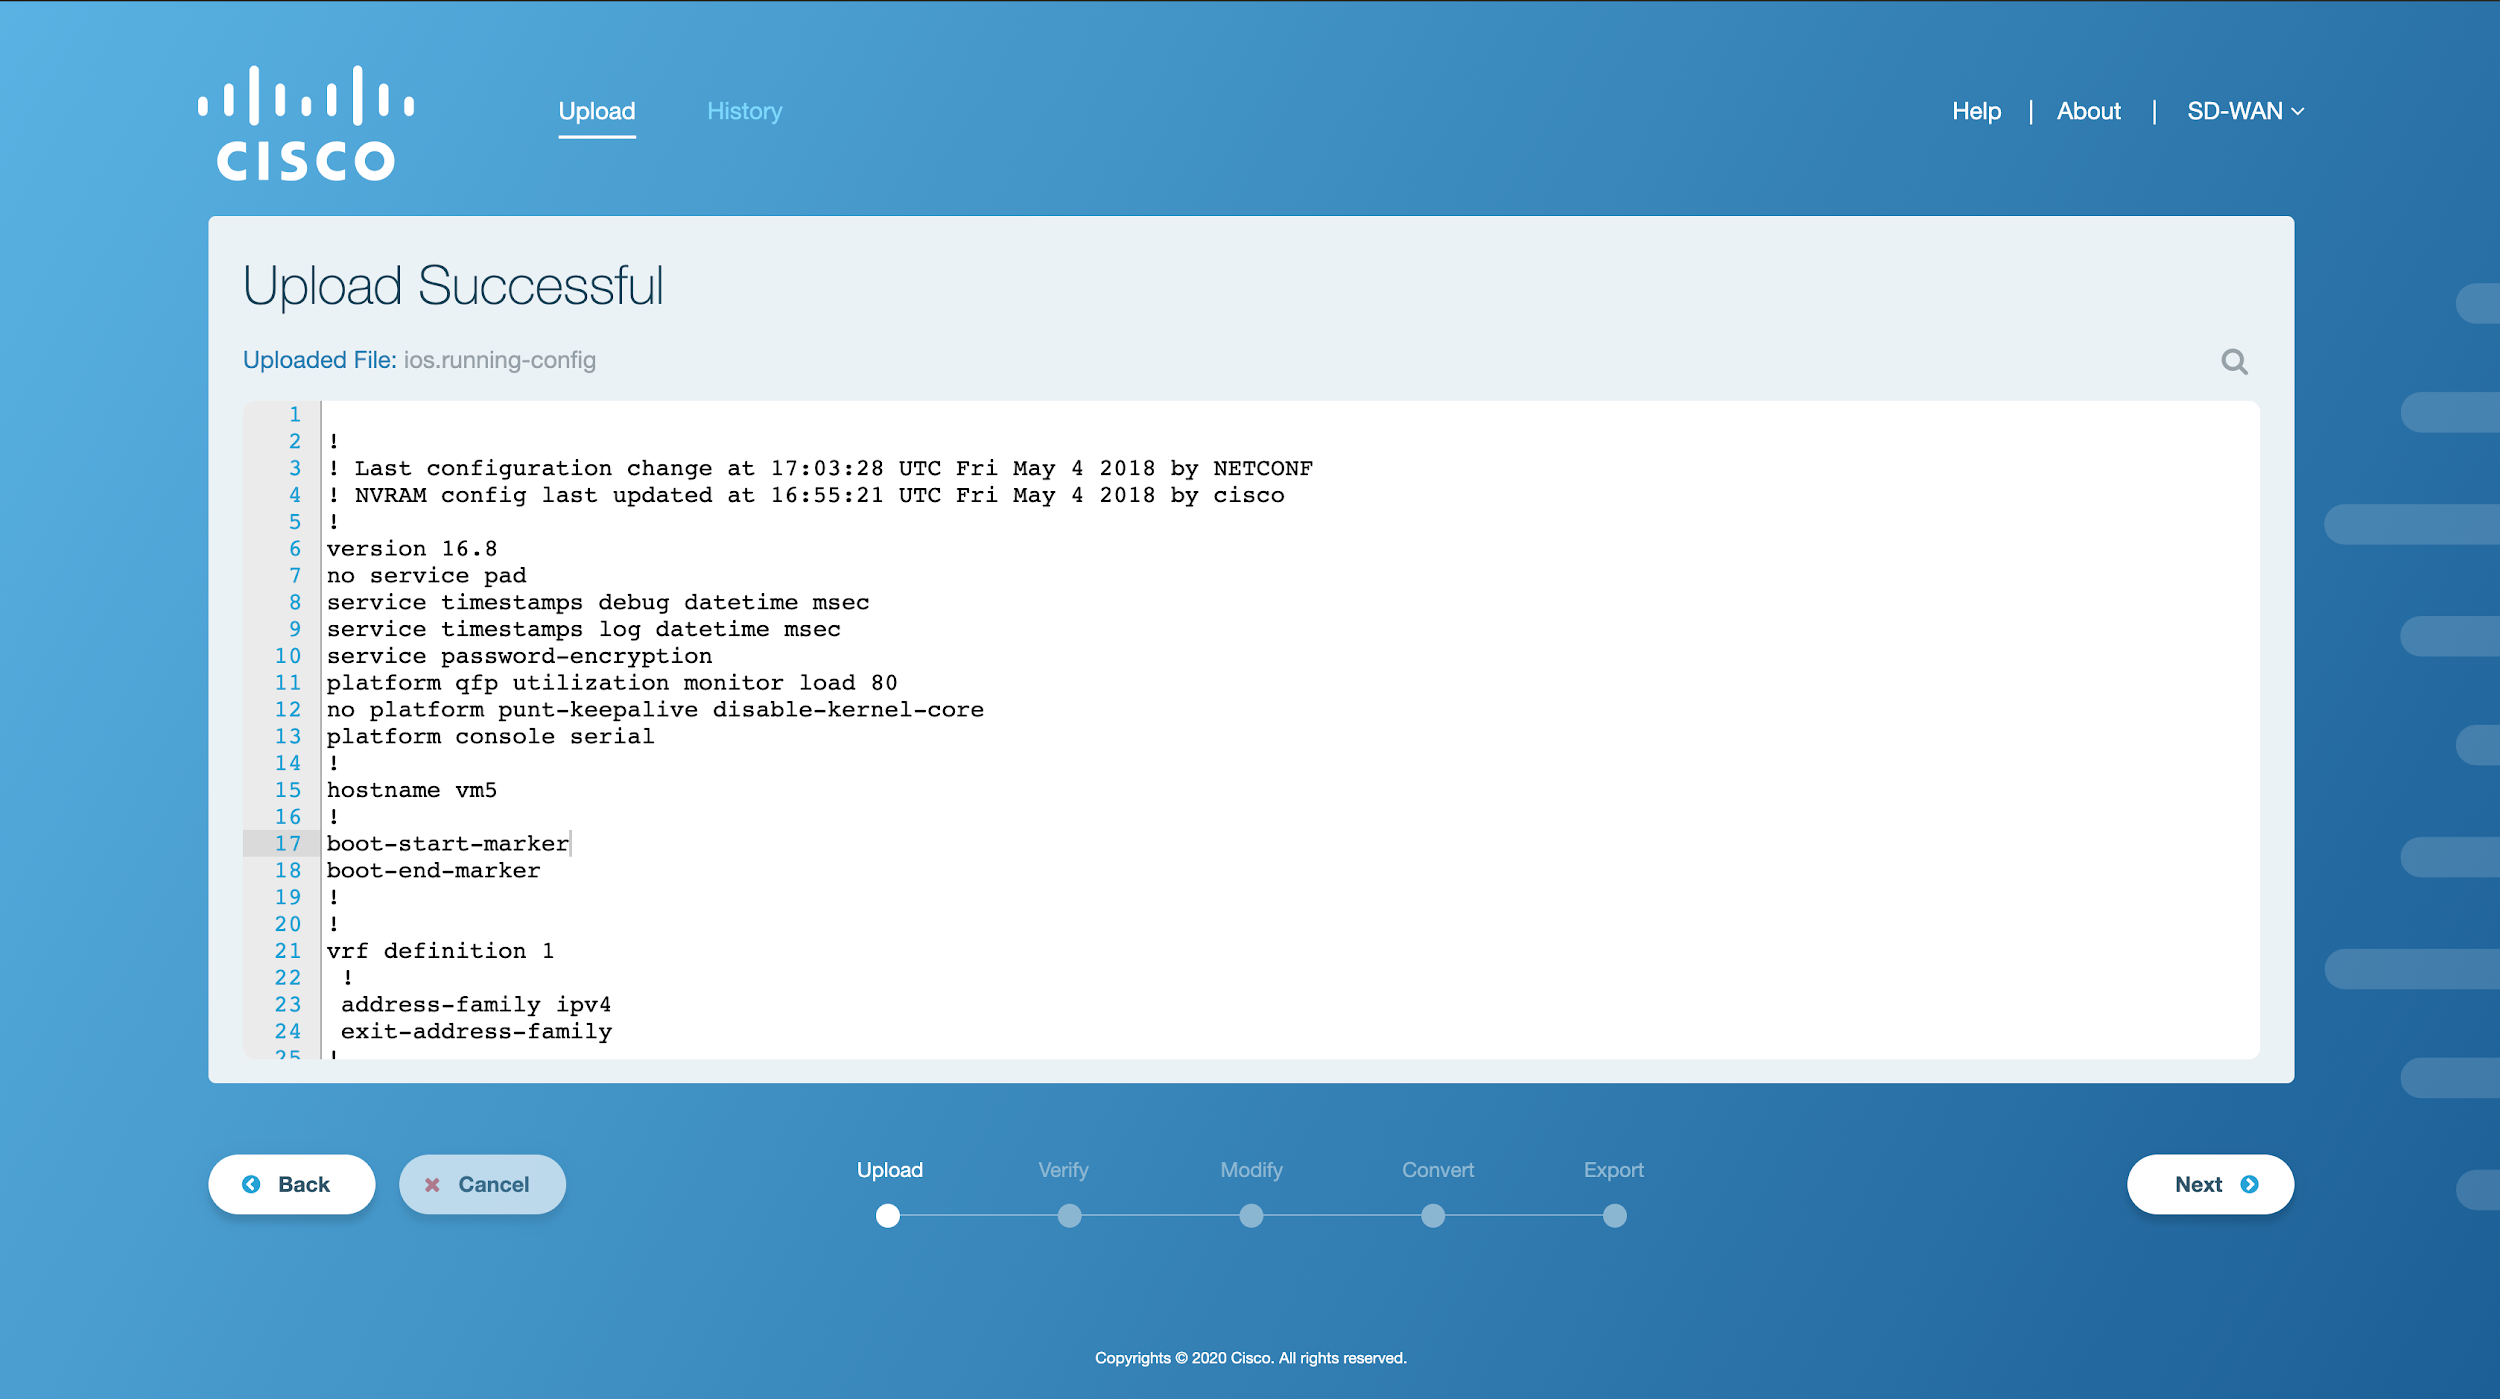
Figure 4. Config file uploaded successfully
See also
In case of an error, refer to the Upload Error: IOS-XE CLI Workflow section in Appendix A.
To view an end-to-end workflow for converting a sample config file, refer to Converting a Sample Config File section.
Verify
The SD-WAN Conversion Tool displays the individual features and interface properties extracted from the validated IOS-XE config to highlight supported and unsupported config. The tool identifies the supported and unsupported commands by performing the same validation process, but this time for Cisco Edge Router NED. The resulting error lines are marked as unsupported by the tool. The unsupported config is not included in the IOS-XE to Cisco Edge Router conversion process.
The UI displays the individual features and interfaces extracted from the config in separate tabs with each parent element containing a child config block specific to it. The supported and unsupported lines are highlighted in green and red colors respectively within the text editor.
Activity Window
This section gives the details of the available functionalities for the Verify step in the activity window. The activity window for this step is divided into two sections as shown in the figure below.
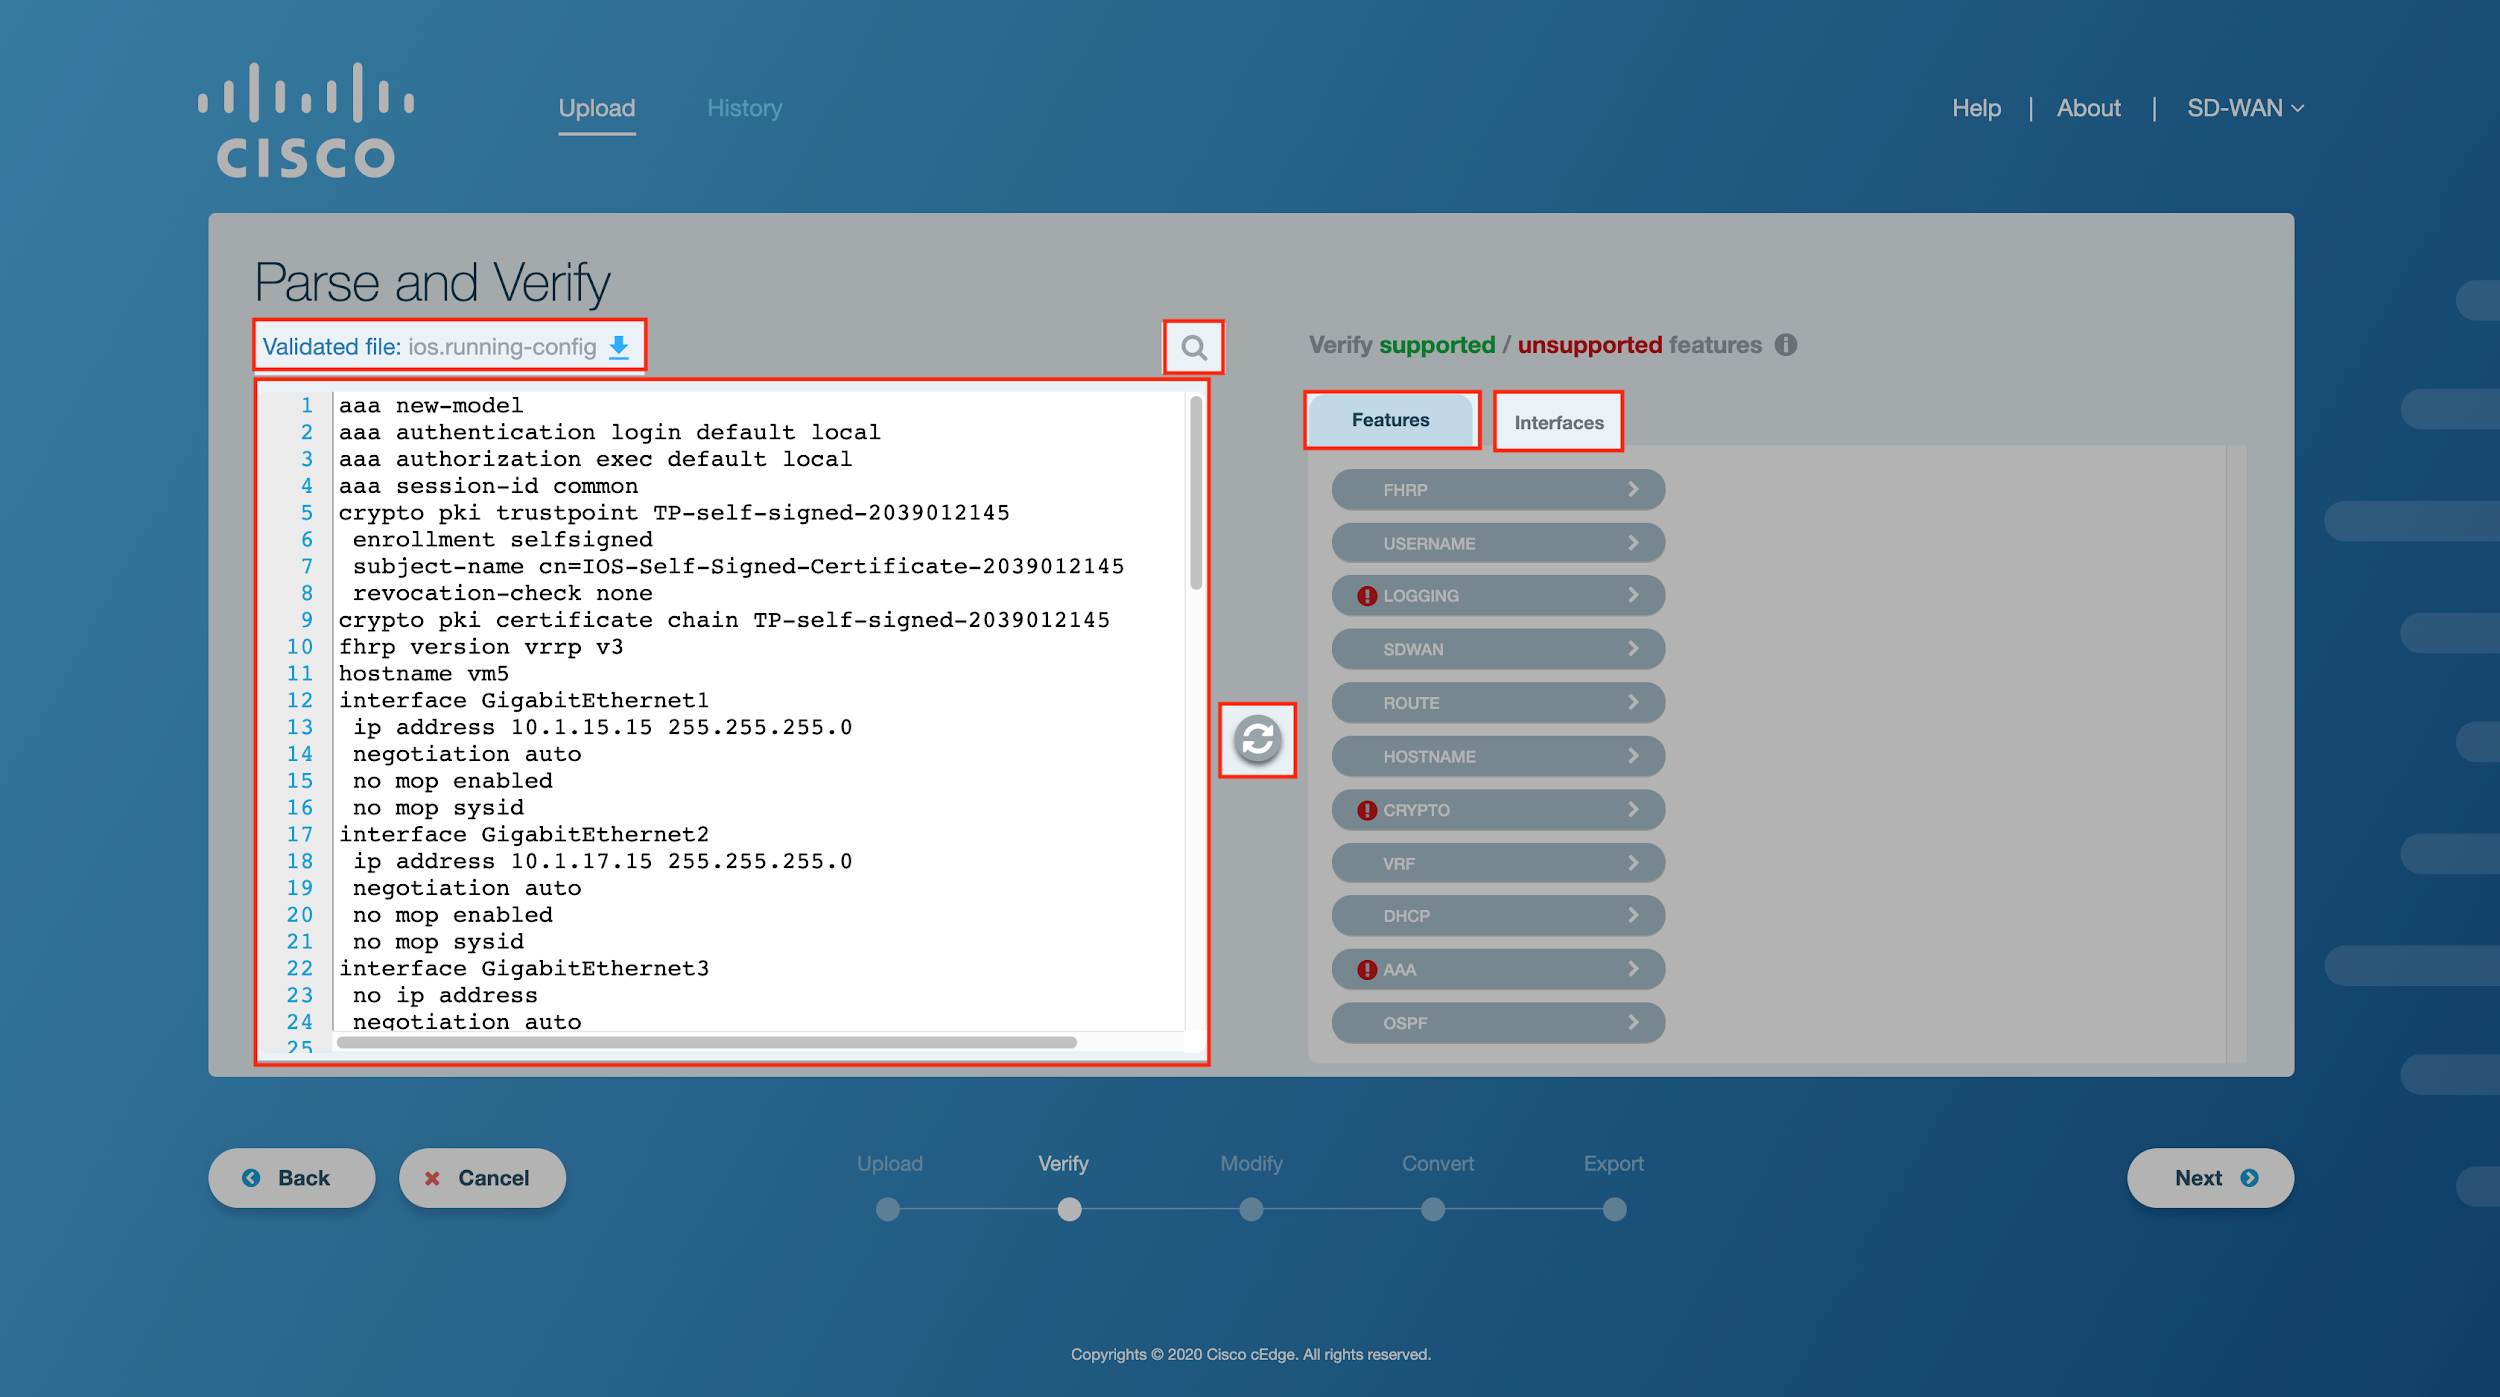
Figure 1. Activity window for verify step
A brief description of each section is explained below.
Field Name |
Description |
|---|---|
Validated file |
This is the IOS-XE config file that has been validated, with the validation results displayed on the right of the editor. The user can download this IOS-XE config file by clicking on the |
Search Bar |
It allows the user to search the contents of the file by typing the relevant keywords and pressing the Enter key. |
On-Screen Editor |
It displays the contents of the successfully validated IOS-XE config file. The user can edit the configuration file here and click the |
Refresh Button |
It is located in the middle of the activity window. Clicking on this button will save any changes made in the on-screen editor and reflect those changes in the Features and Interfaces tab in the form of supported and unsupported configurations. |
Features |
The Features tab is located in the right section of the activity window listing all the supported and unsupported features in the configuration file. The |
Interfaces |
The Interfaces tab is located next to the Features tab listing all the supported and unsupported interfaces. The |


Verification Workflow
Once the IOS-XE config file is uploaded successfully, the next step is to verify the contents of the configuration file.
Click on Next after uploading the config file. A loading screen appears on the application window as shown in the figure below. This indicates the beginning of the validation process.
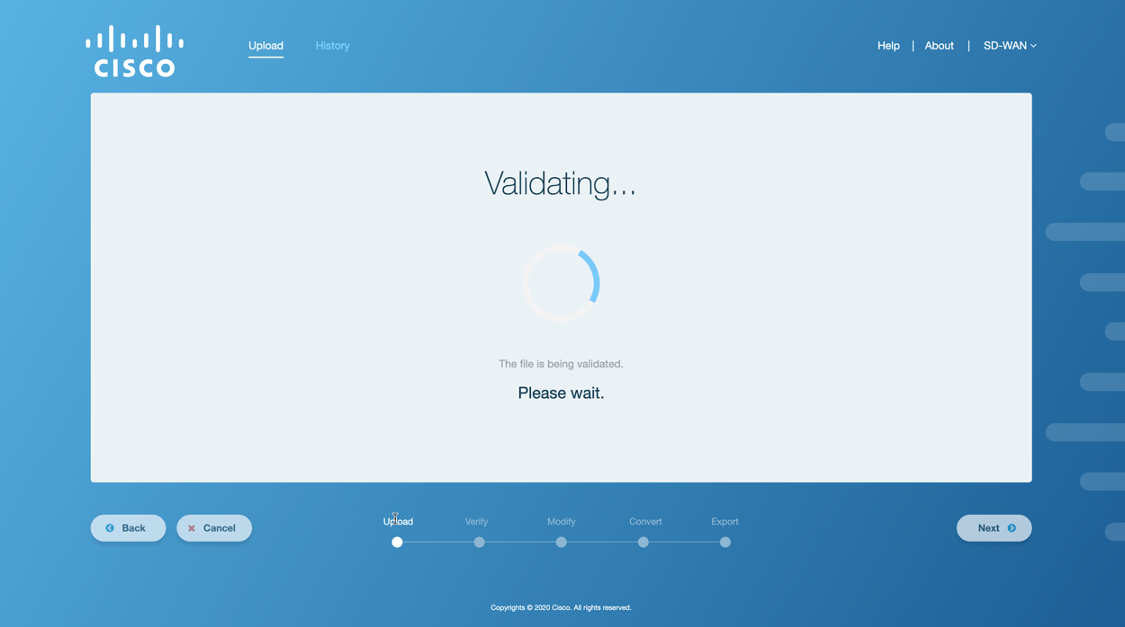
Figure 2. Validating the config file
Once the validation is complete, a parsed file is shown in a side-by-side view grouped into interfaces and features.
Figure 3. Parsed config file
At this stage the user can update the original file in the editable window and click the
 button to see the reflected changes in supported/unsupported configurations.
Note
The user should reconfigure any unsupported features or interfaces if they want them to be a part of the SD-WAN configuration before proceeding to the next step. Any unsupported features or interfaces left at this point will be removed from the XE SD-WAN configuration.
Once the user has reconfigured the unsupported features and interfaces, click on Next to proceed. A loading screen will appear on the application window that indicates the beginning of the verification process in the backend.
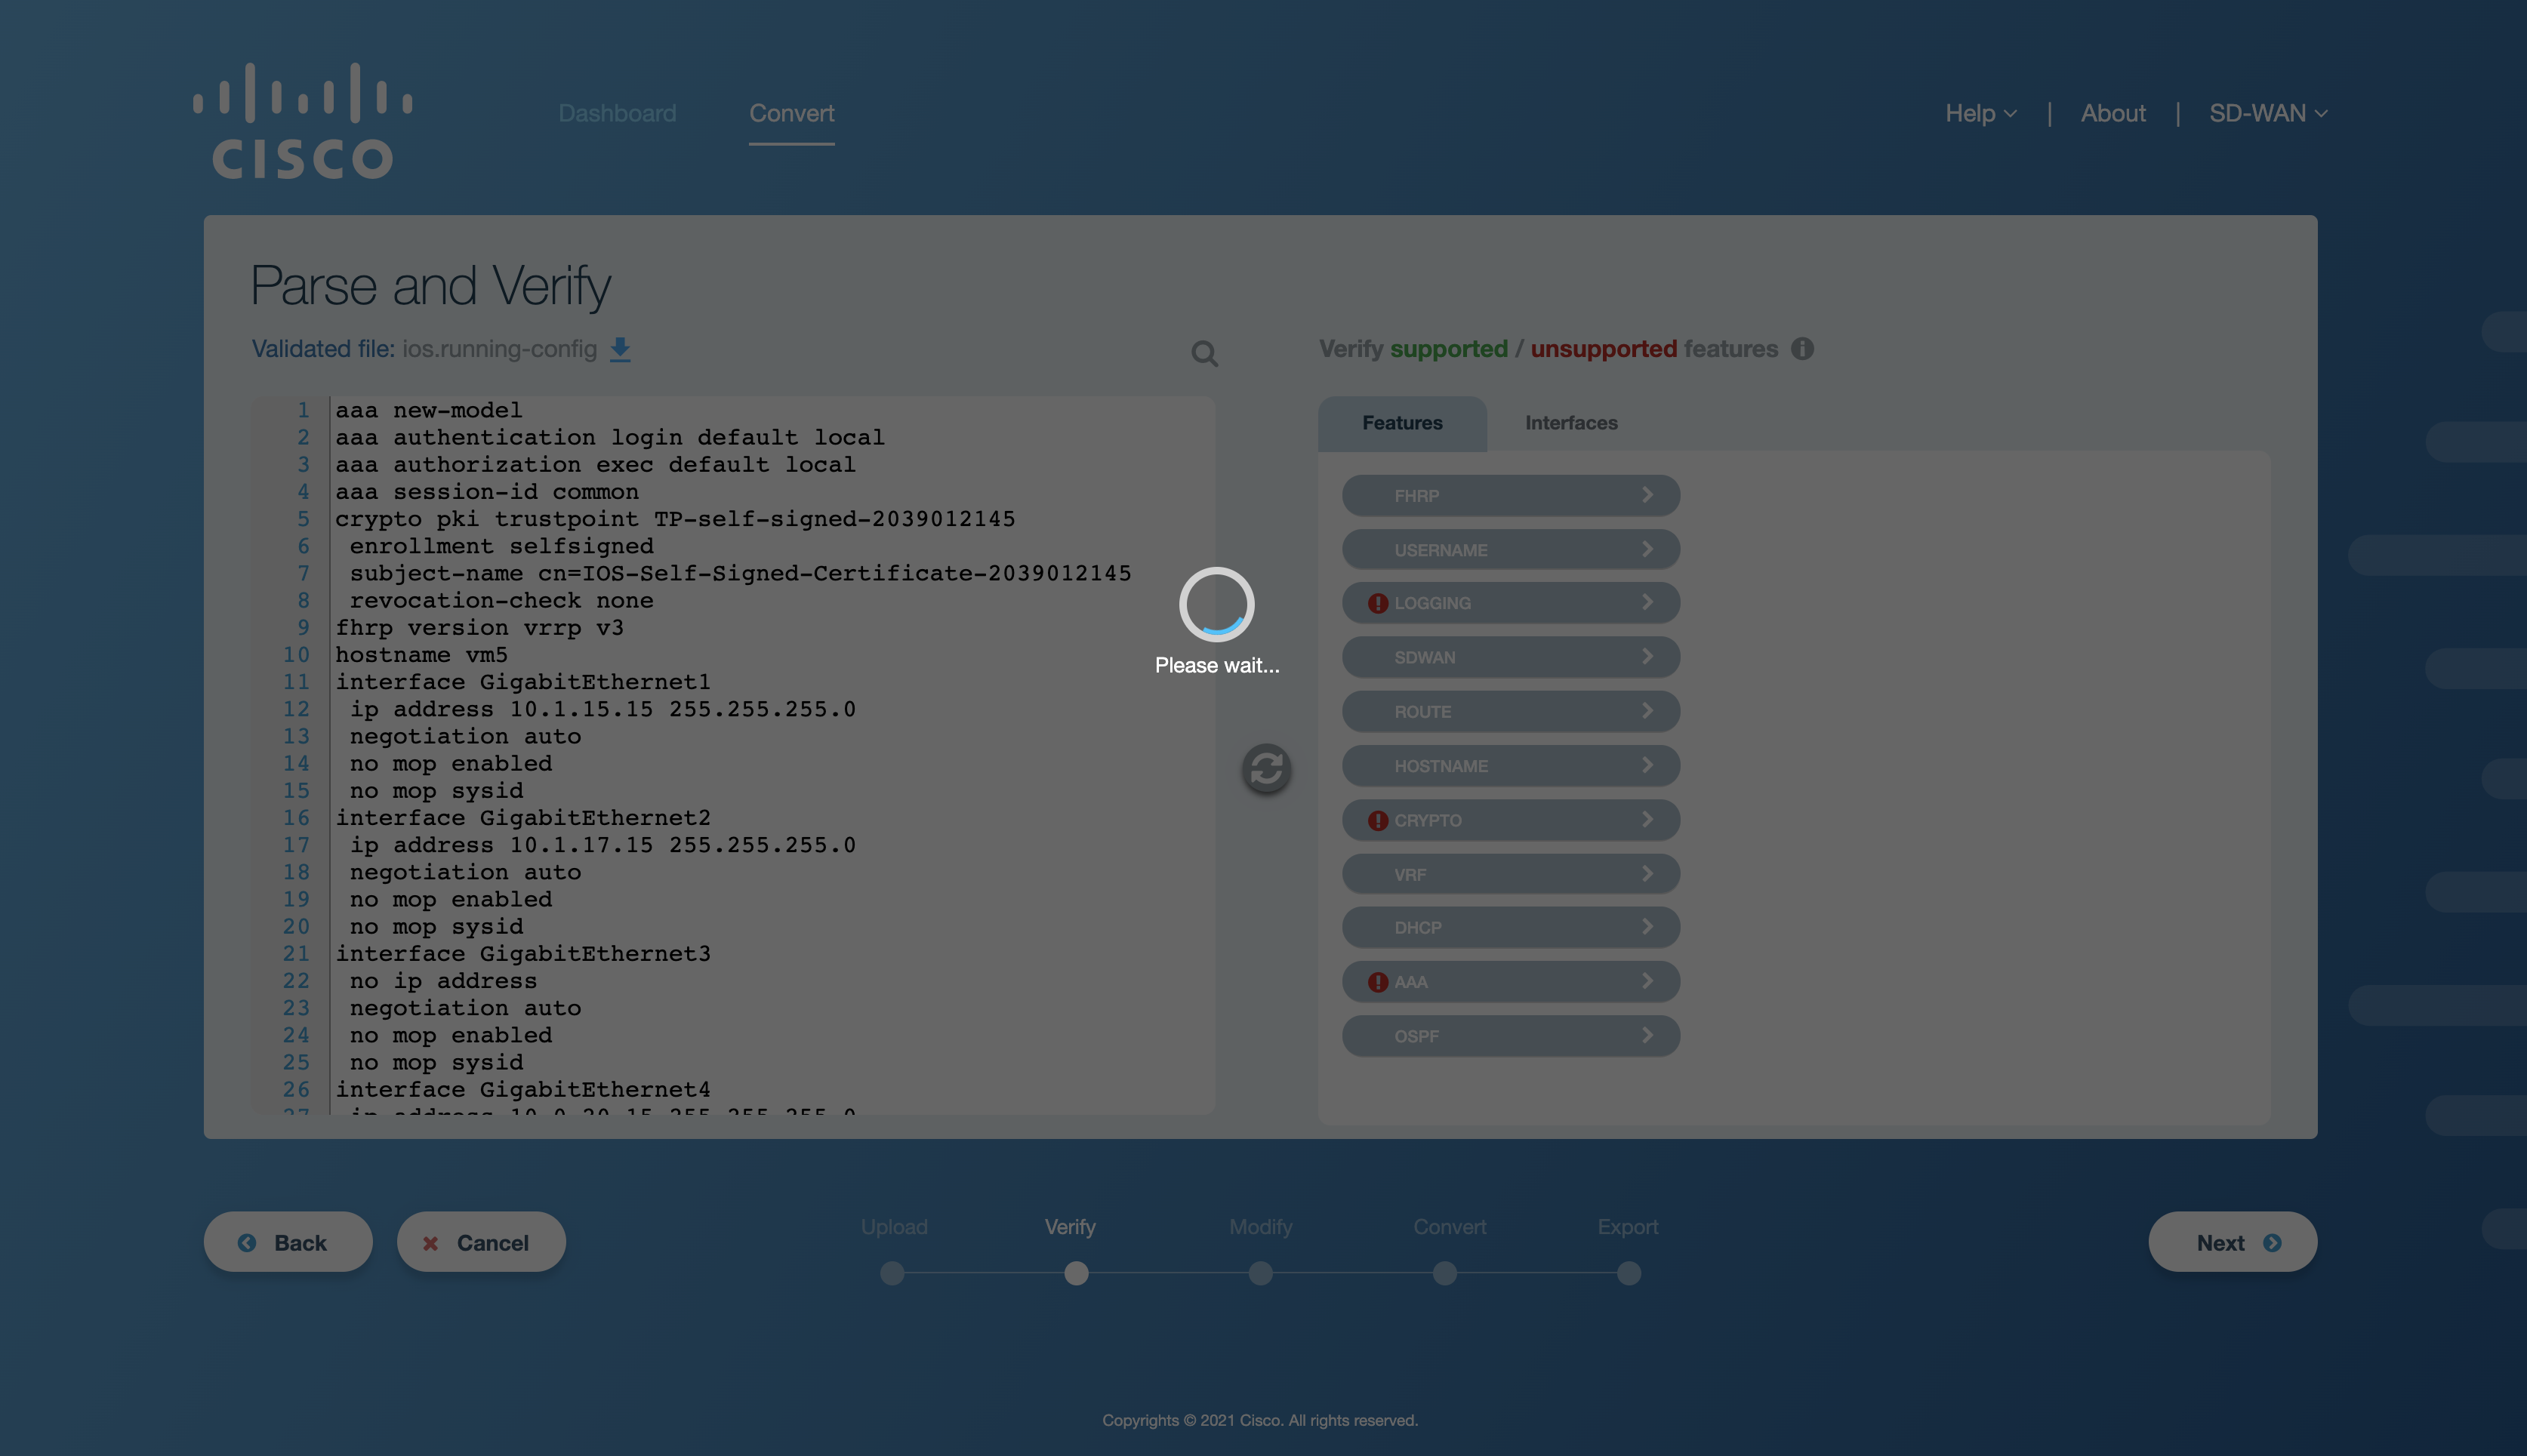
Figure 4. Verifying the config file
Upon successfully verifying the config file, the contents of the updated configuration will be displayed in an on-screen editor for any further modification.
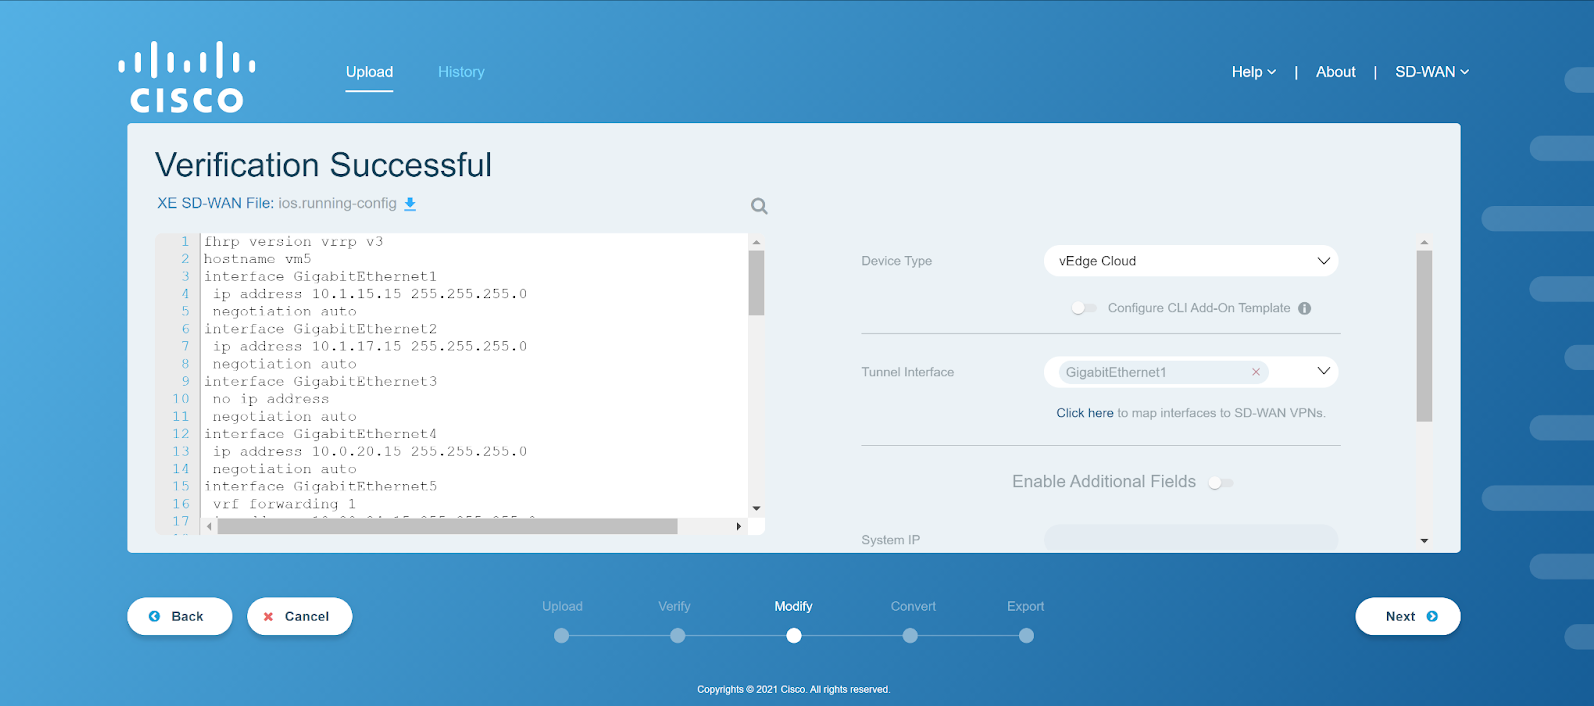
Figure 5. Config file verified successfully
See also
In case of an error, refer to the Verification Error: IOS-XE CLI Workflow section in Appendix A.
To view an end-to-end workflow for converting a sample config file, refer to Converting a Sample Config File section.
Modify
The SD-WAN tool provides users the options to add or remove tunnel interfaces, create new VPNs, assign interfaces to VPNs, and configure other system properties for SD-WAN specific config before the actual conversion process. It modifies the Cisco Edge Router config based on the values provided by the user in order to prepare it for the conversion from Cisco Edge Router to SD-WAN config.
Activity Window
This section gives the details of the available functionalities for the Modify step in the activity window. The activity window is shown in the figure below.
Figure 1. Activity window for Modify UI
Field Name |
Description |
|---|---|
XE SD-WAN File |
It contains the contents of the IOS-XE config file which was parsed and verified successfully in the previous step. The user can download this XE SD-WAN config file by clicking on the download icon. |
Search Bar |
It allows the user to search the contents of the file by typing the relevant keywords and pressing the Enter key. |
On-screen Editor |
It displays the contents of the successfully verified IOS-XE config file. The user can modify the configuration file here. |
Device Type |
It lists the available target device types. The device type determines if the CLI Add-On Template can be enabled and configured. If enabled, CLI Add-On configuration can be done on the next screen. All Cisco Edge Router and vEdge devices present in vManage 20.6 are supported as target device types in the IOS-XE CLI workflow. |
Tunnel Interface |
It lists the available interfaces that can be configured as tunnel/WAN interface. Multiple interfaces can also be configured as the tunnel interface. By clicking on the ‘Click here’ hyperlink, Interface VPN Mapping dialog box appears. For more details, refer to Interface VPN Mapping section. |
Enable Additional Fields |
Click on the toggle to enable additional configurations. Once the toggle switch is turned on, it is mandatory to fill in all the additional fields to proceed.
|
Note
The additional configurations can be specified either directly in the config or through these fields.
If the values are specified in the config as well as the fields, the values entered in the fields will be used and they will overwrite the config values.
If no values are specified, these fields will be created as variables in the exported template.
Interface VPN Mapping
This dialog box can be used to map all available interfaces in the config to VPNs as shown in the following image.
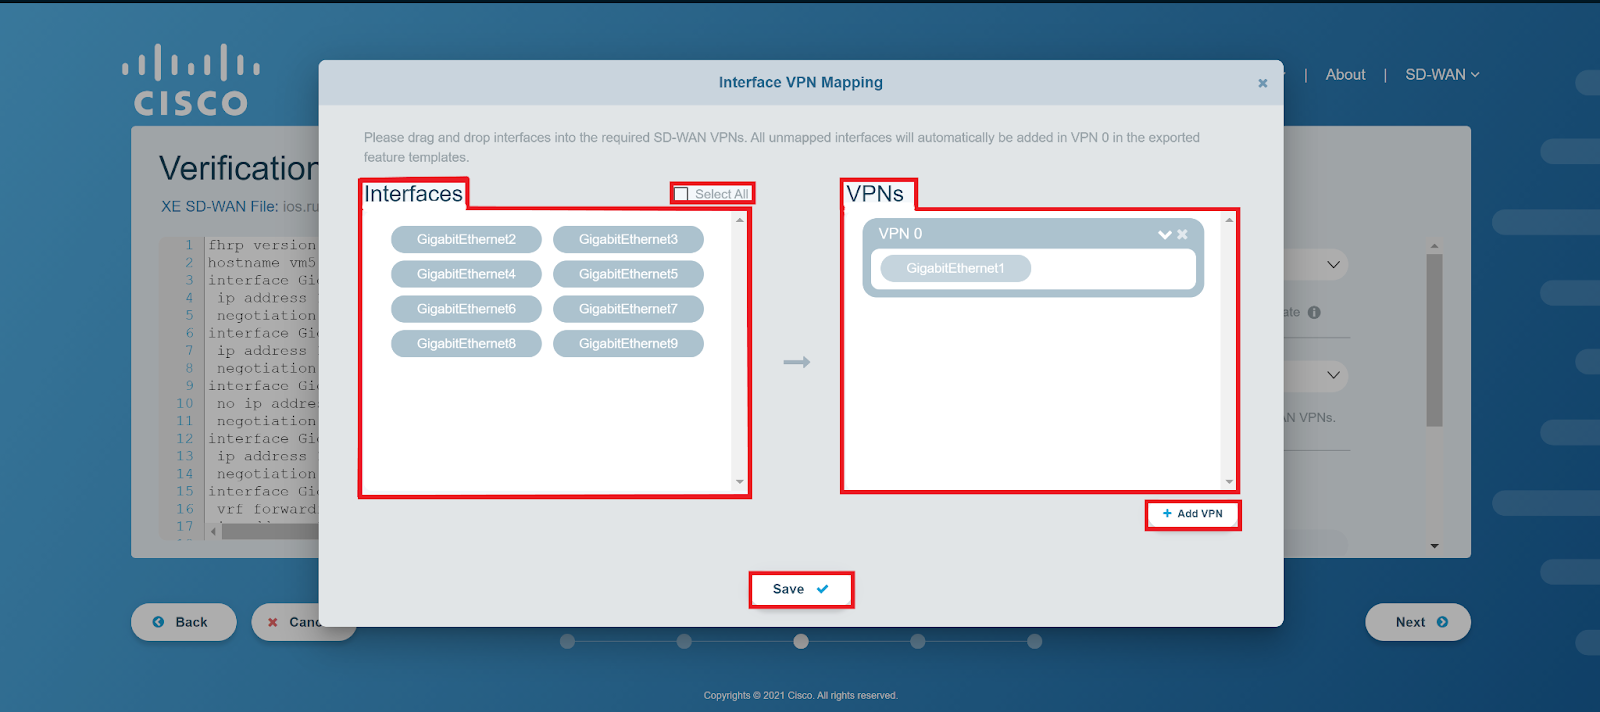
Figure 2. Interface VPN Mapping
Field Name |
Description |
|---|---|
Interfaces |
It lists the available interfaces in the uploaded configuration file. These can be dragged and dropped to and from the VPNs. |
Select All |
It selects or deselects all the interfaces. The selected interfaces are highlighted in bright blue color. |
VPNs |
It lists all the available and newly created VPNs along with the interfaces within them. If the VPNs are already present in the config, they cannot be deleted from this dialog box. Otherwise, they can be deleted by clicking the |
Add VPN |
It creates a new VPN within the range of 0 to 65527. An error is shown when the VPN name is not a number or if the VPN already exists. |
Save |
When the user clicks Save, they are taken back to the Modify screen. |
When the user clicks Next, the changes made in the Modify step are reflected in the config on the next screen.
Modify Workflow
Once the IOS-XE config file is parsed and verified successfully, the next step is to modify the interfaces configuration or edit the additional fields, as per the use case. This is the last step to make changes before the final conversion begins.
After the config file has been successfully verified, the following screen appears on the application window:
Figure 3. Config file verified successfully
Click on the dropdown arrow for Device Type to select a device type. By default, vEdge Cloud will be selected.

Figure 4. Select the device type for conversion
The CLI Add-On Template feature can be enabled by clicking on the toggle switch. This option is only available if the selected device type is a Cisco Edge Router device.
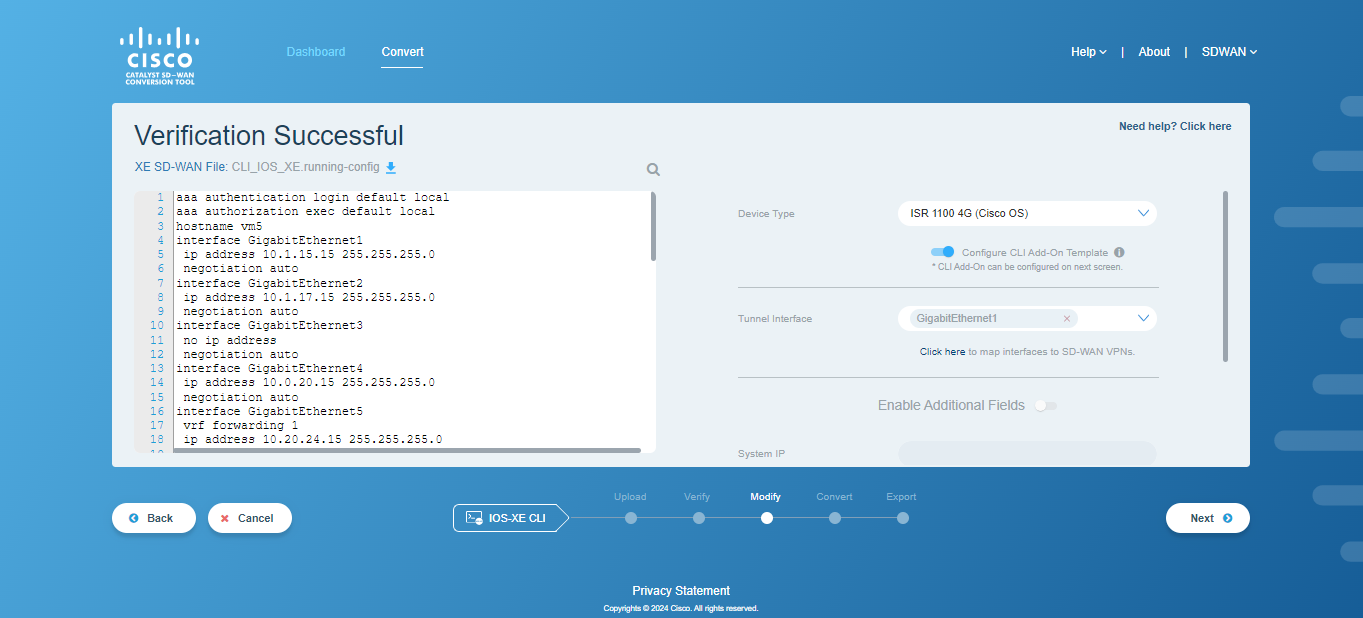
Figure 5. CLI Add-On toggle
Click on the dropdown arrow for Tunnel Interface to select a tunnel interface(s). Multiple interfaces can also be selected as required.
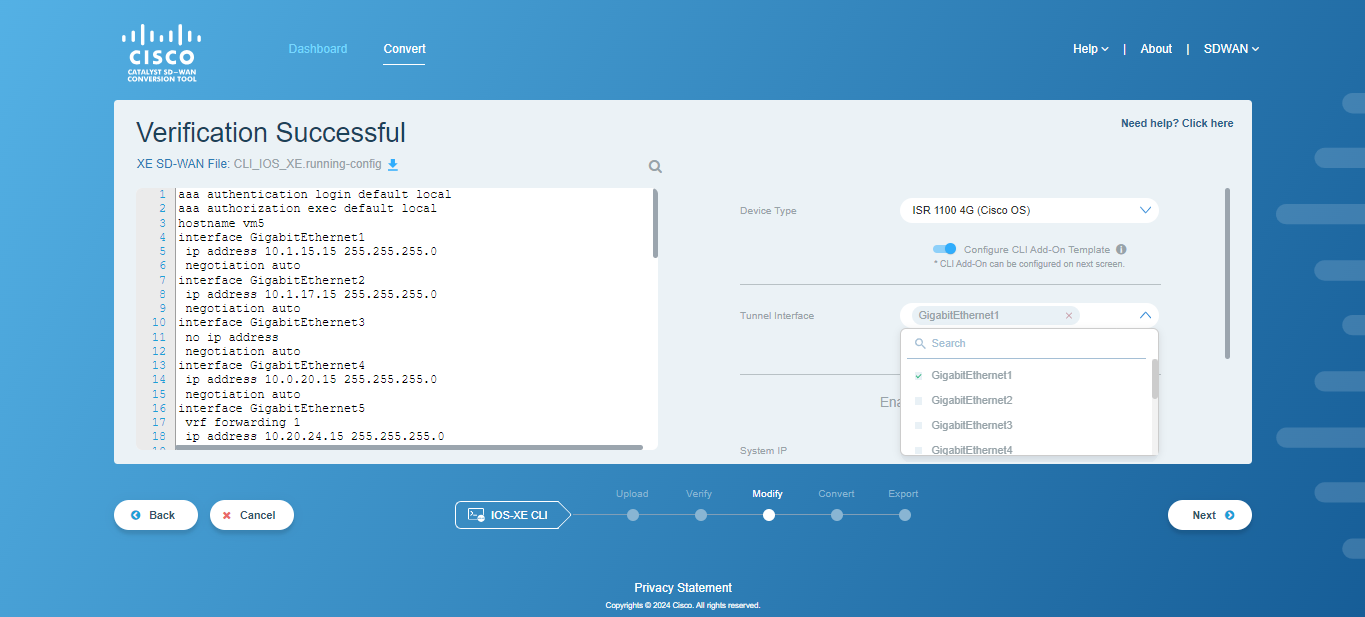
Figure 6. Tunnel interfaces
Note
A previously configured tunnel interface can also be removed by unchecking the box next to that interface name from the dropdown menu.
To map interfaces to VPNs, hit the “Click here to map interfaces to SD-WAN VPNs.” under Tunnel Interface dropdown. The following dialog box will appear.
Figure 7. Interface VPN Mapping pop-up
Create a new VPN by clicking on the “Add VPN” button.
Enter the required VPN ID between 0 and 65527. This VPN ID cannot be pre-existing. Once created, the VPN IDs are sorted numerically. User can perform the following operations for the created VPN:
Click on
 to remove a created VPN.
Click on
 to expand the VPN block.
Figure 8. Enter VPN ID
Note
VPNs cannot be removed if they have interfaces present in them or if they pre-exist in the configuration file.
Drag and drop the required interfaces into the VPN. To select all the interfaces, check the Select All checkbox. Unchecking this checkbox will deselect all the interfaces.
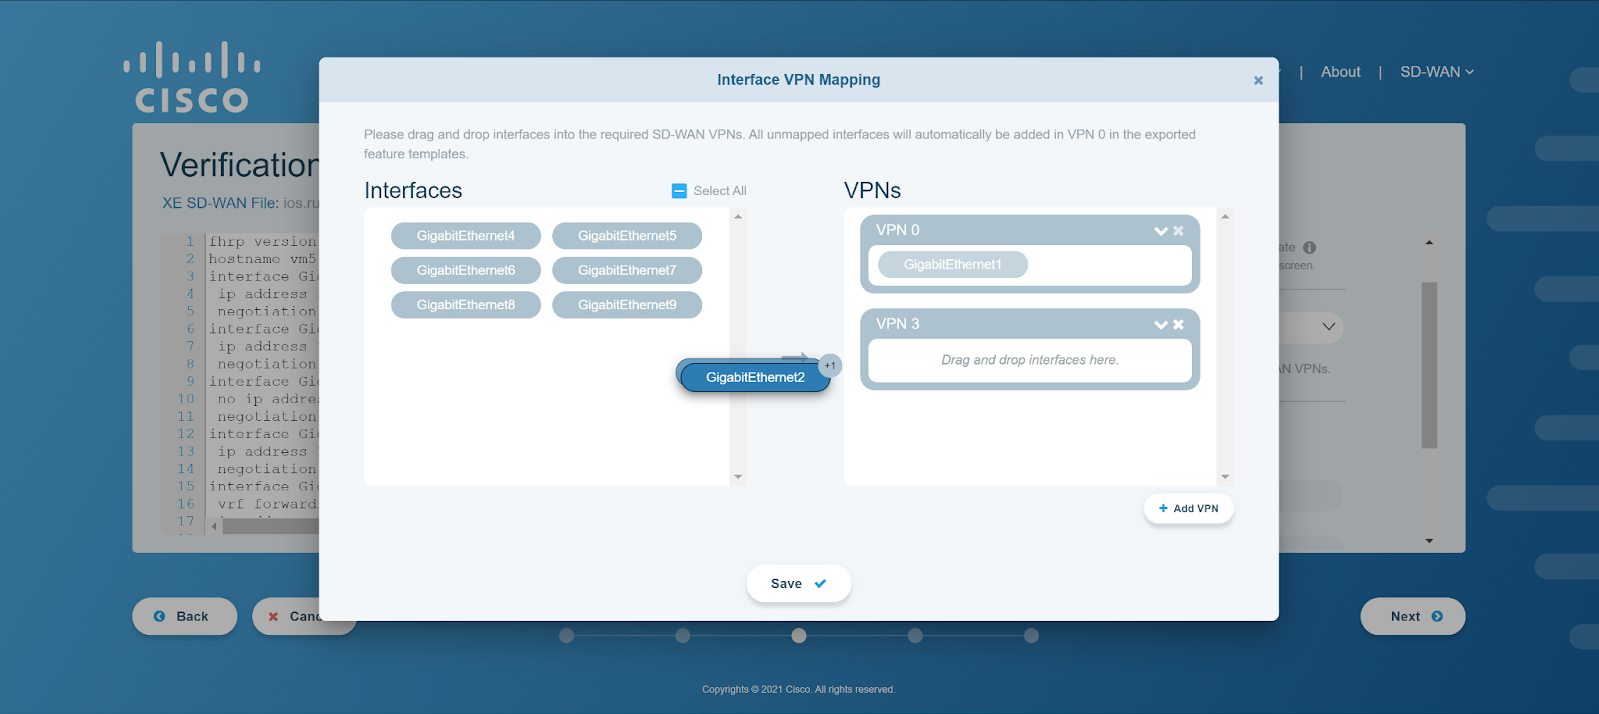
Figure 9. Drag the interface
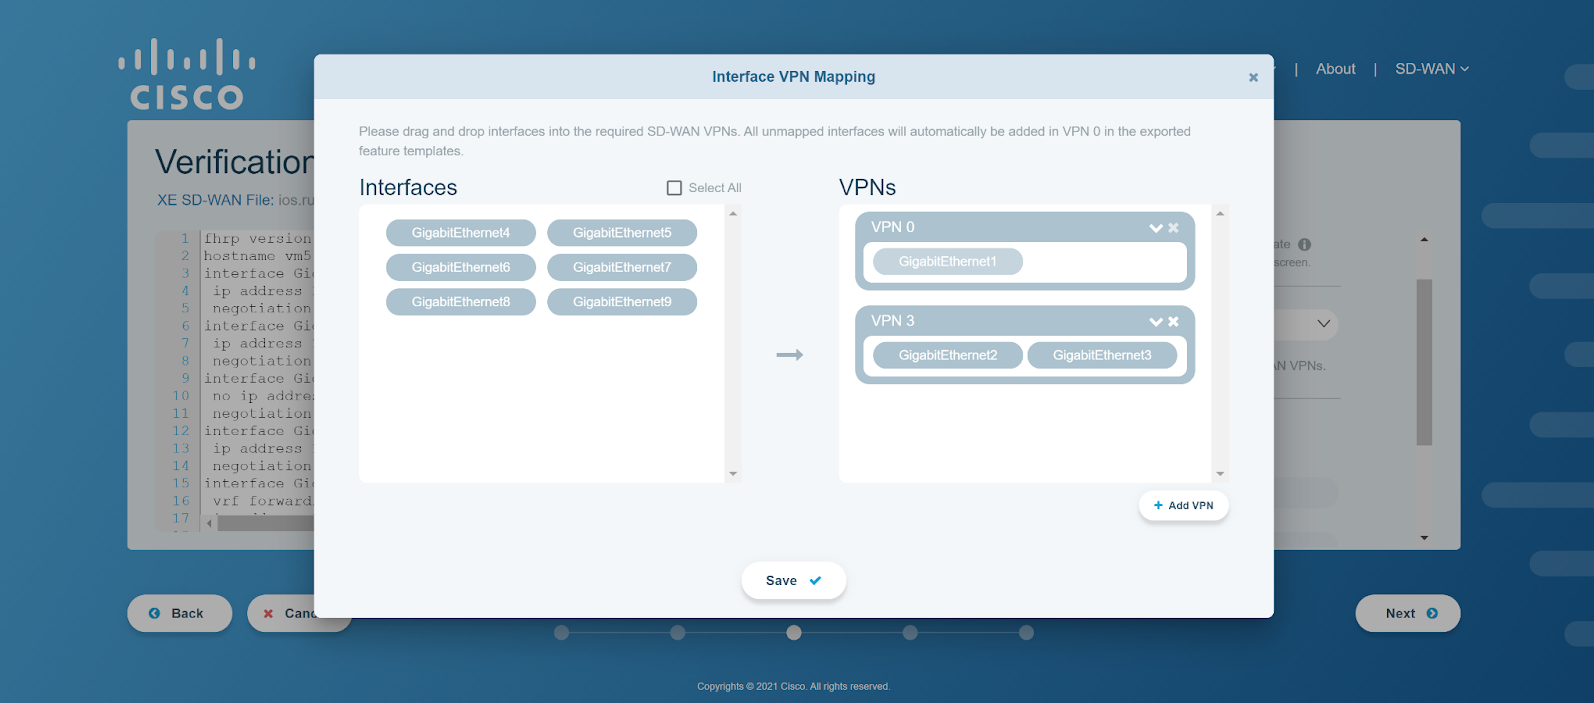
Figure 10. Drop the interface
Note
Tunnel Interfaces can be seen in VPN 0 within the Interface VPN Mapping dialog box. They cannot be removed directly from within the dialog box. In order to remove them as tunnel interfaces, they need to be either unchecked from the Tunnel Interface dropdown or removed from within the CLI configuration on Verify screen.
Click Save to complete the mapping of interfaces to VPNs.
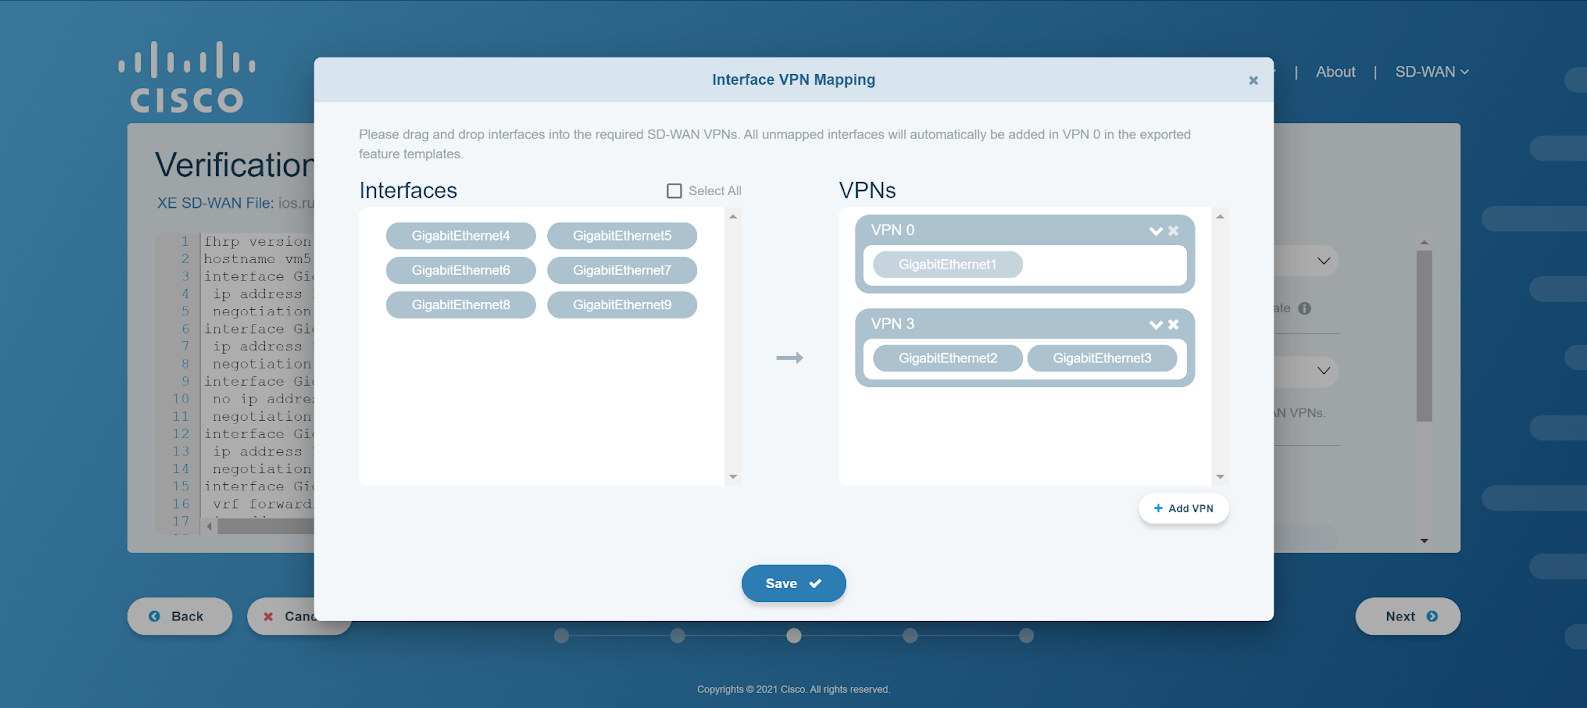
Figure 12. Save Interface Mapping to VPNs
The interface mapping changes can now be seen in the configuration file.
If required, click on the toggle switch to enable additional fields and provide the relevant SD-WAN configuration information.
Figure 13. Additional fields for SD-WAN configuration
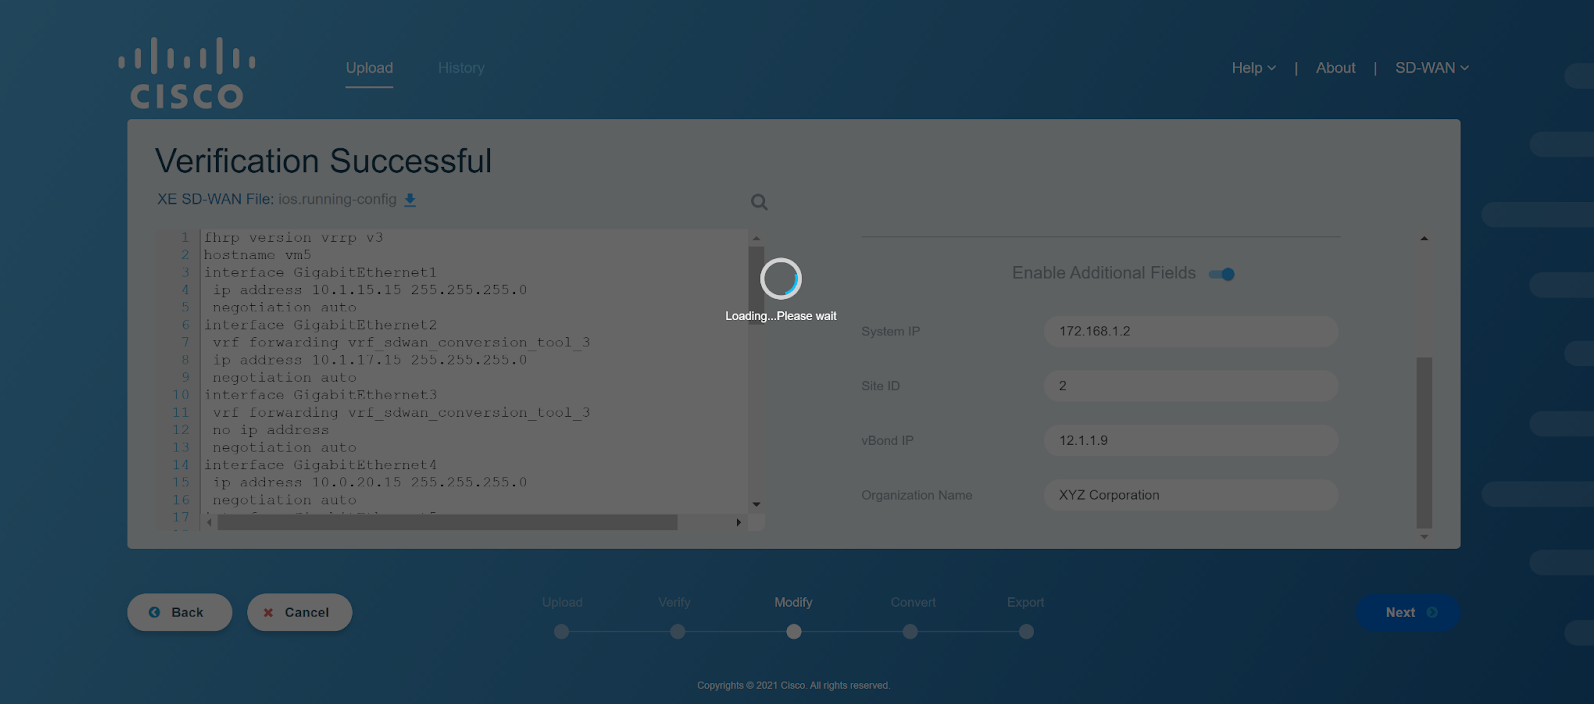
Figure 14. Loading modified config file
Upon successfully modifying the configuration file, the following screen will appear on the application window indicating a successful modification process. If the CLI Add-On Template feature is enabled, the screen will contain two tabs: one for XE SD-WAN configuration, and another for CLI Add-On configuration.
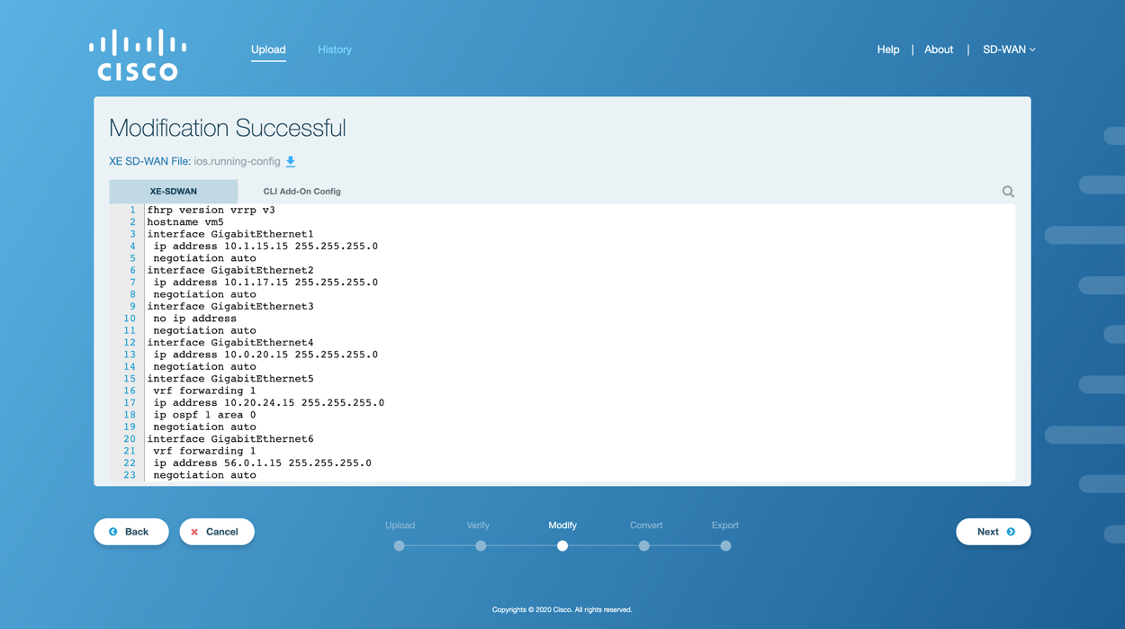
Figure 15. Config file modified successfully
Note
The CLI Add-On Configuration will be preloaded with the unsupported features removed in the Verification Workflow.
See also
In case of an error, refer to Modification Error: IOS-XE CLI Workflow section in Appendix A.
To view an end-to-end workflow for converting a sample config file, refer to Converting a Sample Config File section.
Convert
The SD-WAN Conversion Tool converts the Cisco Edge Router config to vManage compatible configuration using Cisco NSO NEDs and Service Package. The conversion service returns the converted SD-WAN config in XML format, which is consumed by the feature template generator tool in the subsequent step.
See also
The implementation details of the conversion process are explained in the Architectural Implementation section.
Convert Workflow
Once the XE SD-WAN config file has been modified successfully, the next step is to translate and convert this configuration to a compatible SD-WAN config file.
After the config file has been successfully modified, click on Next to proceed. A loading screen will appear on the application window that indicates the beginning of the conversion process.
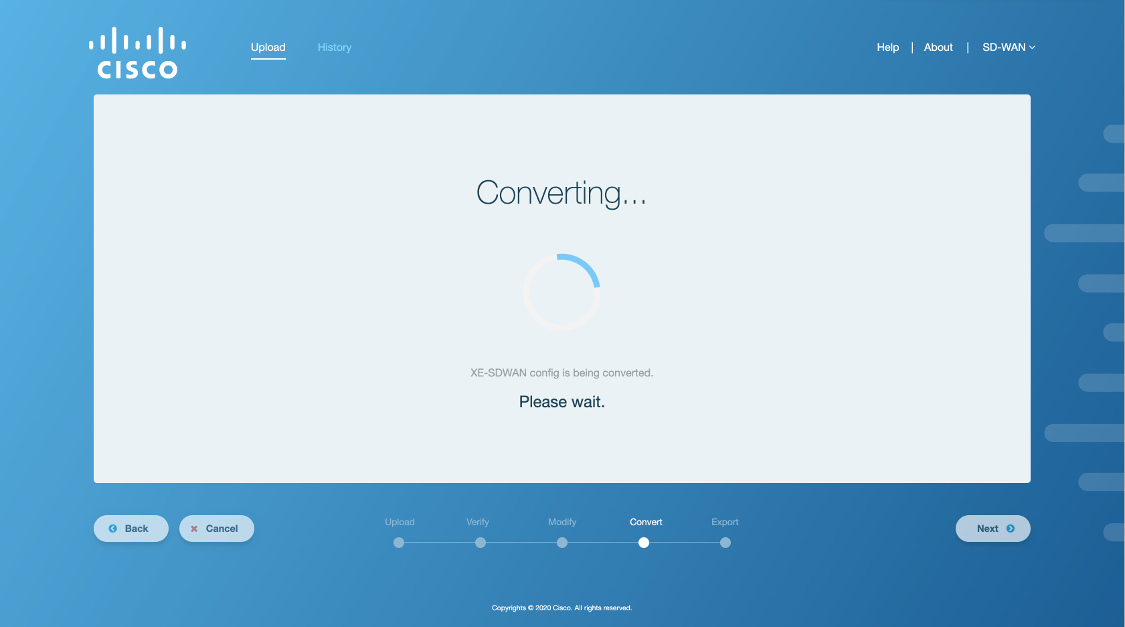
Figure 2. Converting the config file
Upon successfully converting the config file into an SD-WAN compatible config file, the user will be redirected to the export workflow screen.
See also
In case of an error, refer to Conversion Error: IOS-XE CLI Workflow section in Appendix A.
To view an end-to-end workflow for converting a sample config file, refer to Converting a Sample Config File section.
Export
The SD-WAN Conversion Tool generates feature templates using the converted SD-WAN config. In case of vManage as a target, these templates are created in user-selected vManage and attached to a device template for consumption from vManage UI. The credentials provided for vManage can be saved by the user for subsequent workflows in the future. In case of Sastre archive as a target, the tool creates a Sastre archive that contains these templates which can be downloaded from the tool’s UI.
Activity Window
This section gives the details of the available functionalities for the Export step in the activity window. An example activity window for this step is shown in the figure below.
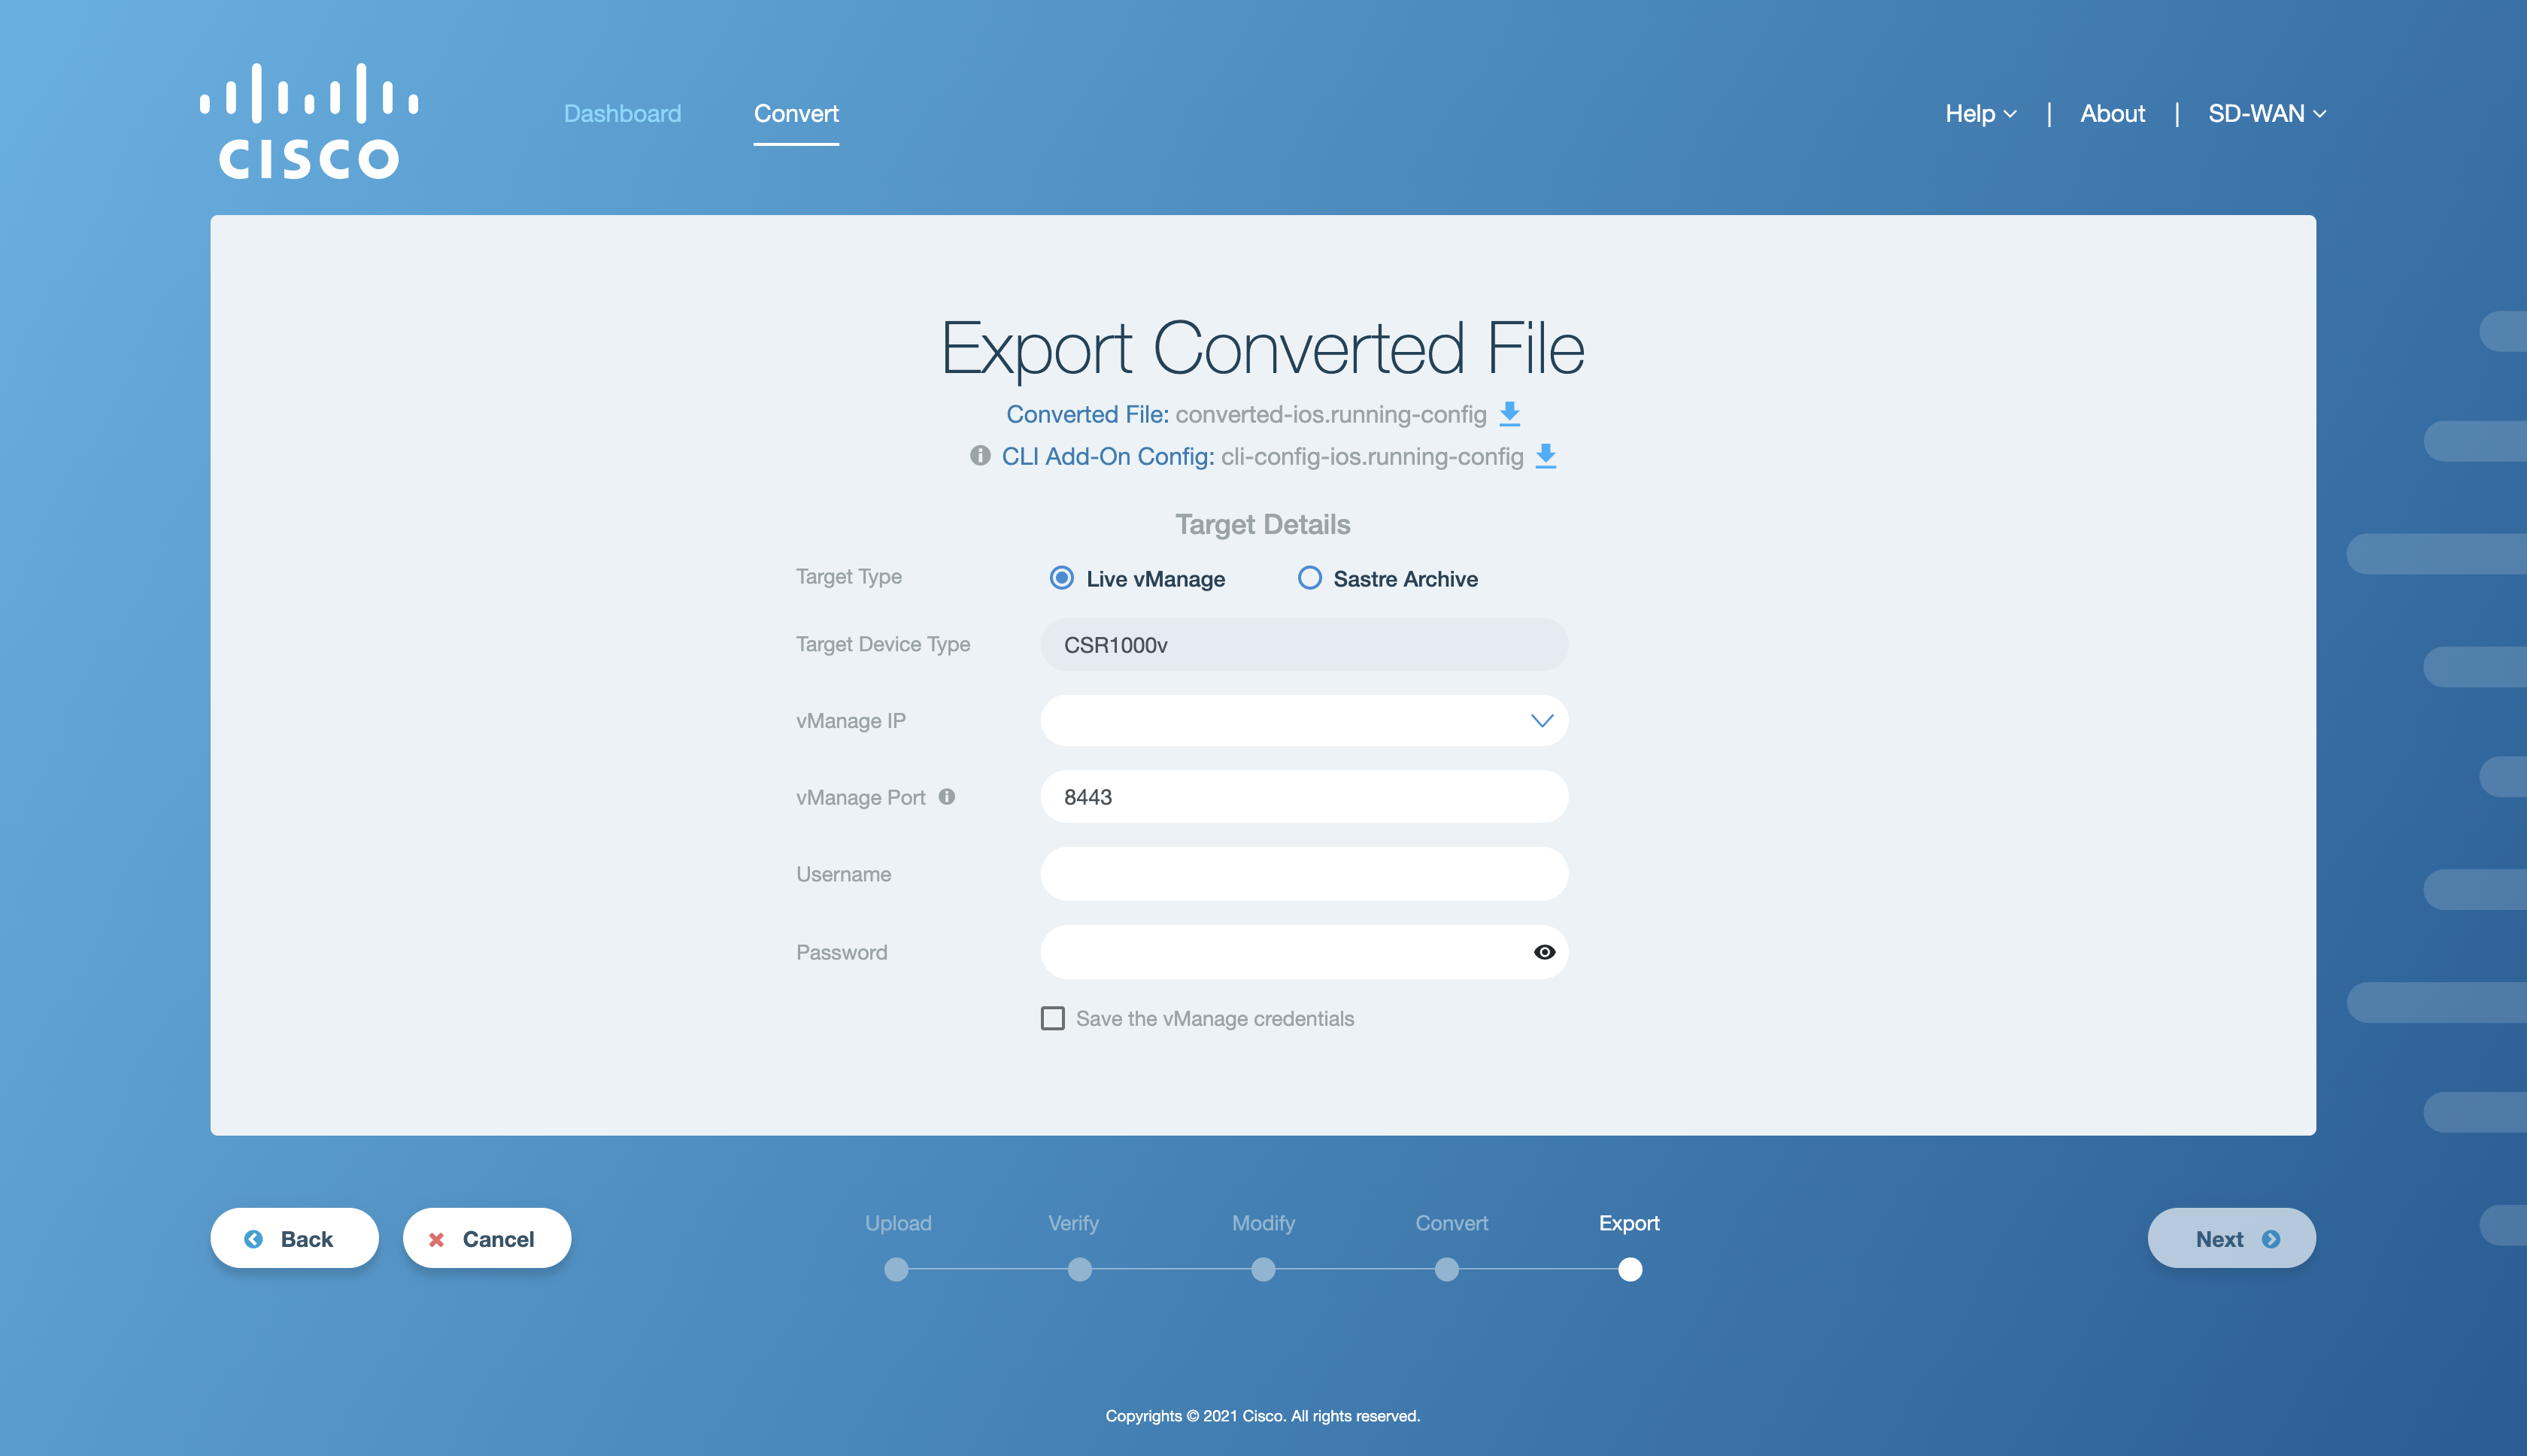
Figure 1. Activity window for Export UI
Field Name |
Description |
|---|---|
Target Type |
Type of target (Live vManage or Sastre archive) for the conversion. |
Target Device Type |
Read-only value representing the target device type selected during the workflow. |
vManage IP/New IP |
This is the IP or domain name of the running vManage to which the device and feature templates will be exported. The user can either enter a new IP or select from the list of previously saved vManage IPs from the dropdown menu. This field is disabled when Sastre archive is selected as the target type. |
vManage Port |
This is the port of the vManage to which the feature templates will be exported. This field is disabled when Sastre archive is selected as the target type. |
Username |
This is the username of the server on which vManage is running. It is disabled when Sastre archive is selected as the target type. |
Password |
This is the password of the server on which vManage is running. It is disabled when Sastre archive is selected as the target type. |
Export Workflow
Once an SD-WAN XE compatible config file has been converted successfully, the next step is to export this config file.
After the config file has been successfully converted to SD-WAN XE compatible config file, click on Next to proceed. The following screen will appear.
Figure 1. Application window to export converted file
Fill in the required fields by entering the relevant configuration details of the target to proceed with the export process. An example is shared in the figure below.
Figure 2. Sample config to export the file
Once the user has filled in the relevant fields, click on Next to proceed. A loading screen will appear on the application window that indicates the beginning of the export process in which the config file is exported to vManage or as a Sastre archive.
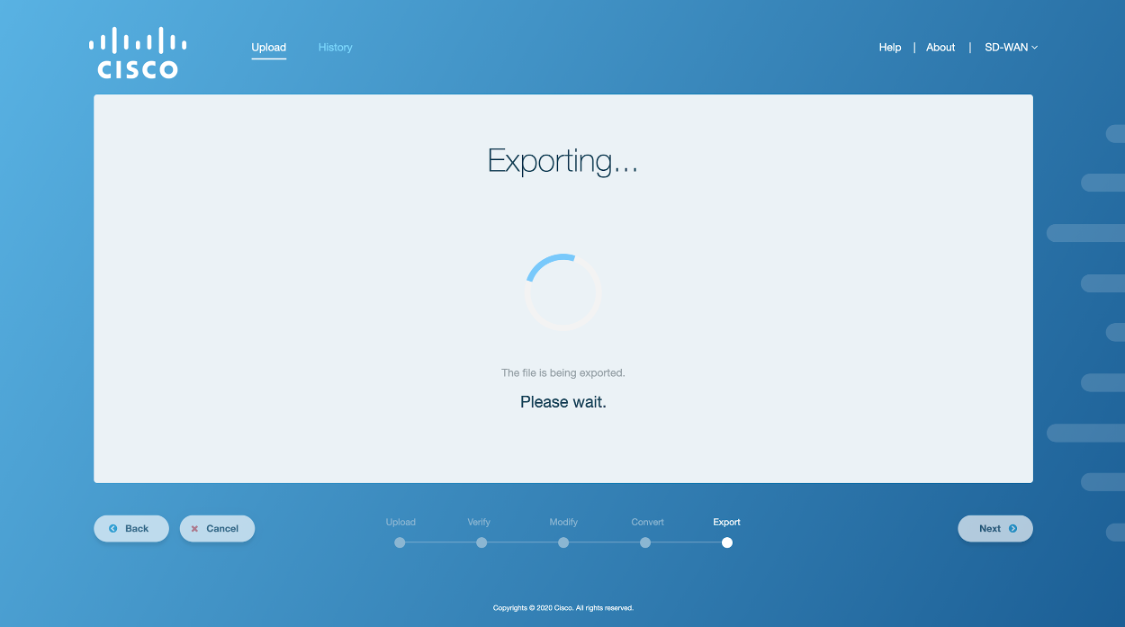
Figure 3. Exporting the config file
After the config file has been successfully exported to vManage or as a Sastre archive, a screen will appear on the application window indicating a successful export process. The successful export screen would vary based on the target environment chosen earlier by the user. In case of Sastre target type, the user will be additionally shown a Sastre archive available for download. The screenshots for both scenarios are shown below.
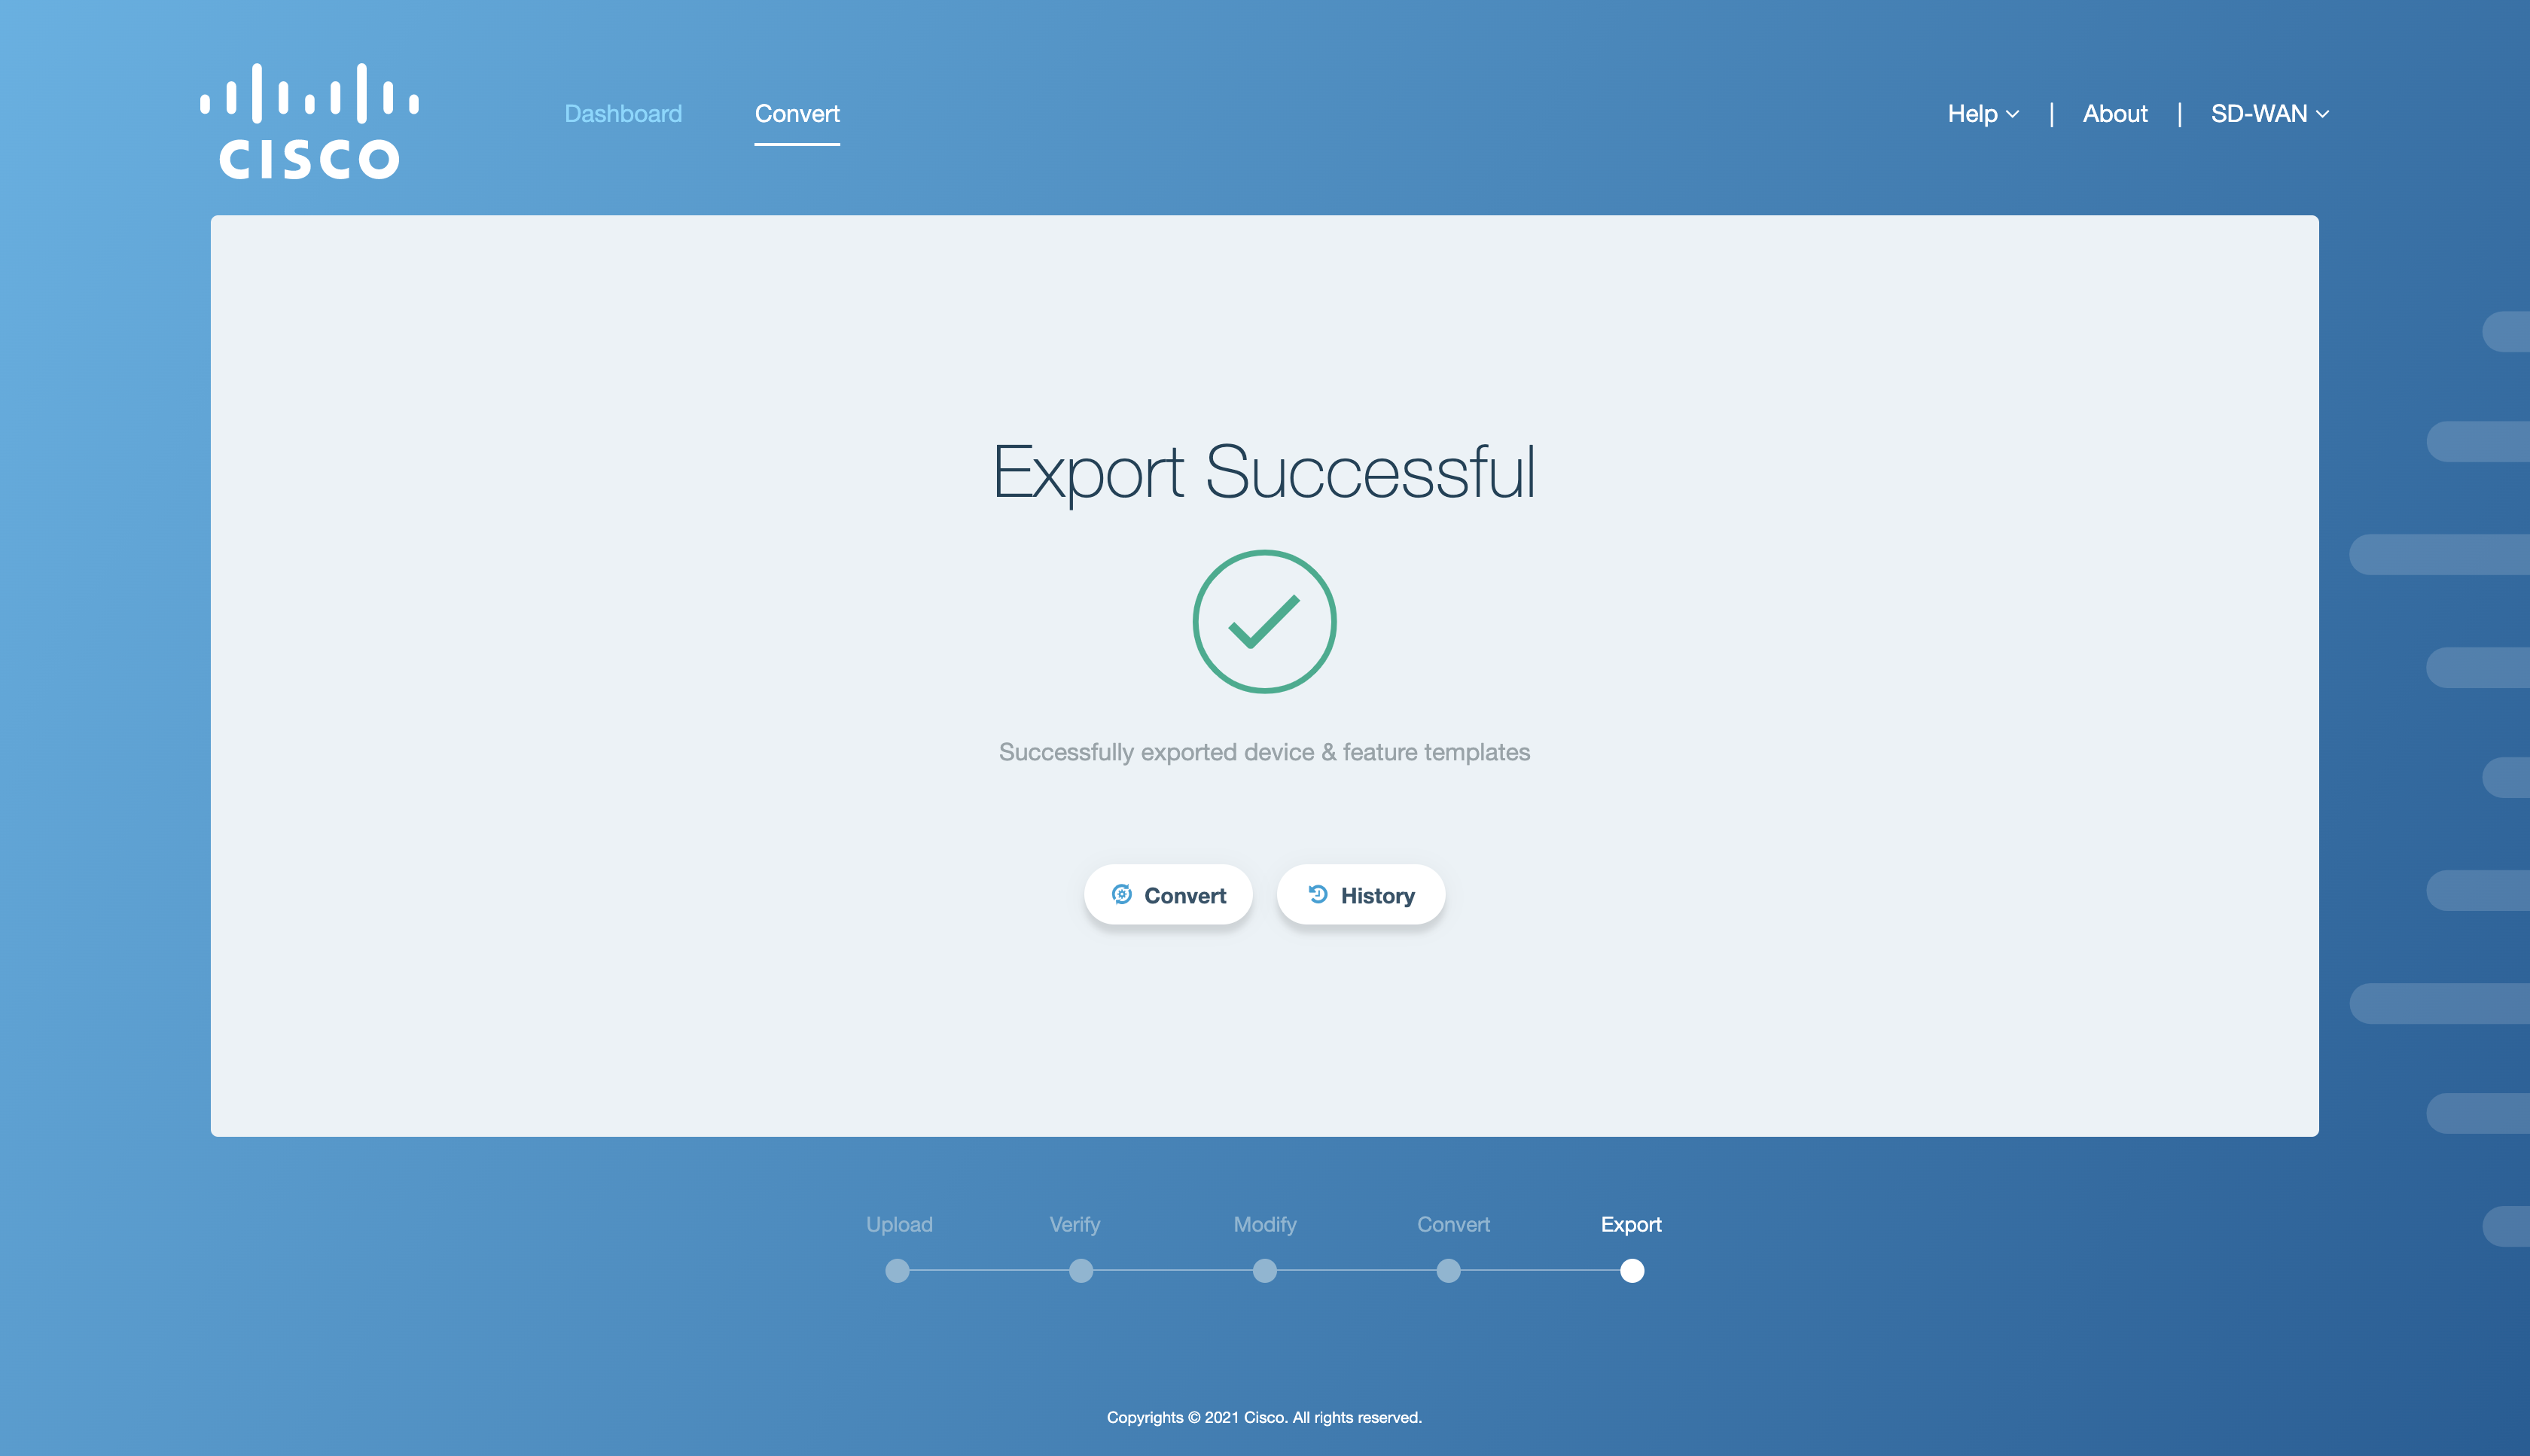
Figure 4. Config file successful export - Live vManage as target
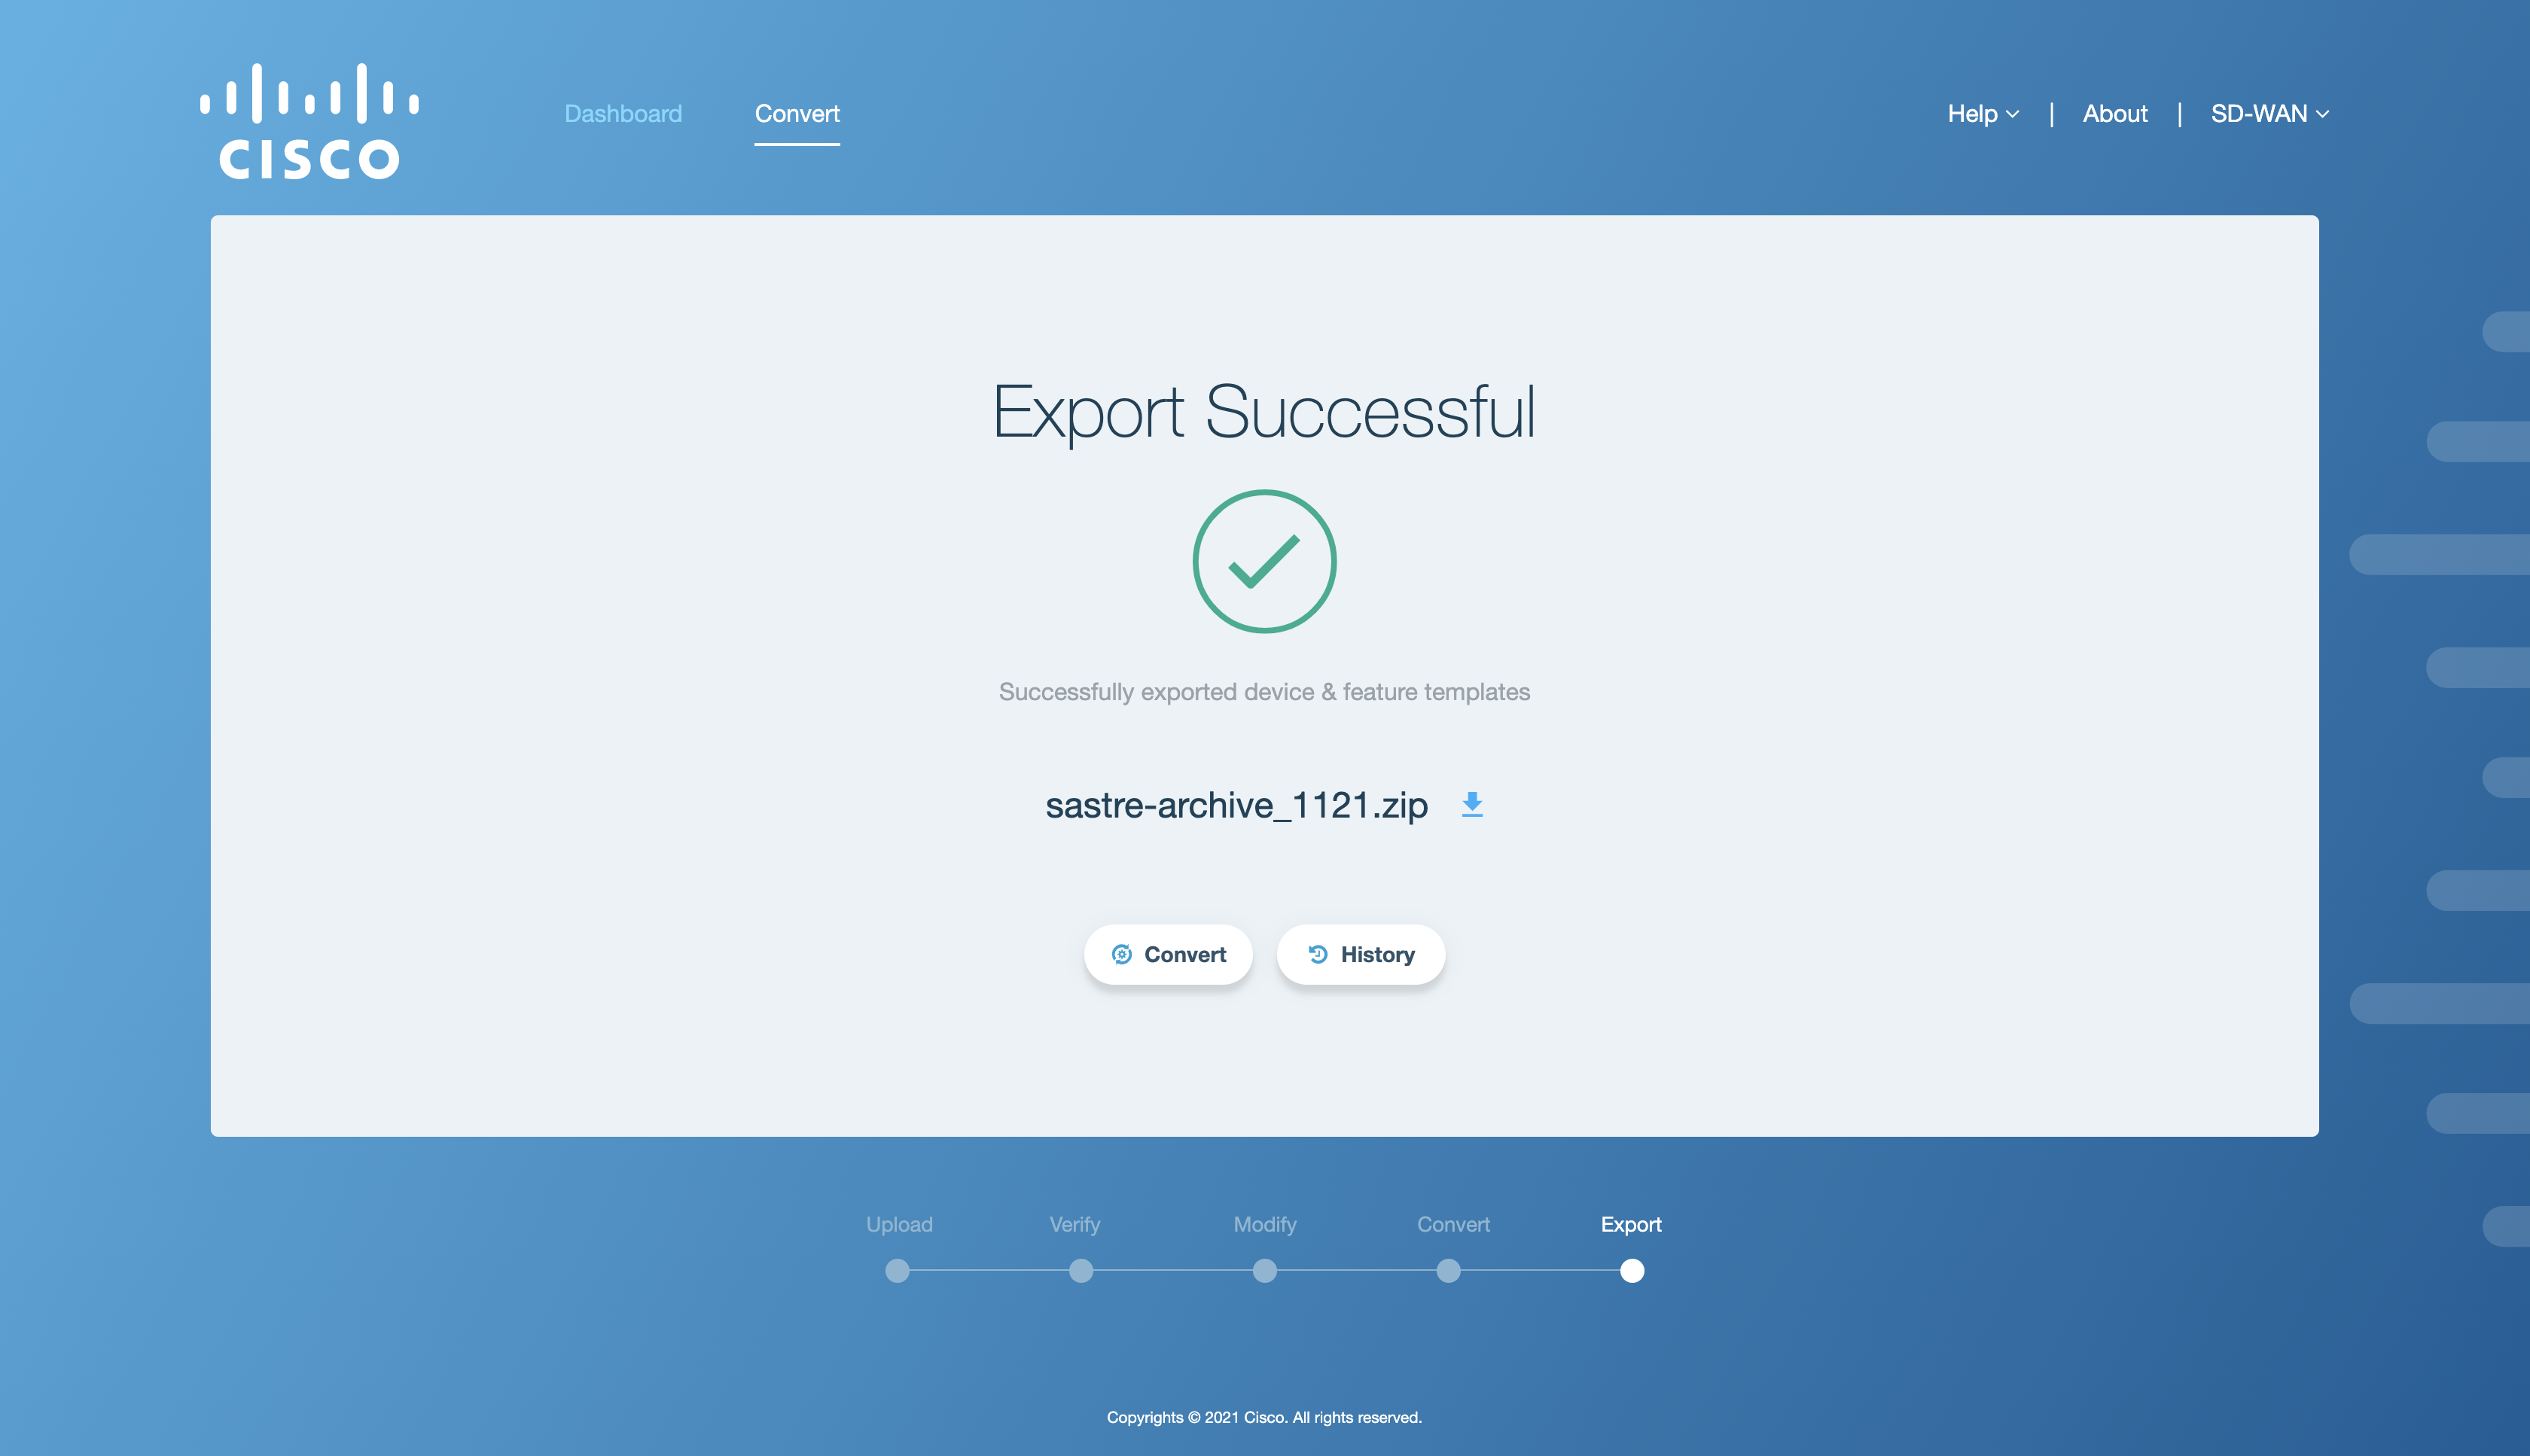
Figure 5. Config file successful export - Sastre as target
Note
In case of an error, refer to Export Error: IOS-XE CLI Workflow section in Appendix A.
On the export successful screen, the following two buttons are available to the user:
Convert: To perform another configuration conversion, click the Convert button. This will take the user back to the workflow selection screen.
History: To view the history of the configuration conversion workflows, click the History button. This will take the user to the History tab.
See also
To view an end-to-end workflow for converting a sample config file, refer to Converting a Sample Config File section.