UI Overview
Before using the SD-WAN Conversion Tool, it is essential to familiarize yourself with various UI components of this tool. Based on the user categories, it is divided into two different views to ensure an interactive user experience. A list of various available tabs is shared below. Click on your desired option to jump directly to the details of that tab.
Dashboard Tab
Dashboard tab allows the admin user to view user logs and manage registered users. To view this tab, select the Dashboard option located on the navigation bar of the SD-WAN Conversion Tool UI. A default view of this tab is shown in the figure below.
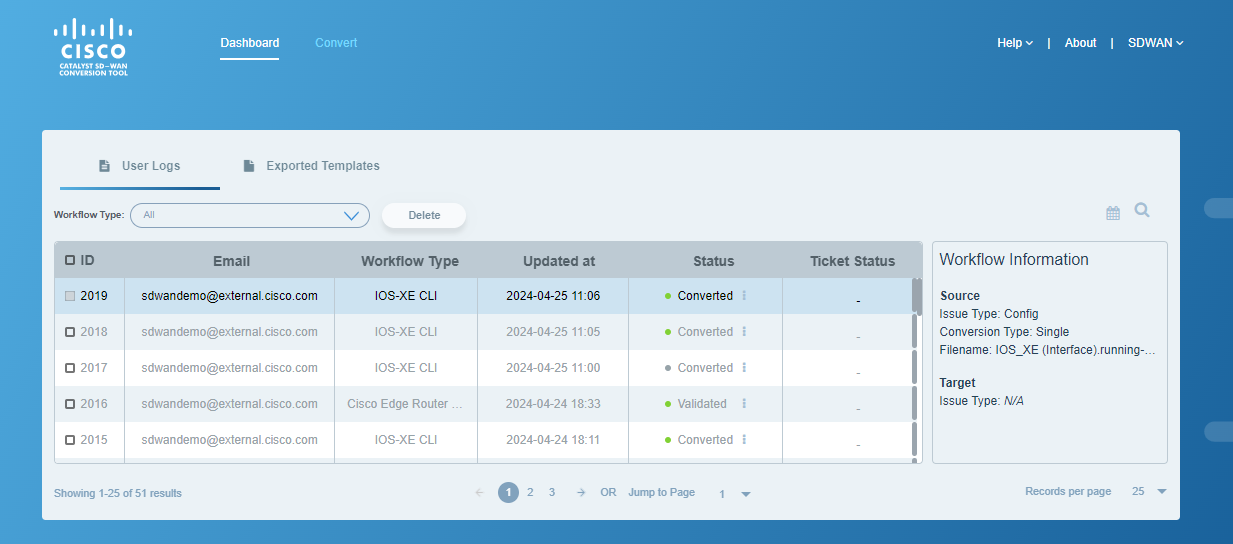
Figure 2. Dashboard tab overview
Note
Dashboard tab can be viewed by the admin user only.
A brief description of the various UI components in the Dashboard tab is shared below:
User Logs
User Logs tab is located on the navigation menu of the activity window displaying an overview of all the conversion workflows performed by the users. Click on this tab to view it.

Figure 3. User Logs view on admin dashboard
A brief description of various components of this tab is shared in the table below:
Field Name |
Description |
|---|---|
Workflow Type Selection |
It is a dropdown located below the User Logs tab and allows the user to select what type of workflow they want to view the logs for. |
Delete Button |
It allows the user to delete workflow logs selected from the activity table. A brief description of this feature can be found in the Logs Deletion section. |
Activity Table |
It is located in the center of the activity window and displays a list of all the activities related to conversion workflows performed by the users. A brief description of the fields in this table is given below:
Clicking on |
Workflow Information |
The Workflow Information pane is located on the right of the activity table. On selection of an entry from the activity table, this pane displays details around the source and target for the selected conversion workflow. By default, it displays details for the first conversion workflow appearing in the activity table. |
Registered Users
The Registered Users tab is located on the navigation menu of the activity window. It displays a list of the users who are registered with the SD-WAN Conversion Tool. Click on this tab to view it.
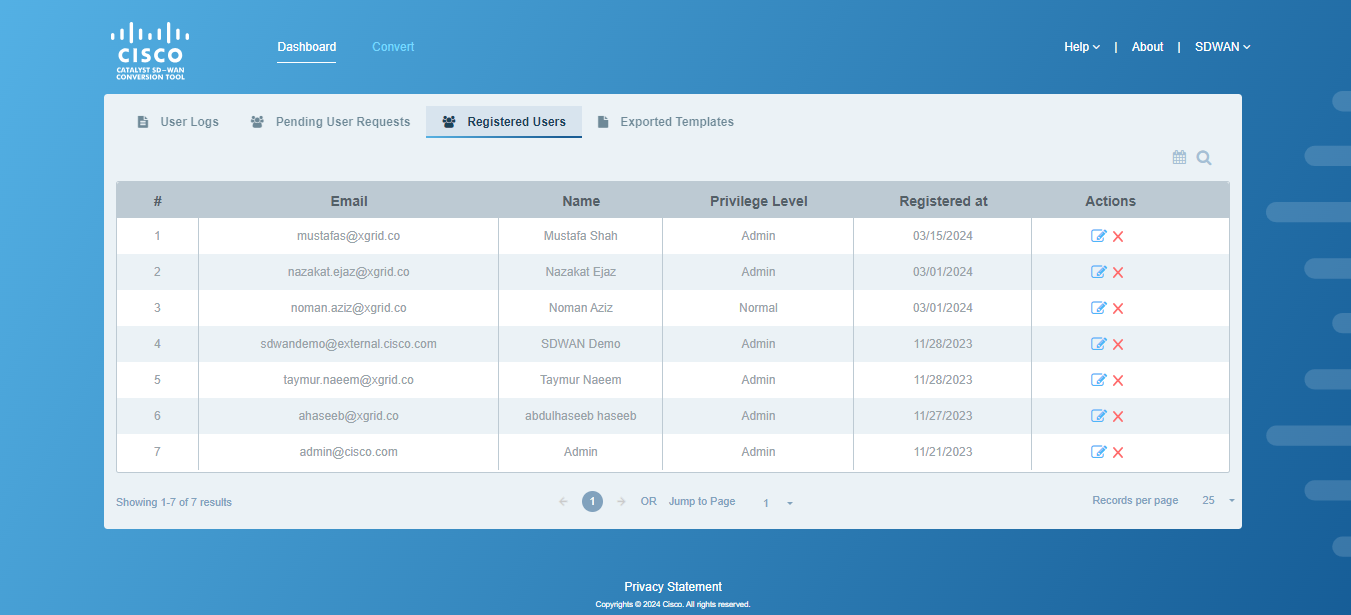
Figure 4. Registered Users view on admin dashboard
Field Name |
Description |
|---|---|
Displays the email addresses of the registered users. |
|
Name |
Displays the list of user names. |
Privilege Level |
Displays the privilege level defined for the particular user by the admin user. |
Registered At |
Displays the date when the user was registered. The format followed for this is mm/dd/yyyy. |
Options |
Provides the admin with an option of editing the user rights. |
Convert Tab
The Convert tab provides the user with a wizard-based interface that allows conversion workflows on configurations and policies for Cisco’s SD-WAN product. To view this tab, click the Convert option located on the navigation menu of SD-WAN Conversion Tool UI. A default view of this tab can also be seen in the figure below.
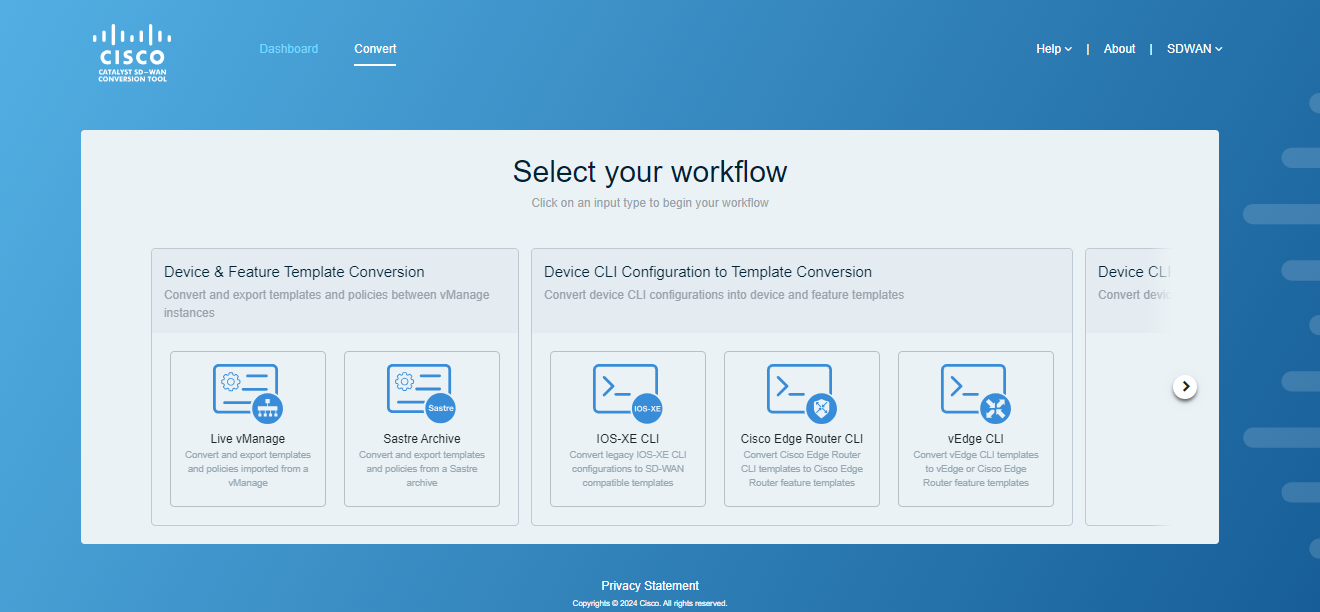
Figure 5. Convert tab UI
The Convert tab is primarily composed of the activity window. The activity window is located in the middle of the screen and covers the major section of the UI. It is an interactive window that, after the selection of workflow type, guides the user through all the required steps for the conversion workflow.
See also
To know more about the functionalities associated with the Convert tab, click here.
Logs Deletion
Users can delete logs for the workflows they have executed. Admin users have the privilege to delete logs for all registered users as well. Please note that the workflow logs can not be restored once they have been deleted. A brief description of various UI components involved in this feature is shared below:
Delete Button: It is located on the right side of workflow type selection dropdown and allows the user to delete workflows selected from the activity table.
Note
The delete button will remain disabled unless a workflow is selected for deletion.
Checkboxes: Checkboxes beside the workflow ID associated with each conversion workflow allows the users to select workflow logs for deletion.
Note
Checkbox for active workflow(s) will be disabled and it must be cancelled or completed before attempting to delete it.
When clicked on the delete button, a confirmation dialog will popup showing the count of selected workflows which are going to be deleted as shown in the figure below.
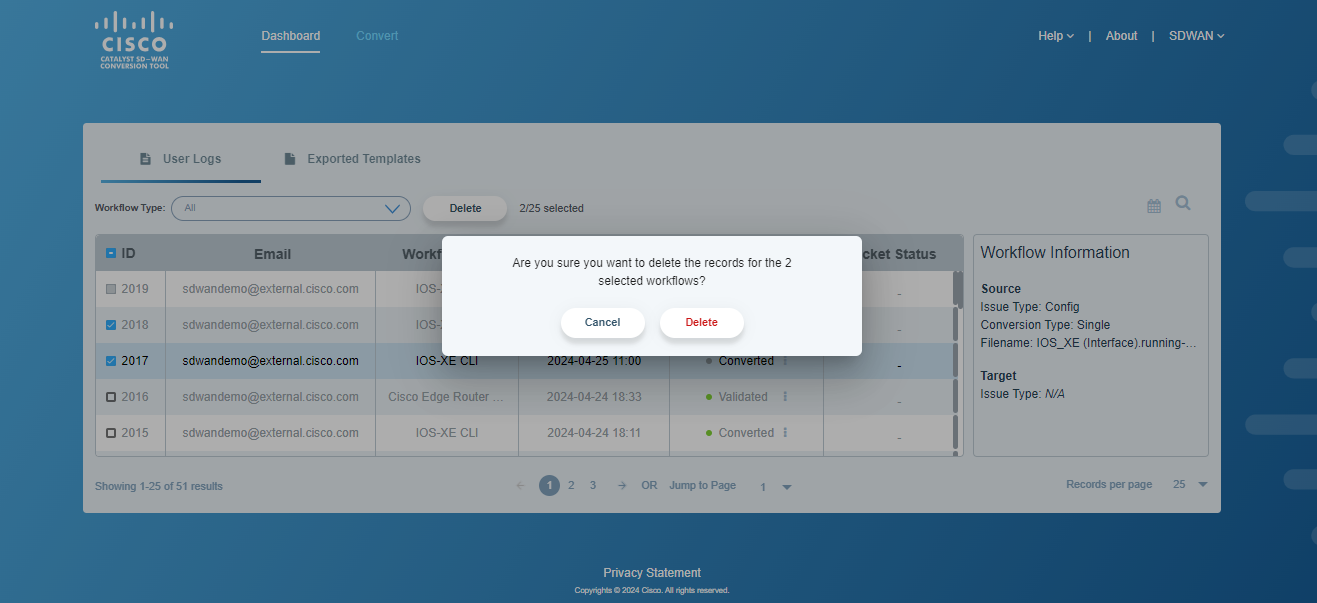
Figure 7. Confirm dialog
Upon successful deletion of selected workflows a notification of successful logs deletion will appear on the top right corner of the UI as shown in the figure below.
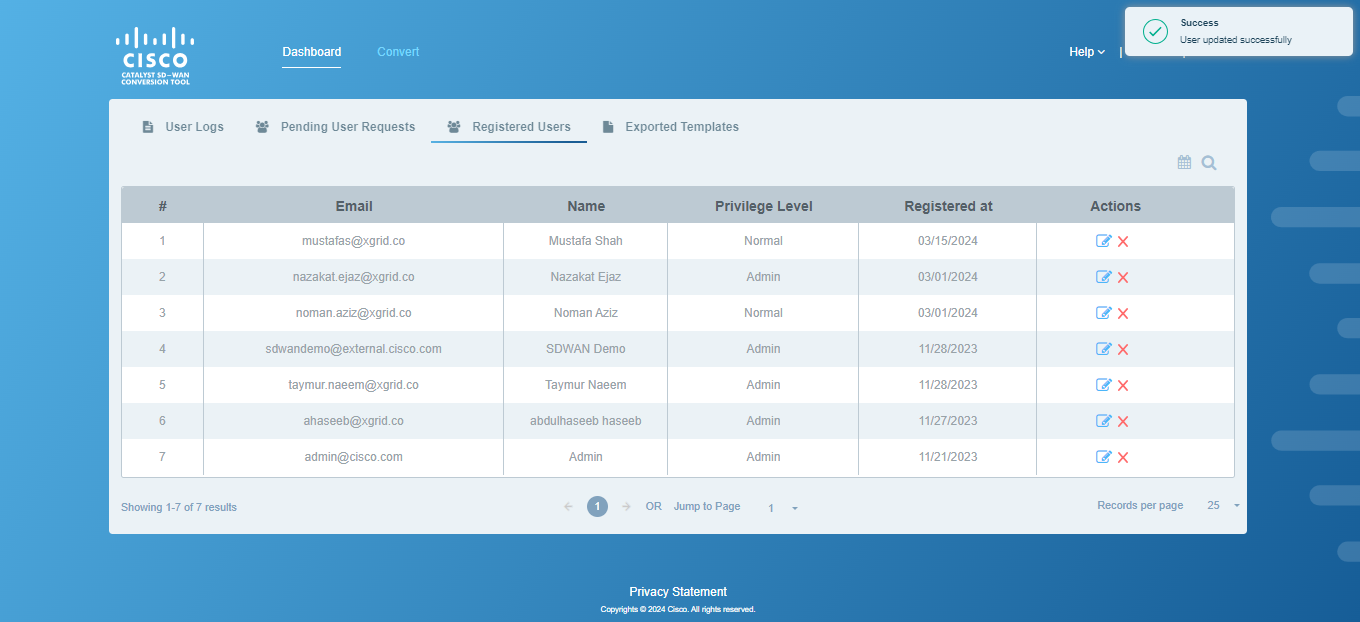
Figure 8. Success notification


