Live vManage
The following steps are involved in importing policies, and device and feature templates from a running vManage and exporting them to another vManage or as a Sastre archive:
Import
The user initially provides details for the vManage they want to import device and feature templates, and policies from. The vManage should be publicly accessible for the tool to be able to communicate with it and pull in the required information. The details and credentials provided for vManage can be saved by the user for subsequent workflows in the future.
The SD-WAN Conversion Tool connects to the vManage and imports all the templates and policies that are present in that vManage. These templates and policies are stored in the tool so they can be used in the subsequent steps.
Activity Window
This section gives the details of the available functionalities for the Import step in the activity window. An example activity window for this step is shown in the figure below.
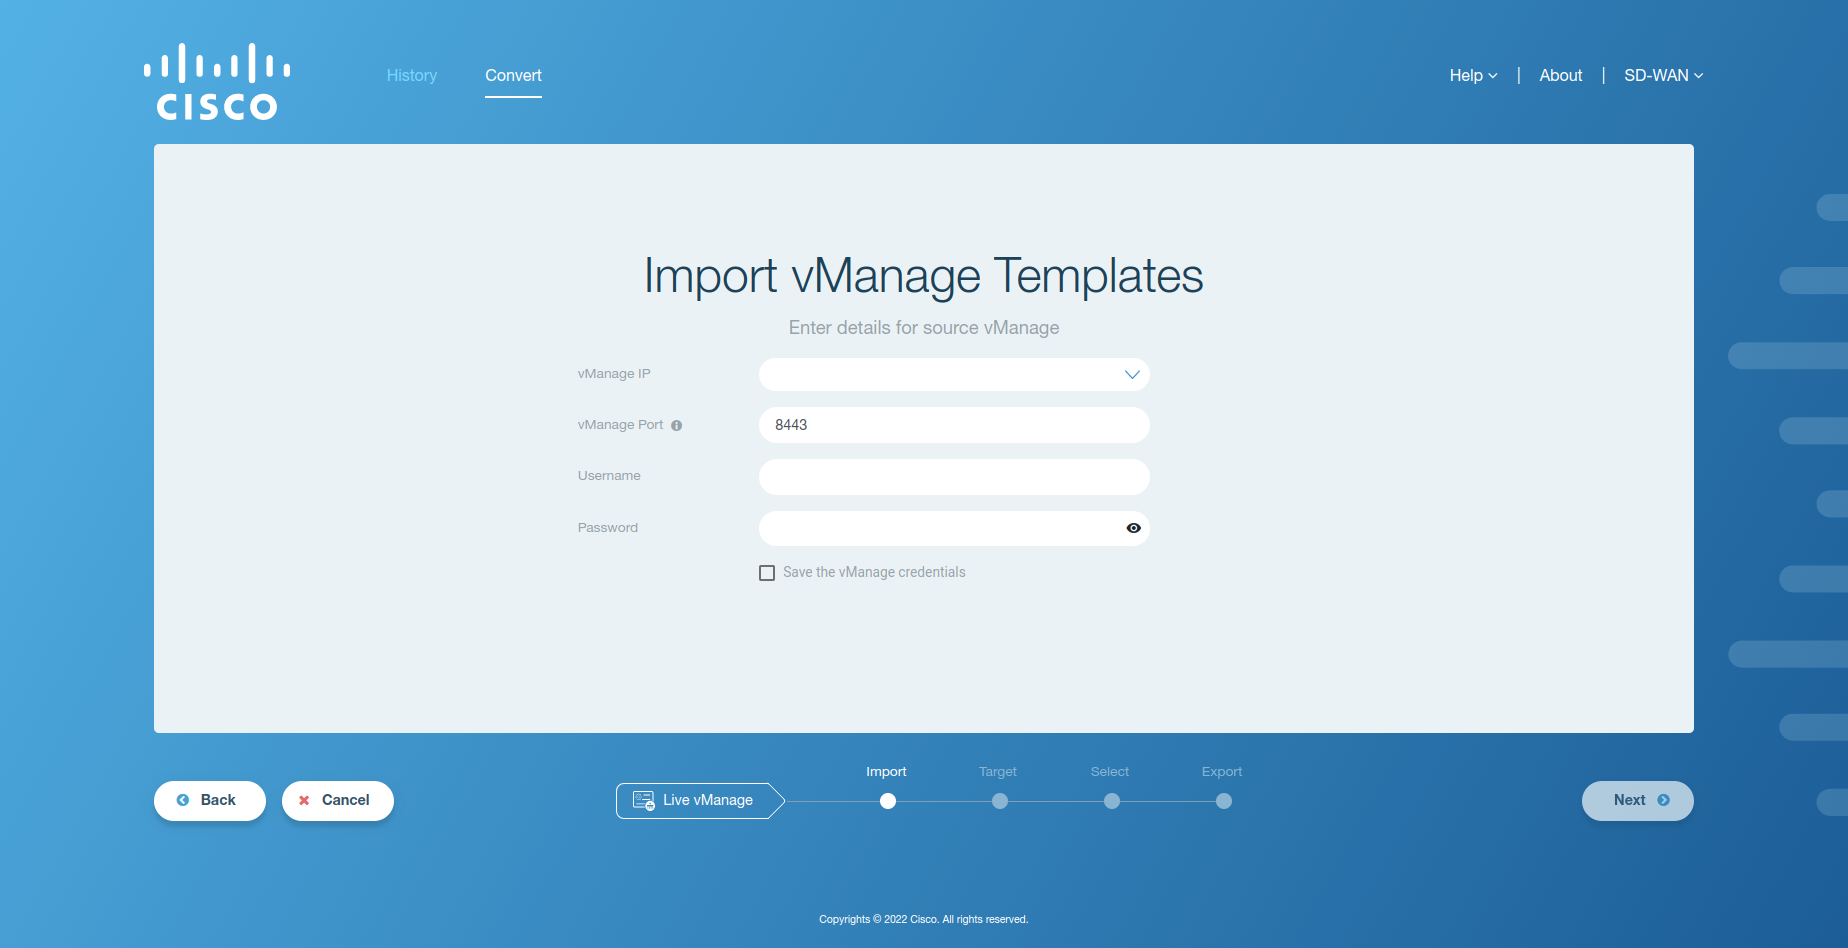
Figure 1. Import activity window
Field Name |
Description |
|---|---|
vManage IP/New IP |
This is the IP or domain name of the running vManage on which the templates and policies are configured. The user can either enter a new IP or select from the list of previously saved vManage IPs from the dropdown menu. |
vManage Port |
This is the port of the vManage on which the templates and policies are configured. |
Username |
This is the username of the vManage server. |
Password |
This is the password of the vManage server. |
Save vManage credentials |
This is a checkbox that can be used to save new vManage credentials or delete a saved one from the database. |
Import Workflow
The first step required by the user is to enter the details for their source vManage environment.
Upon clicking the Live vManage option in the workflow selection screen, the following application window will appear.
Figure 1. Import vManage templates
Fill in the required fields by entering the relevant configuration details to proceed with the import process.
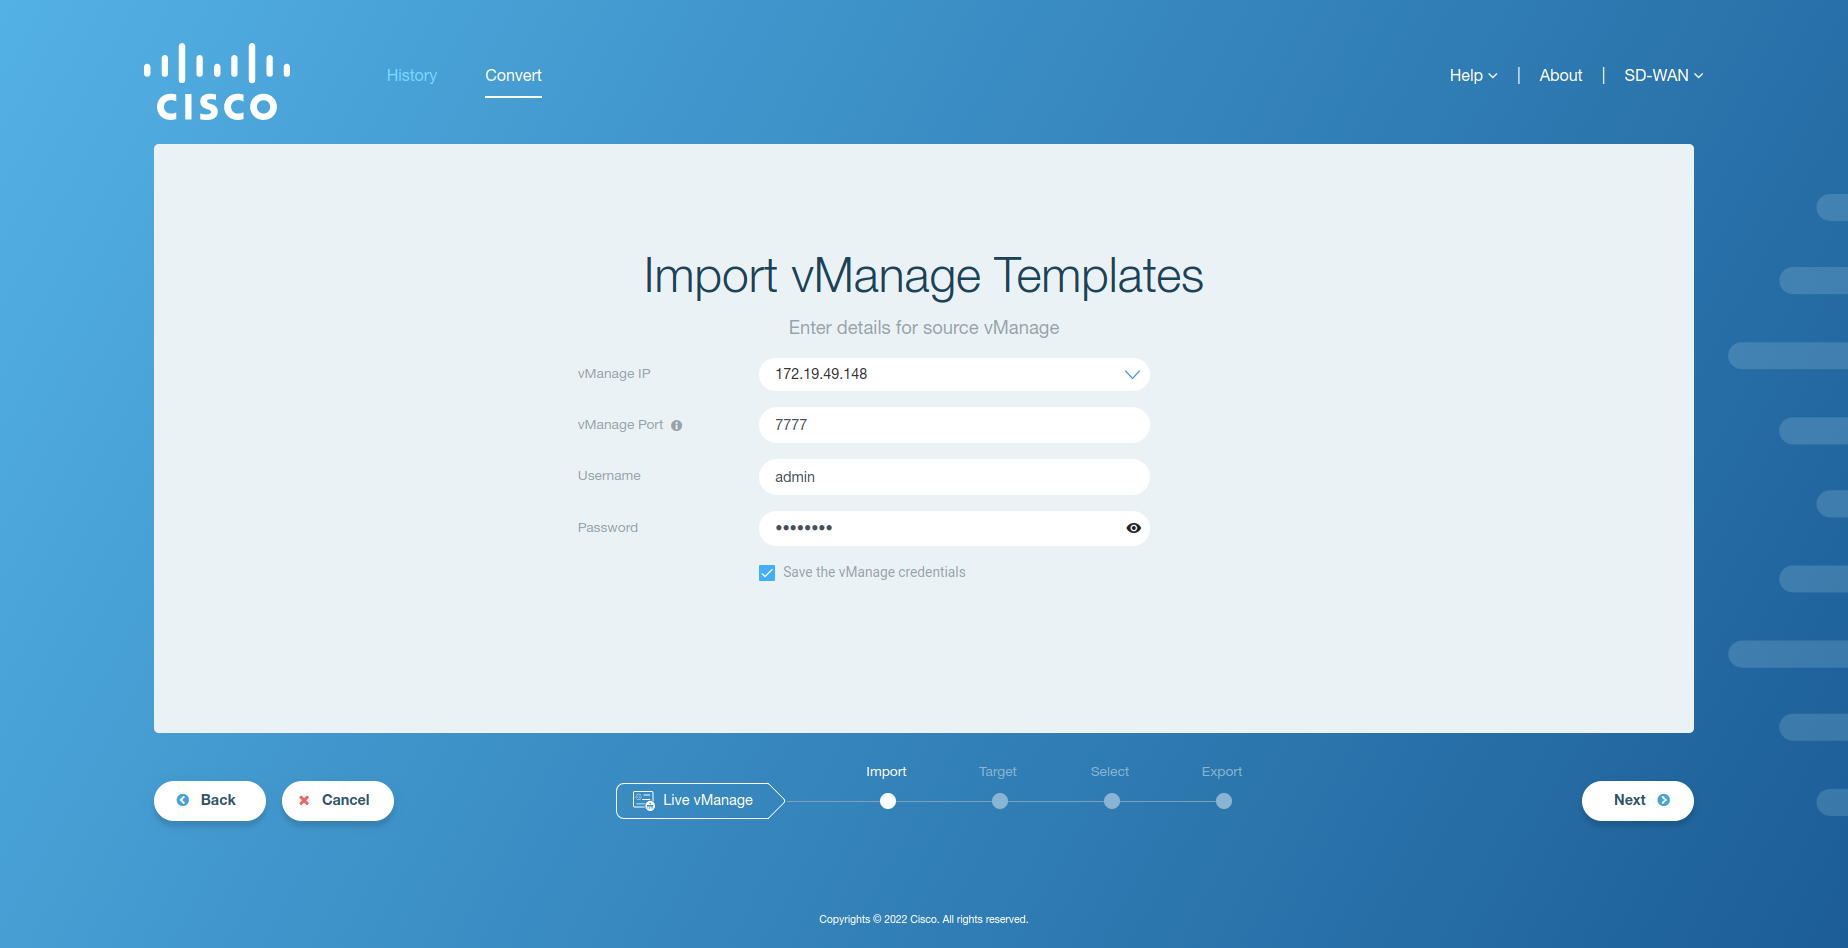
Figure 2. Example Import vManage templates
Once the relevant fields have been filled in, click on Next to proceed. A loading screen will appear on the application window that indicates the beginning of the import process in which the device and feature templates, and policies are imported from the source vManage.
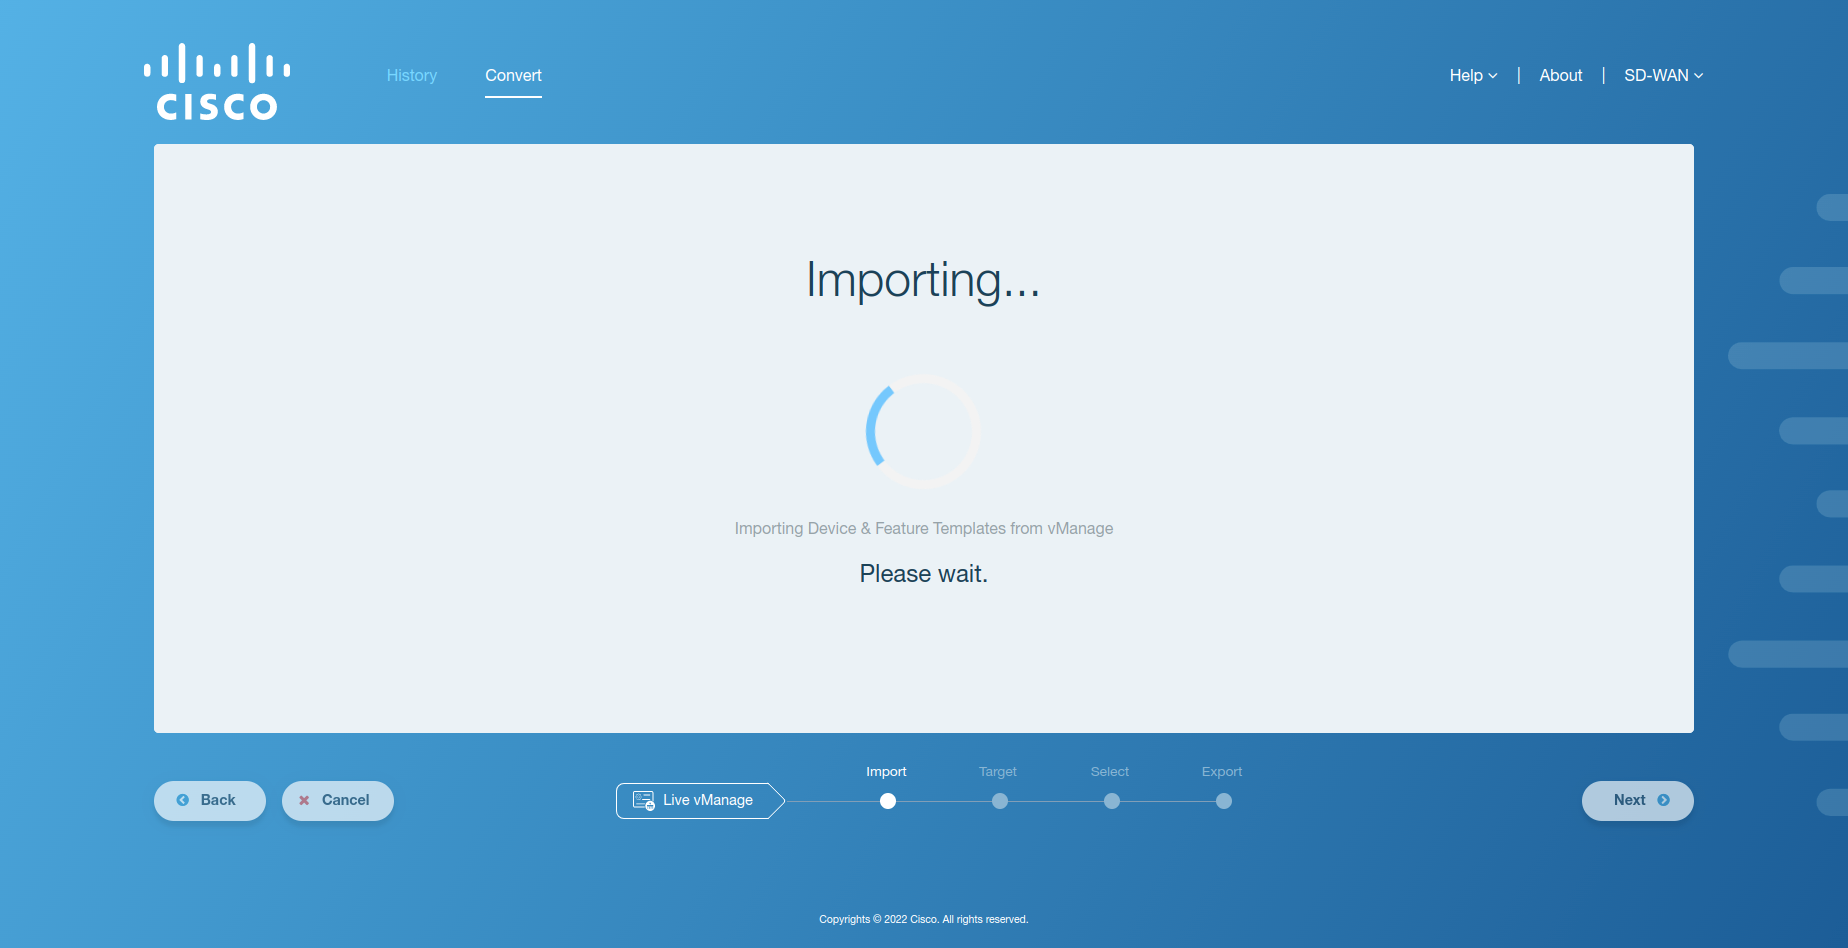
Figure 3. Import loading screen
After the Import process has completed successfully, the user will be taken to the next step of the workflow, which is defining the target environment and the target device type.
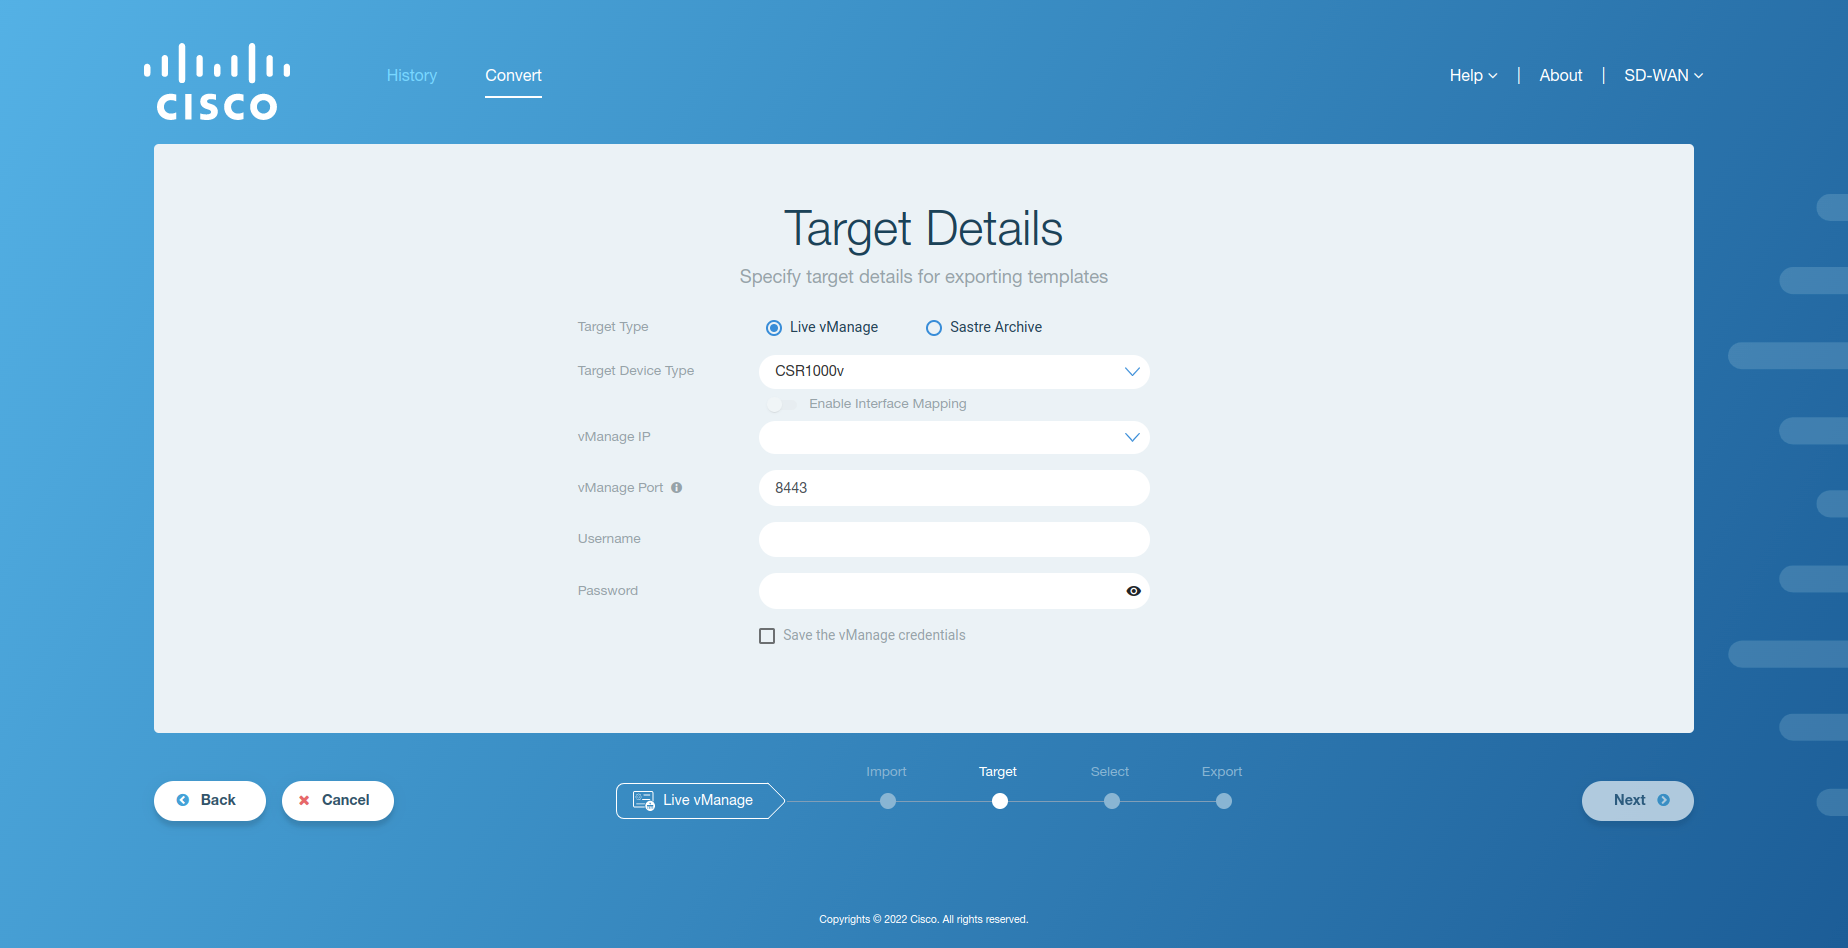
Figure 4. Define Target environment and target device type
Target
Once the templates and policies are imported by the tool, the user will then provide details for the target device type and the environment that they want to export their policies and converted templates to. The device type will be used by the tool to verify which feature templates from the source vManage can be converted and exported. Based on the selected device type, the user can also opt whether to map vEdge ethernet interfaces to SVI interfaces.
In the case of vManage as a target, the tool connects to the target vManage and pulls in the feature template specifications from it. Else, it refers to template specifications housed offline within the tool. These specifications, along with the target device type, are used in the verification process to determine which feature templates can be supported through the conversion process.
Activity Window
This section gives the details of the available functionalities for the Target step in the activity window. An example activity window for this step is shown in the figure below.
Figure 1. Target activity window
Field Name |
Description |
|---|---|
Target Type |
Type of target (Live vManage or Sastre archive) for the conversion. |
Target Device Type |
Lists the available SD-WAN device types. The selected device type will be used to verify the imported feature templates to see which templates can be converted. |
Enable Interface Mapping |
Toggle for enabling or disabling interface mapping. |
vManage IP/New IP |
This is the IP or domain name of the running vManage to which the feature templates will be exported. The user can either enter a new IP or select from the list of previously saved vManage IPs from the dropdown menu. This field is disabled when Sastre archive is selected as the target type. |
vManage Port |
This is the port of the vManage to which the feature templates will be exported. This field is disabled when Sastre archive is selected as the target type. |
Username |
This is the username of the vManage server. It is disabled when Sastre archive is selected as the target type. |
Password |
This is the password of the vManage server. It is disabled when Sastre archive is selected as the target type. |
Note
All Cisco Edge Router devices present in vManage 20.6 are supported as target device types in the Live vManage workflow.
Interface mapping toggle is enabled only if any ethernet templates for vEdge are present in the templates sourced.
If the users have enabled firewall services, they need to allow cisco conversion tool by updating the following information on their firewall.
Field Name
Description
Domain
convert2sdwan.cisco.com.
IP
52.27.154.79
Port
443
Protocol
HTTPS
Target Workflow
Once the templates and policies have been successfully imported from the source vManage, the next step is for the user to define the target environment.
Users are required to fill in the fields in the Target Details form to proceed with the verification process. An example of the filled out form in case of vManage as a target is shared in the figure below.
Figure 1. Example Target vManage
Once the relevant fields have been filled in, click on Next to proceed. A loading screen will appear on the application window that indicates the beginning of the verification process in which the device and feature templates are verified against the target device type and template specifications.

Figure 2. Target loading screen
After the verification process with the target environment has completed successfully, the user will be taken to the next step of the workflow, which is selecting the templates and policies they want to export.
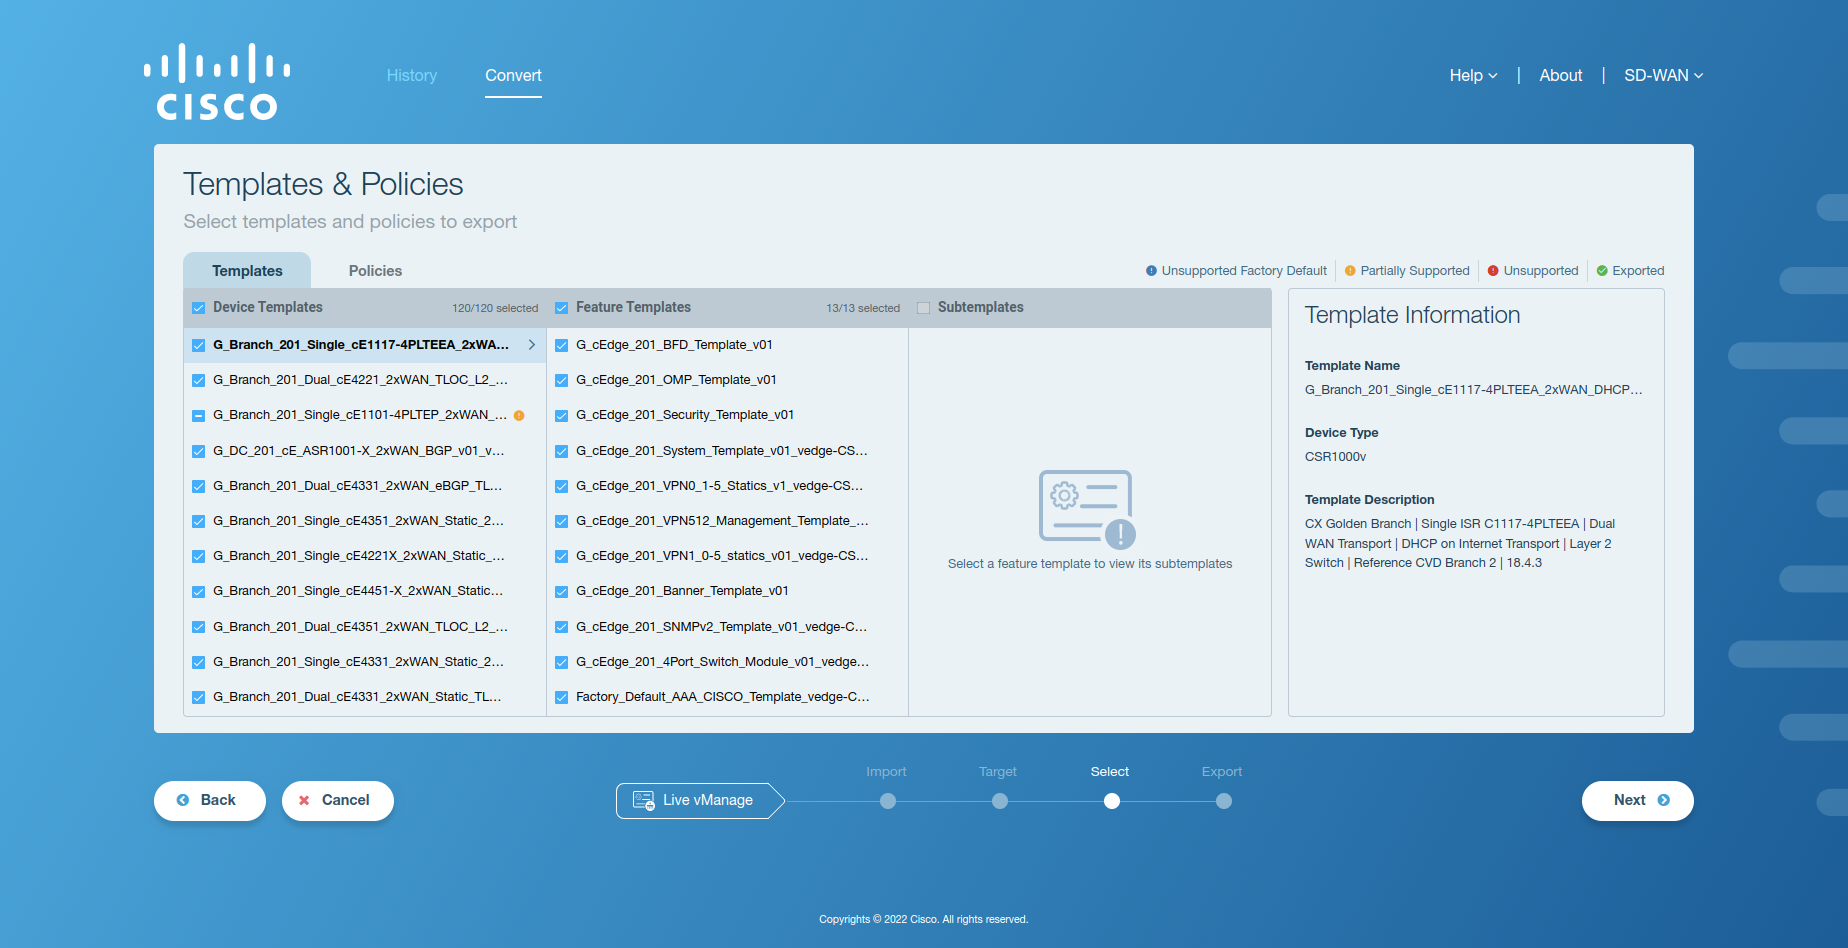
Figure 3. Templates and Policies
Select
The user defines which device and feature templates, and policies should be exported by selecting them in the tool’s UI. By default, all policies and supported templates are selected. The unsupported templates can not be selected and will be removed by the tool automatically during the export process.
Activity Window
This section gives the details of the available functionalities for the Select step in the activity window. An example activity window for this step is shown in the figure below.
Figure 1. Select activity window - templates
Field Name |
Description |
|---|---|
Templates |
The Templates tab is located on the top left of the activity window listing all the supported and unsupported templates. This tab is selected by default. |
Policies |
The Policies tab is located next to the Templates tab and lists all the policies imported from the source vManage. |
Device Templates |
This is the first pane in the Templates tab view. The device templates imported from the source vManage are displayed in this pane. |
Feature Templates |
This is the second pane in the Templates tab view. The feature templates present in the selected device template are shown in this pane. |
Subtemplates |
This is the third pane in the Templates tab view. If a selected feature template contains any subtemplates, they are shown in this section. |
Template Information |
The details around the user-selected template are shown in this panel. |
Legend |
The legend appears at the top right corner of the activity window and displays icons along with a brief description of what each icon represents. |
On selection of the Policies tab, the following activity window is shown.

Figure 2. Select activity window - policies
Field Name |
Description |
|---|---|
Policies & Security |
This is the first pane in the Policies tab view and displays the categories and subcategories of policies. |
Policy Information |
The details around the user-selected policy are shown in this panel. |
Legend |
The legend appears at the top right corner of the activity window and displays icons along with a brief description on what each icon represents. |
Note
The data in the second and third pane would vary based on the category and subcategory selected in the Policies & Security pane.
After the selection of templates & policies, if the user previously enabled interface mapping on Target step, the Interface Mapping screen is shown where ethernet interface templates are displayed to the user for selectively mapping them to SVI.
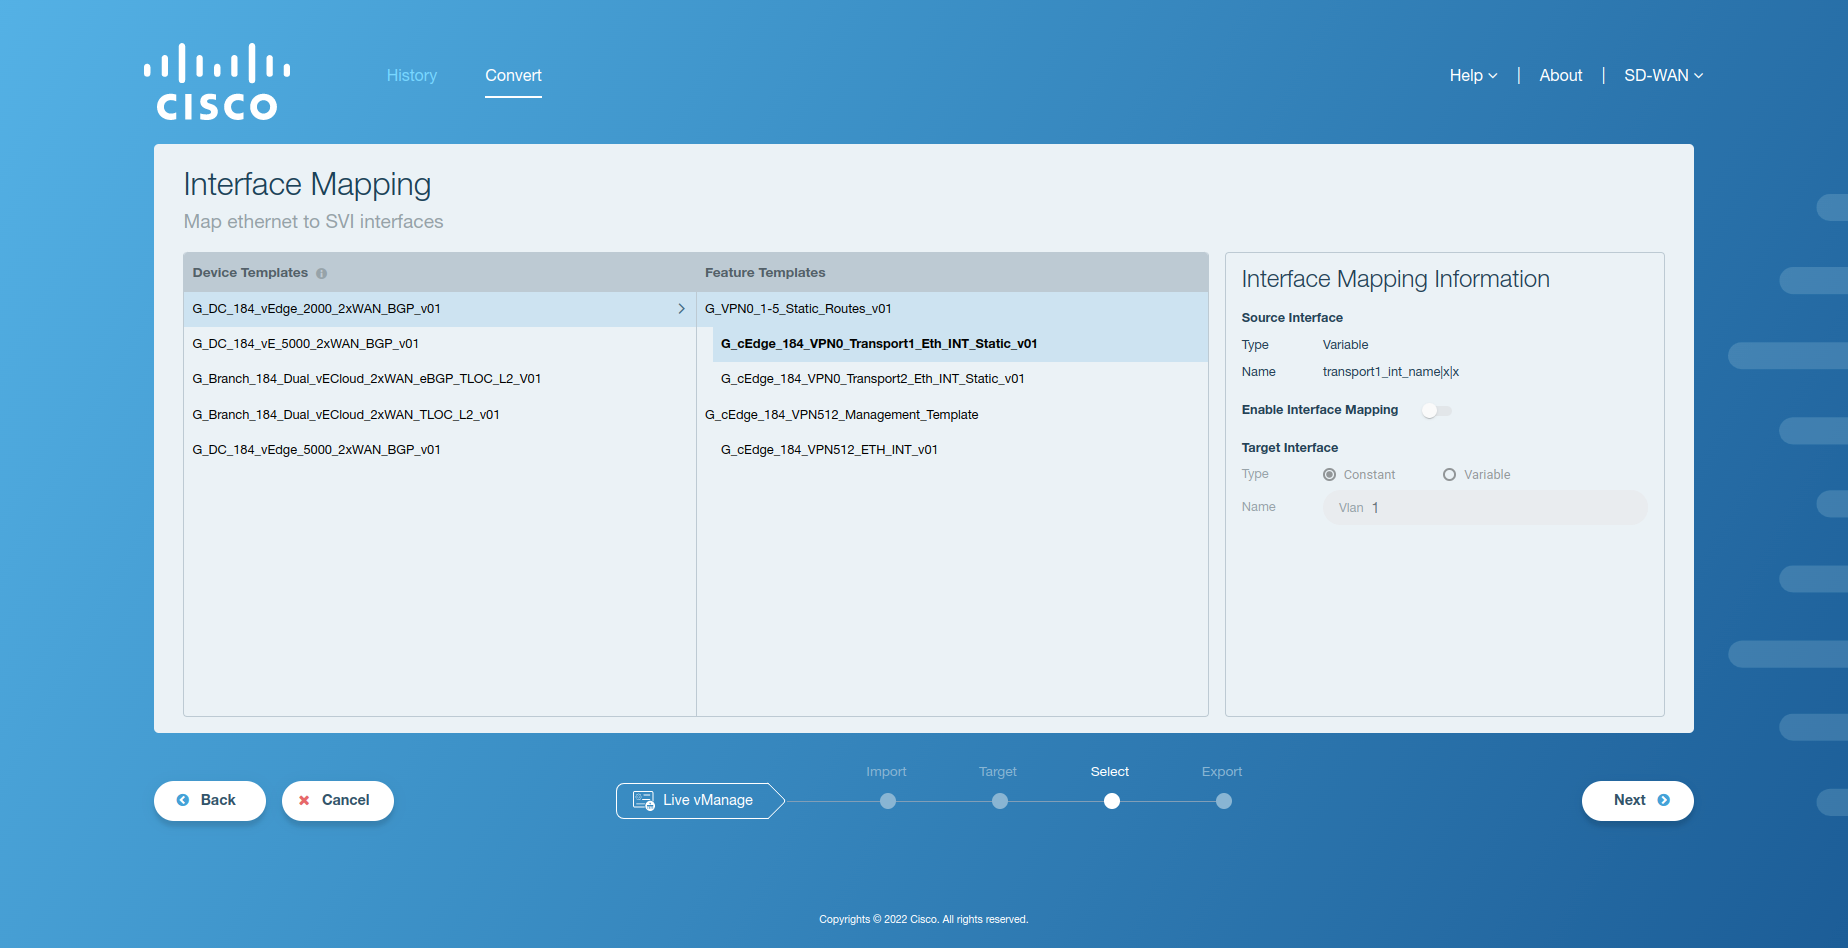
Figure 2. Interface mapping window
Field Name |
Description |
|---|---|
Device Templates |
This is the first pane in the view and displays the device templates. |
Feature Templates |
This is the second pane in the view and displays vEdge VPN and interface templates. |
Interface Mapping Information |
The interface mapping details for the user-selected interface template are shown in this panel. |
Source Interface Type |
The type of source ethernet interface name, which can be either constant or variable. |
Source Interface Name |
The name of the source ethernet interface. |
Enable Interface Mapping |
The toggle button which can be used to enable interface mapping. |
Target Interface Type |
The type of SVI interface name to map the ethernet interface to. This can be either constant or variable. By default, constant is selected. |
Target Interface Name |
The name of the SVI interface to map the ethernet interface to. |
Select Workflow
Once the feature templates have been verified, the user needs to select the templates and policies that they want to export to the target environment.
After the verification process, the user is shown the following screen.
Figure 1. Selection screen
This contains information around all the templates and policies that were imported from the source vManage in the respective tabs, with added information around which templates cannot be supported on the target device type. Templates with
icon cannot be converted to the target device type. Templates with
icon contains some unsupported templates. Templates and policies with
icon have already been exported to the target vManage. Templates with
icon are unsupported factory defaults which cannot be converted and are replaced with the corresponding factory defaults of the target device type during conversion. The user can click on a template or policy to view its information in the right-hand panel.
The user can select which templates and policies to carry forward to the export process by using the checkboxes next to them. Unsupported templates or the templates and policies already exported cannot be selected for export. By default, all policies and supported templates are selected by the tool.
After the selection of templates and policies, if the user has previously enabled interface mapping on the Target step, clicking on Next will take the user to the interface mapping screen where the user can selectively map ethernet interfaces to SVI.
Figure 4. Interface mapping
The user can selectively enable interface mapping for an ethernet template by switching on its toggle in the Interface Mapping Information section. The user can then provide a target interface name in two formats depending on the radio button option selected.
In case a constant is selected, the user can enter any number which will be prefixed with ‘Vlan’, e.g. Vlan3.

Figure 5. Interface mapping for constant target interface
In case a variable is selected, the user can enter any variable name for the interface.
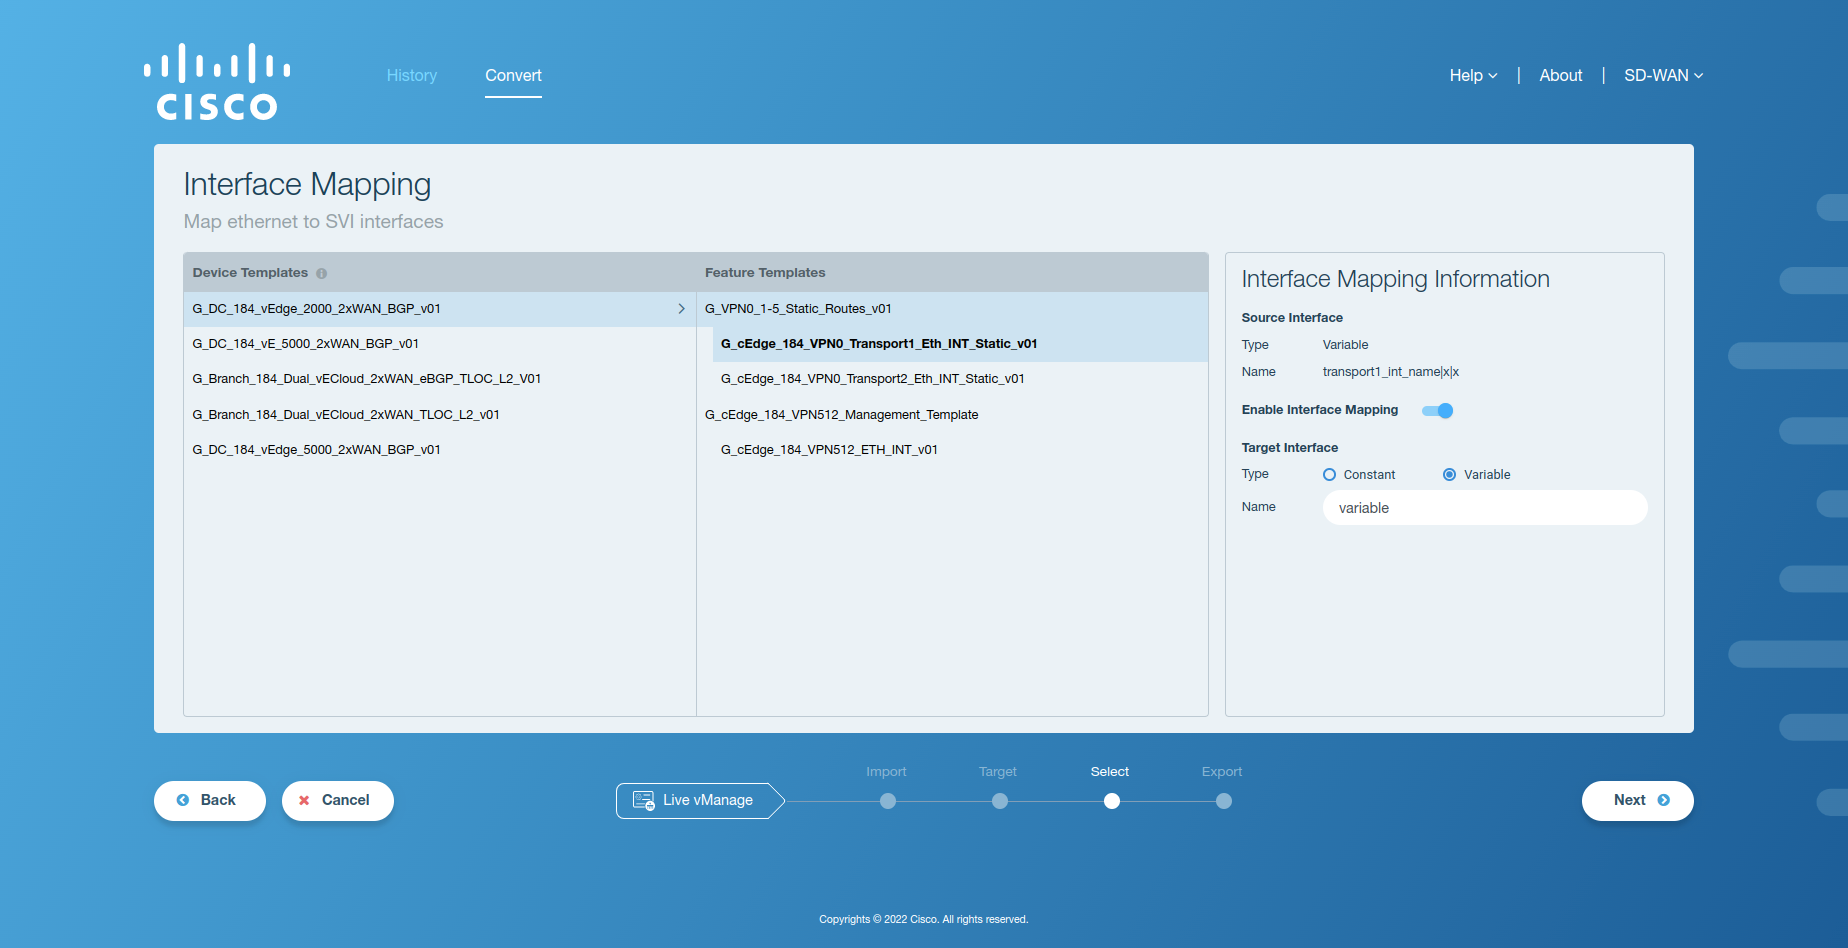
Figure 6. Interface mapping for variable target interface
Once the target interface names have been provided for all the interface templates with interface mapping enabled, user can click on Next to proceed to the export step, in which templates will be converted and exported along with the selected policies to vManage or as a Sastre archive.
Note
Interface name must be unique across interface templates present within a device template.
Export
The tool generates the policies and the converted feature and device templates for export to vManage or as a Sastre archive.
Activity Window
This section gives the details of the available functionalities for the Export step in the activity window. An example activity window for this step is shown in the figure below.
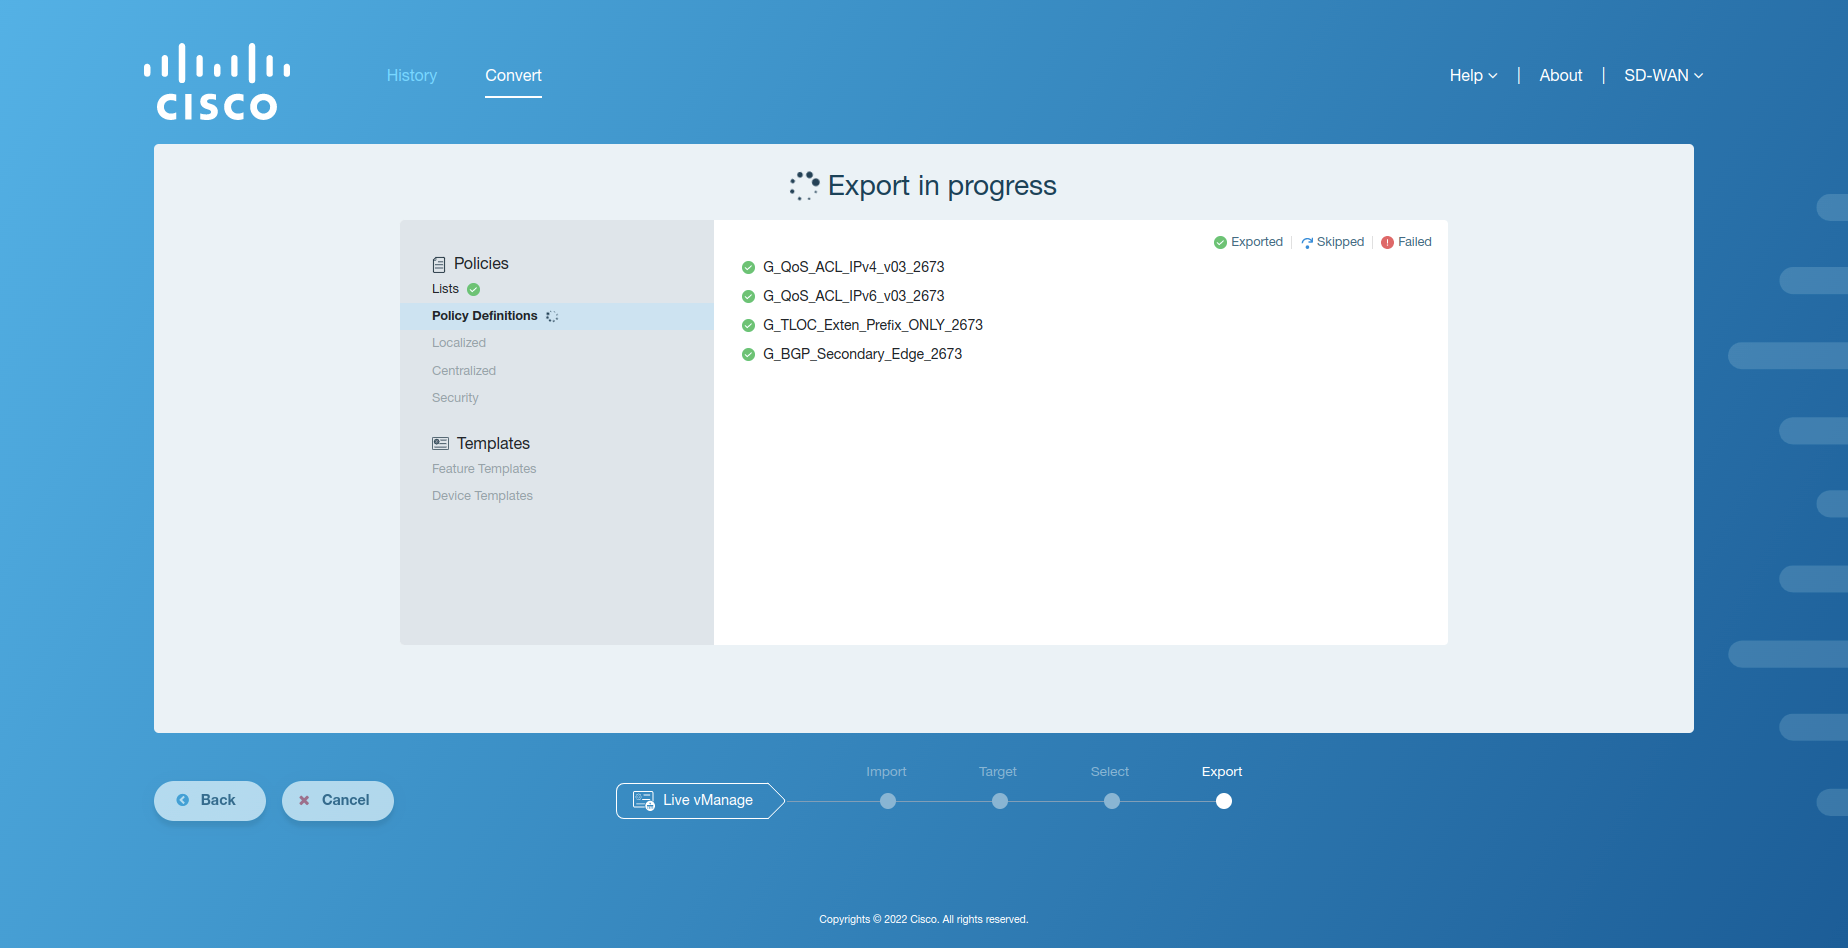
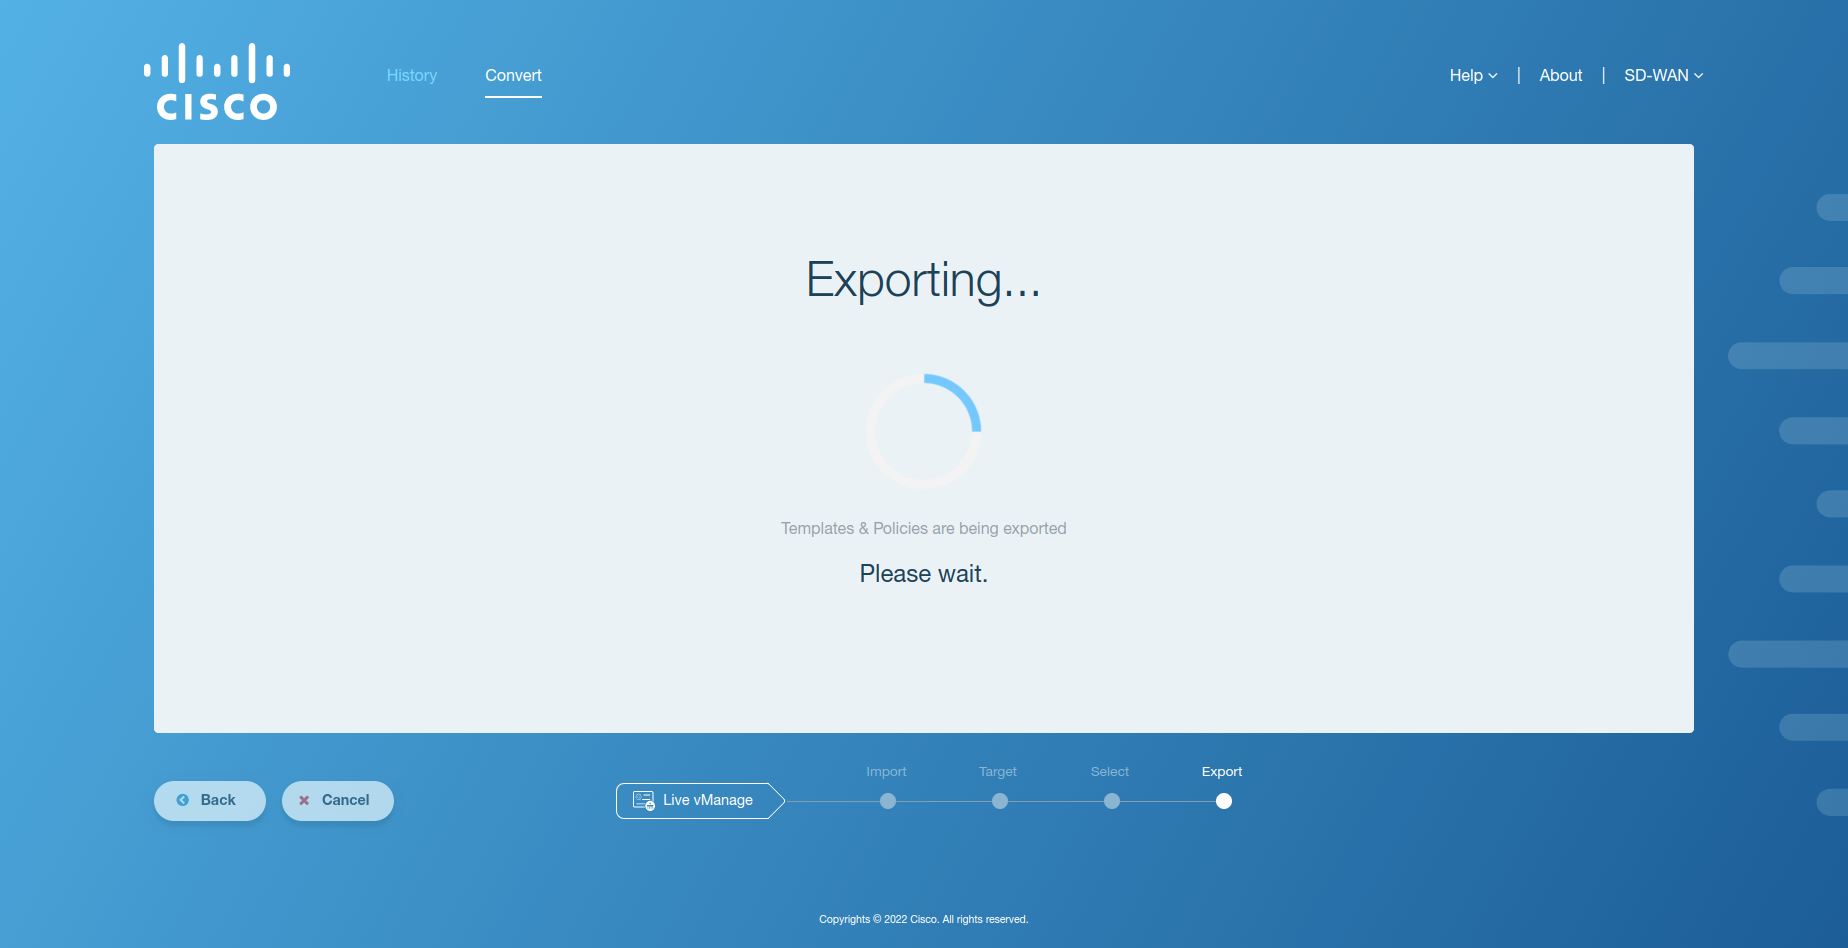
Figure 1. Export in progress
The activity window for the export step allows the user to select a category of either policies or templates and view the exported templates or policies of the selected category in list format in the right pane. Templates & policies with ![]() icon are those which successfully get exported to the target environment. Templates & policies with icon are those which fail to export to the target environment. Templates & policies with
icon are those which successfully get exported to the target environment. Templates & policies with icon are those which fail to export to the target environment. Templates & policies with  icon are those which do not get exported, rather their references in other templates & policies get updated to reuse an existing template or policy with similar definition present in the target environment.
Export Workflow
The view for export in progress will vary based on the target environment chosen earlier by the user. In case of vManage as a target, a screen similar to the following will be shown to the user where templates and policies are progressively shown to be exported to the target vManage.
After the templates and policies have been successfully converted and exported to vManage or as a Sastre archive, the details of the exported templates and policies will appear on the application window. In case of Sastre target type, the user will be additionally shown a Sastre archive available for download. The screenshots for both vManage and Sastre as a target are shown below.
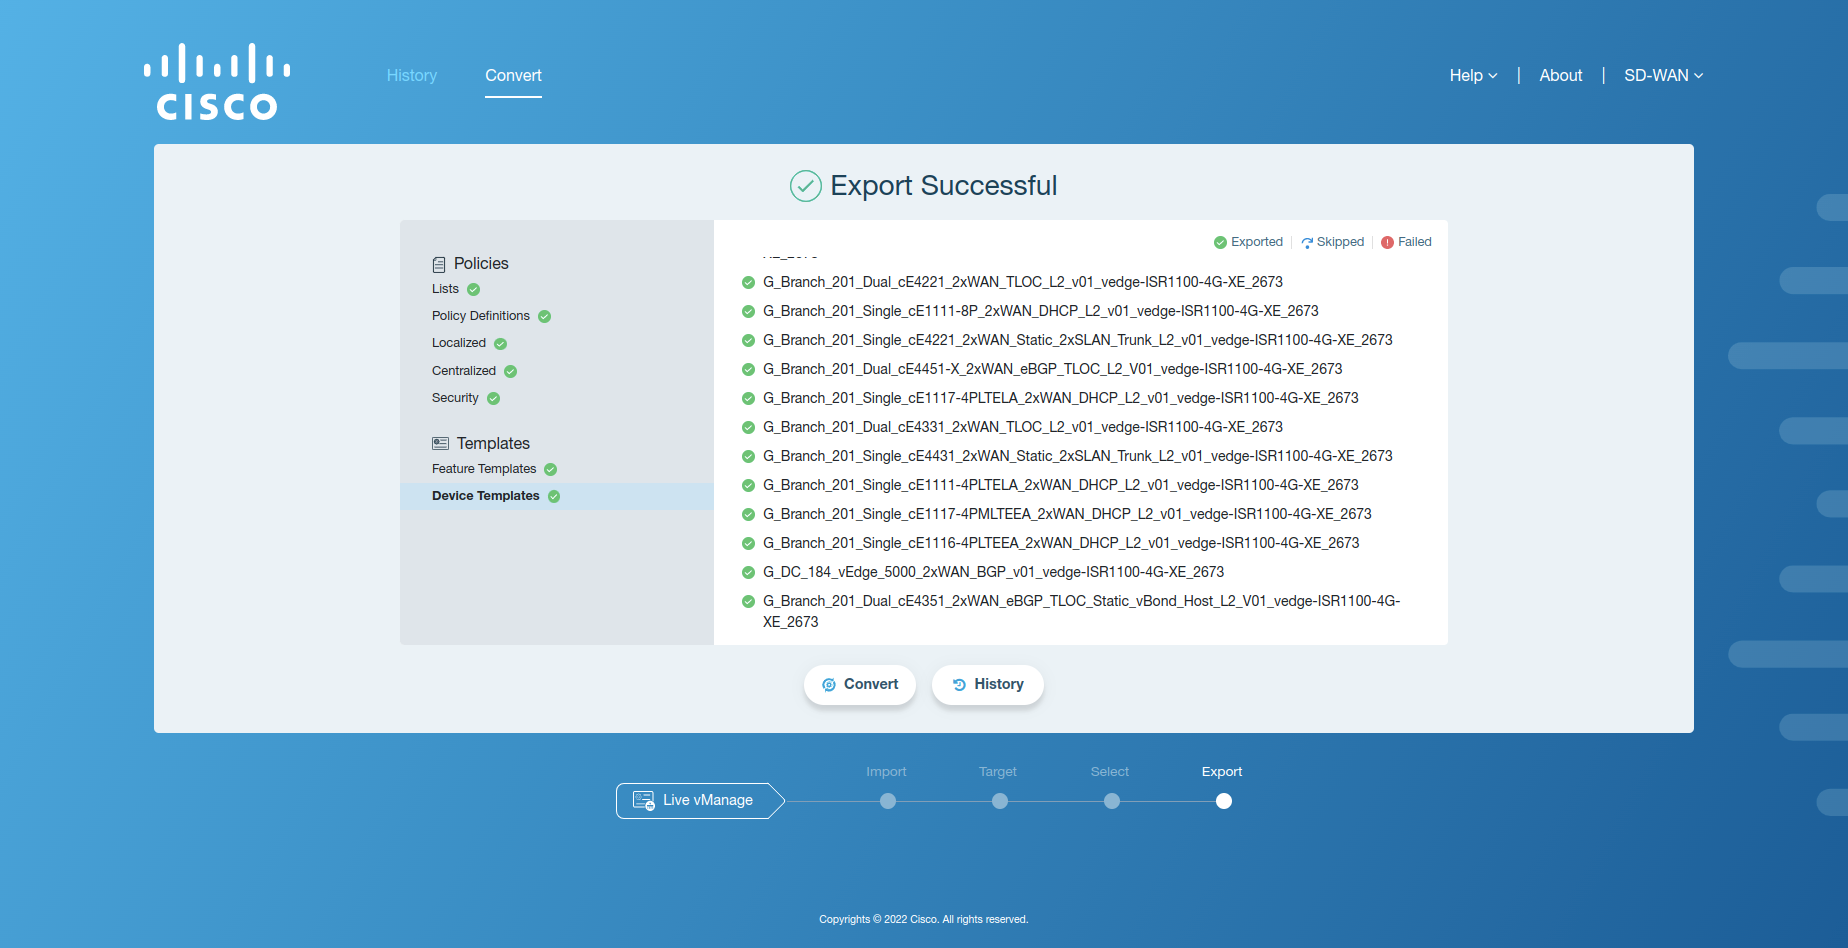
Figure 3. Export success screen - vManage as a target
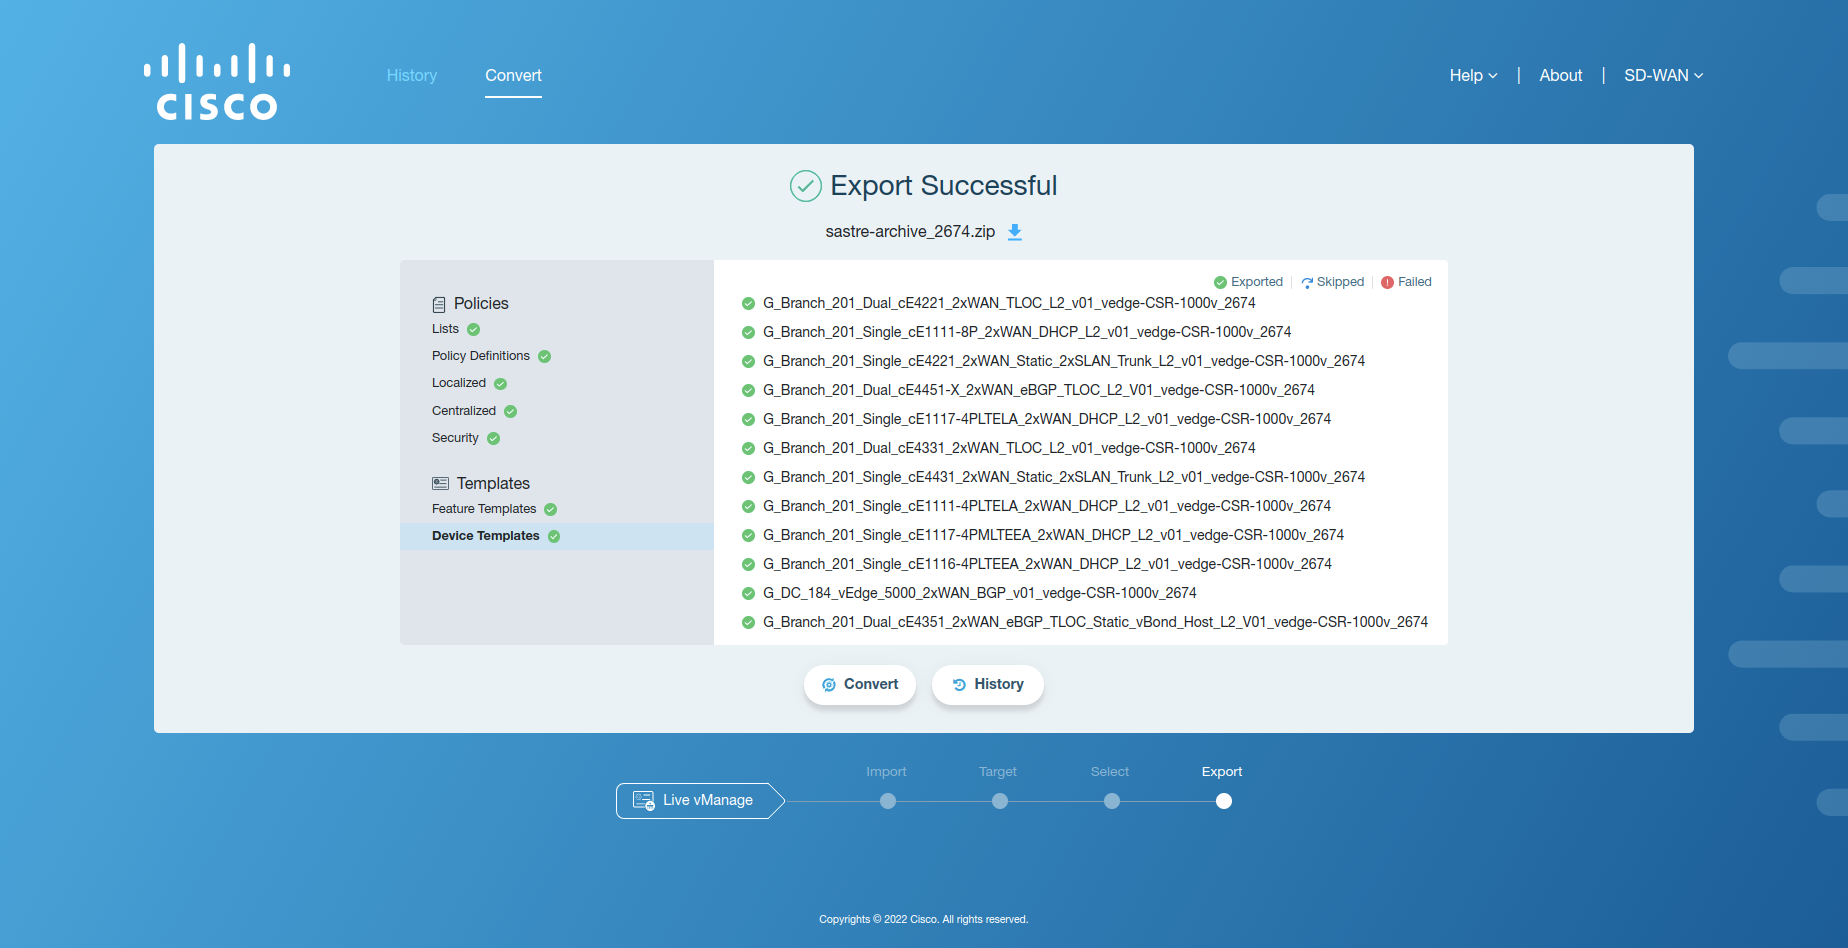
Figure 4. Export success screen - Sastre archive as a target
Note
In case of an error, refer to the Export Error: Live vManage/Sastre Archive Workflow section in Appendix A.
On the export successful screen, the following two buttons are available to the user:
Convert: To perform another configuration conversion, click the Convert button. This will take the user back to the workflow selection screen.
History: To view the history of the configuration conversion workflows, click the History button. This will take the user to the History tab.